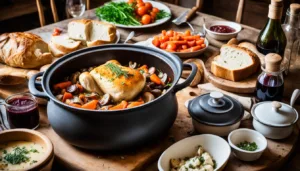
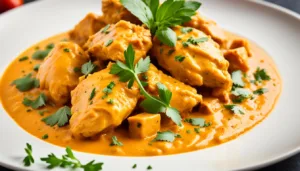
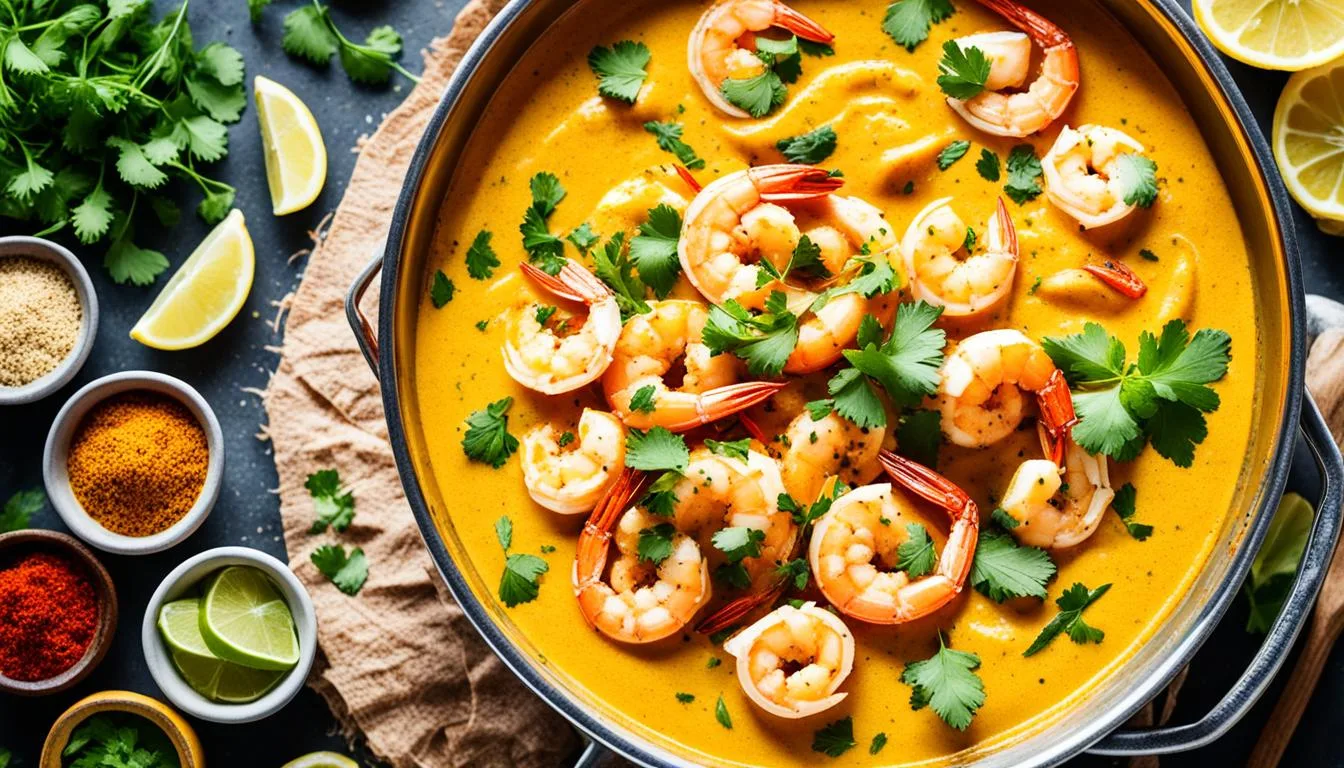
Whether you’re a fan of authentic Indian cuisine or simply looking to try something new, our homemade recipe is guaranteed to impress. Chicken butter masala recipe (Murgh Makhani) is one of the most popular curries in the world and yet happens to be one of the easiest! It’s made with spiced tomato and butter. The curry was developed at the Moti mahal restaurant in the Daryaganj neighbourhood of Old Delhi in the 1950s
Chicken marinated for several hours is either cooked in a tandoor, grilled, oven-roasted or even pan fried. Do try our recipe and enjoy the restaurant style dish at home with friend and family!
Special recommendation (Chicken butter masala recipe)
How can you serve the Chicken butter masala?
Fluffy Rice: Basmati rice or steamed jasmine rice provides a neutral base to soak up the flavorful sauce.
Buttery Naan: Garlicky or plain naan bread adds a soft and chewy texture that pairs well with the creamy curry.
Refreshing Raita: A side of yogurt-based raita with cucumber, mint, and spices offers a cool and tangy contrast to the richness of the dish.
Crunchy Papadums: These thin and crispy lentil crackers provide a delightful crunch and a touch of spiciness.
Side Salad: A simple salad with fresh greens, tomatoes, and onions can add a dose of freshness to your meal.
(Chicken butter masala recipe)
Choosing the right ingredients is important for Chicken butter masala recipe
Ingredients
Quantity
Chicken Thighs
1 kg skinless and boneless , cut into 1.5 inch pieces (or use bone-in Chicken pieces
Oil
1 tablespoon
Ingredients(for the marinade)
Quantity
Hung Curd
1/2 cup
Kashmiri chili powder
1 tablespoon
Coriander Powder
1 tablespoon
Turmeric
1/2 teaspoon
Ginger Garlic Paste
1 1/2 tablespoons
Garam Masala powder
1 teaspoon
Salt
1 teaspoon
Ingredients(for the gravy)
Quantity
Oil
1 tablespoon
Butter
1 tablespoon
Cinnamon
1 inch
Green Cardamom Pods
2
Cloves
3
Kashmiri Red Chillies dried chillies
5
Garlic Cloves
6
Onion roughly chopped
1
Cashew Nuts
1/4
Tomatoes roughly chopped
500 gms
Red Chilli Powder
1/2 teaspoon
Ketchup
2 tablespoons
Dried fenugreek leaves
1 tablespoons
Salt
to taste
Fresh cream
3-4 tablespoons
Ingredients for Chicken butter masala recipe
How to prepare?
Marinade
Mix all the ingredients under marinade, add the chicken and set aside for 30 minutes.
For the gravy
Heat 1 tablespoon oil and 1 tablespoon butter in a pan.
Add cinnamon, cardamom, cloves, whole red chilies and garlic and for a minute or so till fragrant.
Add onions and saute on high heat for 2-3 minutes till pink and translucent.
Now add tomatoes and cashew nuts. Mix once, reduce the flame to a simmer and cover and cook for 10-15 minutes till the tomatoes start breaking down and becoming pulpy.
Switch off the flame. Cool completely and transfer to a blender or liquidiser, and blend till smooth.
Final preparation (Chicken butter masala recipe)
In a pan heat a tablespoon of oil. Add the chicken pieces and sear them on each side for 2-3 minutes on high heat, till there is a char on them. Remove them from the pan and set aside.
Add the puree back to the pan, add chilli powder, ketchup, salt and ¼ cup water. Bring this to a boil and reduce the flame to low, and cover and cook for 15-20 minutes.
At this stage add the chicken pieces and simmer for 10 minutes. Stir in the kasuri methi and fresh cream.
To add a smoky flavour to it place a small steel bowl in the middle of the butter chicken while it’s still in the pan. Heat a piece of charcoal or lump coal on an open flame till red hot and then place it in the bowl. Pour a teaspoon of oil or ghee over it, and as soon as it starts smoking, cover the pan with a lid. Smoke for 3-4 minutes and remove the bowl.
Serve it according to your taste buds. You can choose any recommendation from above.
For more such appetizing dishes please do visit the below links:
Are you ready to embark on a culinary journey filled with aromatic spices and mouth-watering flavours? Look no further because we have the perfect recipe for you – an Authentic Mutton Biryani Recipe that is both easy to make and incredibly flavourful.
At Our Kitchen, we believe that cooking should be a joyous and satisfying experience. That’s why we have carefully crafted this step-by-step mutton biryani recipe to ensure that even novice chefs can recreate this traditional favourite with ease.
Whether it’s a festive occasion or a cozy family dinner, our authentic mutton biryani recipe is sure to impress your loved ones and become a staple in your culinary repertoire. So, let’s dive in and discover the magic of this beloved dish together.
(Authentic Mutton Biryani Recipe)
Special recommendation
Selecting the Best Mutton cuts for Flavourful Mutton Biryani Recipe
Shoulder: This cut is perfect for biryani as it contains a good amount of fat, which helps keep the meat tender and juicy during the cooking process.
Ribs: Lamb ribs are known for their rich flavor and are often used to add depth to the mutton biryani.
Leg: The leg of lamb or mutton is a popular choice for biryani due to its firm texture and flavorful meat.
Chops: Mutton chops are tender and flavourful, making them an excellent option for biryani.
What you need for Authentic Mutton Biryani Recipe
Ingredients
Quantity
Mutton
500g
Basmati Rice
2 cups
Onions, thinly sliced
2
Tomatoes, chopped
2
Yogurt
1/2 cup
Ginger-Garlic Paste
2 tablespoons
Biryani Masala
2 tablespoons
Cumin Powder
1 teaspoon
Cardamom Pods
4-5
Cinnamon Stick
1
Bay Leaves
2
Saffron Strands
A pinch
Coriander Leaves, chopped
A handful
Mint Leaves, chopped
A handful
Ghee
4 tablespoons
Salt
To taste
Water
4 cups
Marination Secrets for Tender Mutton
Marinating the mutton is a crucial step in preparing a tender and flavourful biryani. The right combination of spices and marinade ingredients can help tenderize the meat and infuse it with delicious flavours. Here are some marination secrets for achieving tender mutton:
Use yogurt: Yogurt acts as a natural tenderizer and helps to break down the proteins in the meat, resulting in a more tender texture. It also adds a tangy flavor to the mutton biryani.
Add acidic ingredients: Lemon juice, vinegar, or raw papaya can be added to the marinade to further tenderize the meat. These acidic ingredients help in the process of meat tenderization.
Spice it up: Use a combination of aromatic spices such as ginger, garlic, turmeric, red chili powder, and garam masala to enhance the flavor of the marinated mutton.
Allow time for marination: It’s essential to marinate the mutton for at least 2-4 hours, or overnight if possible. This allows the flavours to penetrate the meat and results in a more tender and flavourful biryani.
By following these marination secrets and selecting the best mutton cuts, you can ensure a biryani that is tender, flavourful, and truly satisfying.
Creating Your Biryani Masala from Scratch
Ingredients
Quantity
Kashmiri red chilli, dried
3
Bay leaf
7
Coriander seeds
2 tablespoons
Cumin
1 tablespoon
Caraway seeds
1 tablespoon
Mace
3
Cinnamon stick
2 inches
Nutmeg
1
Cloves
1 teaspoon
Black cardamom
3
Star anise
3
Cardamom
10
Pepper
1 tablespoon
Fennel
1 teaspoon
Turmeric
1/2 teaspoon
Preparation of biriyani masala for Authentic Mutton Biryani Recipe
firstly, in a thick bottomed pan dry roast 3 red chilli and 7 bay leaf till they turn crisp. keep aside.
further dry roast 2 tbsp coriander seeds, 1 tbsp cumin and 1 tbsp caraway seeds till they turn aromatic. keep aside.
also dry roast 3 mace, 2 inch cinnamon stick, 1 nutmeg, 1 tsp cloves, 3 black cardamom, 3 star anise, 10 cardamom, 1 tbsp pepper and 1 tsp fennel
transfer to a blender and allow to cool completely.
also add in ½ tsp turmeric.
blend to fine powder and transfer to the airtight container.
finally, store biryani masala powder in airtight container and use to prepare biryani.
Preparation Tips for Basmati Rice
Preparing basmati rice for biryani requires some extra care to ensure that it turns out fluffy, aromatic, and perfectly cooked. Here are some helpful tips to ensure your basmati rice is a success:
Soak the rice: Before cooking, it’s important to soak the basmati rice for at least 30 minutes. This helps to remove excess starch and allows the grains to cook evenly.
Rice to water ratio: For biryani, the ideal rice to water ratio is 1:1.5. This means for every cup of rice, use 1.5 cups of water. Adjust the quantity according to your recipe, but keep the ratio consistent for best results.
Cooking techniques: There are two popular methods for cooking basmati rice for biryani – the absorption method and the draining method. In the absorption method, the rice is cooked in just enough water, which is absorbed entirely during the cooking process. In the draining method, the rice is partially cooked, then drained of excess water to prevent overcooking.
Avoid overcooking: Basmati rice is delicate and can easily become overcooked and mushy. Keep a close eye on the cooking process and follow the recommended cooking time to achieve perfectly cooked rice.
Fluffing the rice: Once the rice is cooked, let it sit for a few minutes before fluffing it gently with a fork. This helps to separate the grains and prevent clumping.
Mutton Biryani Recipe: Step-by-Step Cooking Guide
Initial Preparations and Marinating Process
Before we dive into the cooking process, it’s essential to make the necessary preparations and marinate the mutton to enhance its flavours. First, gather all the ingredients listed in the recipe. Then, wash and clean the mutton pieces thoroughly. Next, in a mixing bowl, combine the mutton with yogurt, ginger-garlic paste, red chili powder, turmeric powder, garam masala, and salt. Mix well, ensuring that the mutton pieces are evenly coated with the marinade. Allow the mutton to marinate for at least 2 hours or preferably overnight in the refrigerator. This marinating process will tenderize the mutton and infuse it with aromatic flavours.
Cooking Mutton to Perfection
(Authentic Mutton Biryani Recipe)
When it comes to cooking mutton for biryani, achieving the perfect tenderness is crucial. In a large cooking pot, heat oil or ghee. Add whole spices like cinnamon, cloves, cardamom, and bay leaves to the hot oil. Once the spices release their aroma, add finely chopped onions and sauté until golden brown. This will give the mutton a rich and flavourful base. Now, add the marinated mutton and cook on medium-high heat until it changes colour and starts to release its juices. At this point, reduce the heat, cover the pot, and let the mutton simmer until it becomes soft and tender. This slow cooking process will ensure that the mutton is cooked to perfection, resulting in melt-in-your-mouth biryani.
The Art of Mutton Biryani Layering
Biryani Layer
Ingredients
Method
Rice Layer
Basmati rice, cooked
Spread a layer of cooked rice evenly at the bottom of the biryani pot.
Mutton Layer
Mutton, marinated and cooked
Add a layer of tender and flavourful mutton on top of the rice layer.
Fried Onions Layer
Fried onions, thinly sliced
Sprinkle a layer of fried onions on top of the mutton layer to add a caramelized flavor.
Herbs Layer
Cilantro, mint, chopped
Sprinkle a generous amount of fresh herbs on each layer to add a refreshing aroma.
Repeat
Repeat the layering process until all the rice, mutton, fried onions, and herbs are used.
Alternate between the different layers, creating a beautiful and flavorful biryani.
When it comes to elevating the flavours and aromas of mutton biryani, there are two ingredients that stand out: saffron and rose water. These aromatic touches add a unique and delightful sensory experience to the dish, making it truly special.
Saffron in Biryani:
Saffron, with its vibrant colour and intense flavor, is a prized spice that brings a touch of luxury to any dish, including biryani. This exquisite spice is derived from the delicate threads of the Crocus sativus flower, commonly known as the saffron crocus.
In mutton biryani, saffron is often used to add depth and complexity to the rice layer. Soaked in warm milk or water, the saffron infuses the grains with a beautiful yellow hue and a distinct earthy taste. Each bite becomes a fragrant celebration of flavours.
Rose Water in Biryani:
Rose water, derived from rose petals, has been used for centuries to add a delicate floral essence to various cuisines. In mutton biryani, a dash of rose water can transform the dish into a truly aromatic feast.
Adding rose water during the cooking process infuses the biryani with a subtle and delightful fragrance. As the dish simmers, the rose water blends harmoniously with the other spices and ingredients, creating a symphony of aromas that will captivate your senses.
Serving and Presentation of Your Mutton Biryani
Once your flavourful mutton biryani is ready, it’s time to serve and present it in a way that elevates the dining experience. The way you garnish, plate, and pair your biryani can make a significant difference in its overall appeal. Here are some tips to help you serve and present your mutton biryani in a memorable way:
Garnish with Fresh Herbs: Add a pop of freshness and colour to your biryani by garnishing it with fresh herbs like cilantro or mint. Simply chop the herbs and sprinkle them over the top of the biryani before serving.
Layer with Fried Onions: To enhance the flavor and visual appeal of your biryani, layer it with crispy fried onions. These golden, caramelized onions add a delightful crunch and sweetness to the dish.
Plating Techniques: When plating your mutton biryani, use a wide, shallow dish to showcase the layers of rice and meat. Be mindful of the rice-to-meat ratio, ensuring that each serving contains a generous amount of both.
Pairing Accompaniments: Complement your mutton biryani with a variety of accompaniments that enhance its flavours. Serve raita (a yogurt-based side dish) to cool down the spiciness, and add a squeeze of fresh lemon juice for a tangy twist. You can also serve it with a side of pickle or papad (Indian crispy flatbread) for added texture and taste.
Remember, the presentation of your mutton biryani is an opportunity to create a memorable dining experience. Take the time to garnish, plate, and pair it thoughtfully, and you’ll delight your guests with both the visual appeal and the delicious flavor of this traditional dish.
Welcome to our culinary journey as we explore the flavors of India with an authentic aloo dum recipe. Aloo dum, a popular Indian dish, is known for its rich flavors and simplicity. Whether you’re a novice or an experienced cook, this recipe is guaranteed to impress your taste buds and transport you to the vibrant streets of India.
The aloo dum recipe is known for its unique cooking technique called “dum.” This technique involves slow-cooking the dish in a sealed pot, allowing the flavors to infuse and intensify. The dum cooking method dates back centuries and originated in the royal kitchens of India. It was used to create rich, flavorful dishes that were fit for royalty.
Special recommendation for Aloo Dum Recipe
When selecting potatoes for aloo dum, it is important to choose the variety that holds its shape well during the cooking process.
This ensures that the potatoes remain firm and do not disintegrate, giving the dish a desirable texture. Some of the best potatoes for aloo dum include Yukon Gold, Idaho, or even red-skinned potatoes. These varieties are known for their starchy texture, making them ideal for absorbing the flavors of the dish while maintaining their integrity.
Whole spices, such as cardamom, cinnamon, cloves, and bay leaves, are integral to the authentic flavors of aloo dum.
Ingredients for the Perfect Aloo Dum Recipe
Ingredients
Quantity
Potatoes
4-5 medium-sized
Tomatoes
3-4 ripe
Onions
2 medium-sized
Whole Spices (cardamom, cinnamon, cloves, bay leaves)
5-6 pieces each
Cashews
1/4 cup
With these ingredients in your pantry, you’ll be well on your way to creating a delicious and authentic Aloo Dum recipe
Mastering the Aloo Dum Texture
One of the key aspects of aloo dum that sets it apart is its texture. Achieving the perfect balance of creaminess and tenderness in this popular Indian dish can take it to a whole new level. If you want to elevate your aloo dum game and impress your family and friends with a dish that has the ideal texture, follow these tips and techniques:
Choose the right potatoes: To achieve the desired texture, it is essential to select the right type of potatoes. Look for potatoes that are starchy and have a creamy texture when cooked.
Cooking method: The cooking method used can significantly impact the texture of your aloo dum. While some recipes call for deep-frying the potatoes before adding them to the gravy, others suggest sautéing them. Experiment with both techniques to find the one that gives you the desired texture.
Creamy consistency: To achieve a creamy consistency in your aloo dum, consider blending a portion of the cooked potatoes with the gravy. This will help thicken the sauce and give it a rich, velvety texture.
Simmering technique: Allow your aloo dum to simmer gently on low heat to allow the flavors to meld together and the potatoes to absorb the spices and gravy. This slow cooking process will help achieve a tender texture.
By following these tips and techniques, you can master the texture of your aloo dum and create a dish that is incredibly flavorful and satisfying. Experiment with different variations and cooking methods to find the perfect balance that suits your taste.
The Secret to Rich and Creamy Gravy Aloo Dum recipe
Another essential element of restaurant-style aloo dum is the creamy gravy that envelops the potatoes. Achieving this luxurious consistency requires careful attention to the cooking process.
To start, ensure that the tomato and onion purée is cooked until it reaches a smooth and silky texture. This step allows the flavors to develop and intensify, resulting in a luscious base for the gravy.
Next, add a generous amount of cashews to the purée. These nuts contribute to the richness of the gravy and lend a velvety smoothness. Their natural oils create a creamy texture that complements the soft potatoes perfectly.
To further enhance the creamy richness, consider adding a dollop of thick yogurt or heavy cream towards the end of the cooking process. This will add a luxurious touch and bring all the flavors together.
(Aloo Dum recipe)
For many other toothsome recipes please visit the below links:
When it comes to enjoying the rich flavors of aloo dum, choosing the right accompaniments can elevate your dining experience. Pairing this popular Indian dish with complementary side dishes can enhance the overall taste and provide a well-rounded meal. Here are some of the best accompaniments to serve with aloo dum:
Jeera Rice: The fragrant aroma of jeera rice, also known as cumin rice, pairs beautifully with the spicy and flavorful aloo dum.
Naan: Soft and pillowy naan bread is perfect for scooping up the delicious aloo dum gravy and savoring every bite.
Poori: These deep-fried, fluffy breads make a delightful combination with aloo dum, offering a satisfying crunch.
Paratha: Whether it’s plain paratha or stuffed paratha, the flaky texture of this Indian bread complements the velvety aloo dum gravy.
Raita: A refreshing and cooling side dish like cucumber raita or boondi raita can balance the heat of the aloo dum and add a creamy element to the meal.
Pickle: A tangy and spicy pickle, such as mango pickle or mixed vegetable pickle, can provide a zesty contrast to the richness of the aloo dum.
Papad: Crispy papad or poppadum adds a delightful crunch to the meal and offers a contrasting texture to the creamy aloo dum.
By serving these popular Indian side dishes alongside your aloo dum, you can create a truly memorable and satisfying dining experience. Experiment with different combinations to find your favorite pairing and enjoy the explosion of flavors on your plate.
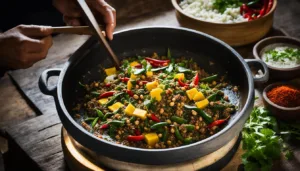
Welcome to our article on the delicious Kochu Bata recipe, a Bengali delicacy that will surely add a burst of flavor to your meals. As we explore this easy-to-follow recipe, get ready to embark on a culinary journey that showcases the unique tastes of Bengal. Whether you’re a seasoned cook or a beginner, this side dish recipe is perfect for home cooking.
Kochu Bata is a traditional Bengali dish that holds a special place in Bengali cuisine. It is a monsoon favorite, known for its unique flavors and versatility. Kochu Bata adds a touch of authenticity and spice to any meal, making it a must-try recipe for food enthusiasts.
Special recommendation for Kochu Bata Recipe
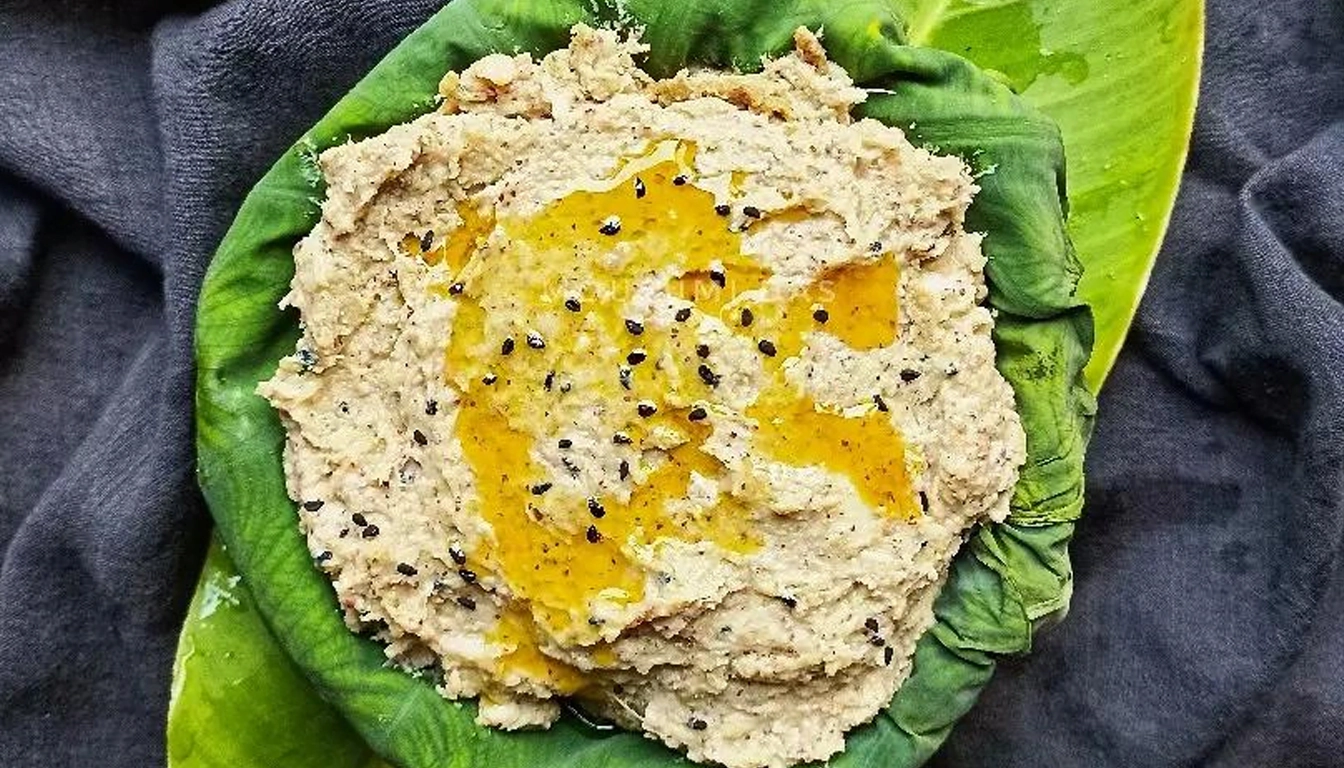
Use Maan Kochu, also known as Malanga Coco or Taro Root, as the main ingredient for Kochu Bata Recipe. Maan Kochu is a seasonal vegetable that adds a distinct flavor and texture to the dish. The process of preparing Kochu Bata involves grating the Maan Kochu and combining it with other spices and ingredients to create a flavorful paste.
Use raw mustard oil for garnishing at the end
Kochu bata with rice
Variety
Seasonality
Taste
Sreedevi
Monsoon
Delicate, slightly sweet
Prajanma
Monsoon
Robust, earthy
Radhika
Monsoon
Distinctive, nutty
The Traditional Cooking Method for Kochu Bata Recipe
In the preparation of Kochu Bata, tradition plays a significant role. The process of making this Bengali delicacy has evolved over the years, with the introduction of modern kitchenware and cooking techniques. Let us explore the traditional cooking method for Kochu Bata and the transition from using traditional tools like Shil-Nora to contemporary kitchenware.
From Shil-Nora to Modern Kitchenware (Kochu Bata Recipe)
In the past, the primary tool used to make Kochu Bata was the Shil-Nora, a traditional grinding stone made of granite or other sturdy materials. This tool consisted of a flat surface and a cylindrical rolling pin-like object. The Maan Kochu (Taro Root) was manually ground on the stone to create a fine paste.
Today, with the advent of modern kitchenware, home cooks have various appliances at their disposal to simplify the process. Electric blenders and food processors have replaced the labor-intensive grinding process, making it quicker and more convenient to prepare Kochu Bata.
Boiling vs. Pan-Roasting Techniques
When it comes to cooking Kochu Bata, two popular techniques stand out: boiling and pan-roasting. Each method imparts a distinct flavor and texture to the dish.
Boiling Technique:
In the boiling technique, the Maan Kochu is peeled, chopped, and boiled until tender. Once cooked, the taro roots are drained and mashed to create a smooth paste. This method is ideal for a softer and creamier texture in the final dish.
Pan-Roasting Technique:
The pan-roasting technique involves roasting the peeled and chopped Maan Kochu on a dry pan until it turns golden brown. This process intensifies the flavor of the taro root and adds a nutty aroma to the paste. The roasted roots are then ground into a paste, resulting in a slightly chunkier texture.
Both techniques have their unique charm, and the choice between them depends on personal preference and the desired texture in Kochu Bata.
Essential Ingredients for a Mouthwatering Kochu Bata Recipe
To create a mouthwatering Kochu Bata, there are a few essential ingredients that you’ll need. These ingredients are the key to achieving the mouthwatering flavor and traditional taste that make Kochu Bata a beloved Bengali delicacy.
Let’s take a look at the essential ingredients:
Maan Kochu (Malanga Coco) – also known as Taro Root, this vegetable forms the base of the Kochu Bata paste, lending its unique flavor and texture.
Traditional Spices – a blend of flavorful spices like cumin seeds, coriander seeds, red chili powder, and turmeric powder adds depth and complexity to the dish.
Mustard Oil – an indispensable ingredient in Bengali cooking, mustard oil enhances the flavor and authenticity of Kochu Bata.
By combining these essential ingredients, you’ll be able to create a Kochu Bata that is bursting with mouthwatering flavor and tantalizing aroma. The traditional spices and the distinctive taste of mustard oil will transport you to the heart of Bengal with every bite.
Preparing the Perfect Kochu Bata
Cleaning and Grating Maan Kochu
Before you can start preparing the perfect Kochu Bata, it is crucial to ensure that your Maan Kochu is clean and ready to be transformed into a delicious paste. Start by washing the Maan Kochu thoroughly under running water to remove any dirt or impurities. Use a vegetable brush to scrub the surface gently, paying special attention to the crevices and rough areas. Once clean, pat it dry with a clean kitchen towel.
Next, it’s time to grate the Maan Kochu. Select a grater with small holes to achieve the desired texture for your paste. Hold the Maan Kochu firmly in one hand and use the other to grate it against the grater’s surface. Be cautious of your fingers and maintain a steady grip to ensure a consistent and even grating. Continue until the entire Maan Kochu is grated and ready for the next step.
A Step-by-Step Guide to Making Kochu Bata Recipe
In this section, we will provide you with a step-by-step guide to making Kochu Bata, ensuring that you can recreate this flavorful Bengali dish with ease. From cooking techniques to essential tips, we have got you covered.
Cooking on Medium Heat: Techniques and Tips
When it comes to cooking Kochu Bata, using medium heat is key to achieving the perfect balance between flavor and texture. Here are some techniques and tips to keep in mind:
Start by heating a pan on medium heat and adding mustard oil. Allow the oil to heat up before proceeding.
Add the grated Maan Kochu and cook it slowly, stirring continuously to ensure even cooking. This gentle cooking process helps to unlock the flavors of the ingredients.
Be patient and avoid rushing the cooking process. Cooking on medium heat allows the flavors to meld together and prevents the spices from burning.
Keep a close eye on the Kochu Bata while it’s cooking. Stir frequently to prevent sticking and ensure that it cooks evenly.
Feel free to adjust the cooking time based on your preference for the final consistency. If you like a smoother texture, cook for a longer time. For a chunkier Kochu Bata, cook for a shorter time.
Knowing When Your Kochu Bata is Ready
Determining the doneness of your Kochu Bata is crucial to achieving the desired flavors. Here are some indicators to help you know when your Kochu Bata is ready:
Texture: The grated Maan Kochu should become soft and translucent while retaining its shape. It should no longer have a raw, crunchy texture.
Color: The color of the Kochu Bata will deepen as it cooks, turning into a rich golden hue.
Aroma: The aromatic blend of spices and mustard oil will permeate the air, indicating that the flavors have developed.
Taste: With a little taste test, you will be able to tell if the Kochu Bata has reached the desired level of spiciness and seasoning. Adjust the flavors accordingly if needed.
(Kochu Bata Recipe)
How to Present Kochu Bata on Your Dining Table
When it comes to presenting Kochu Bata, visual appeal plays a significant role. Consider the following presentation ideas:
Traditional Thali: Serve Kochu Bata in the center of a traditional Thali, surrounded by bowls of complementary dishes and a side of fragrant rice.
Garnish with Fresh Herbs: Sprinkle freshly chopped cilantro or mint leaves on top of the Kochu Bata to add a vibrant pop of color and freshness.
Artistic Plating: Use a ring mold to create a beautifully plated Kochu Bata on a rectangular dish, drizzling mustard oil in an elegant design.
By following these serving suggestions and presentation ideas, you can elevate your dining experience with Kochu Bata, impressing your guests and enjoying the authentic flavors of this Bengali delicacy.
For more such mouth-watering recipes do visit the below links:
Kochu bata is a good source of carbohydrates and dietary fiber. It also contains vitamins and minerals, including vitamin C, vitamin A, potassium, and magnesium. However, it should be noted that kochu(Taro) contains oxalates, which can cause irritation in the mouth and throat if consumed raw.
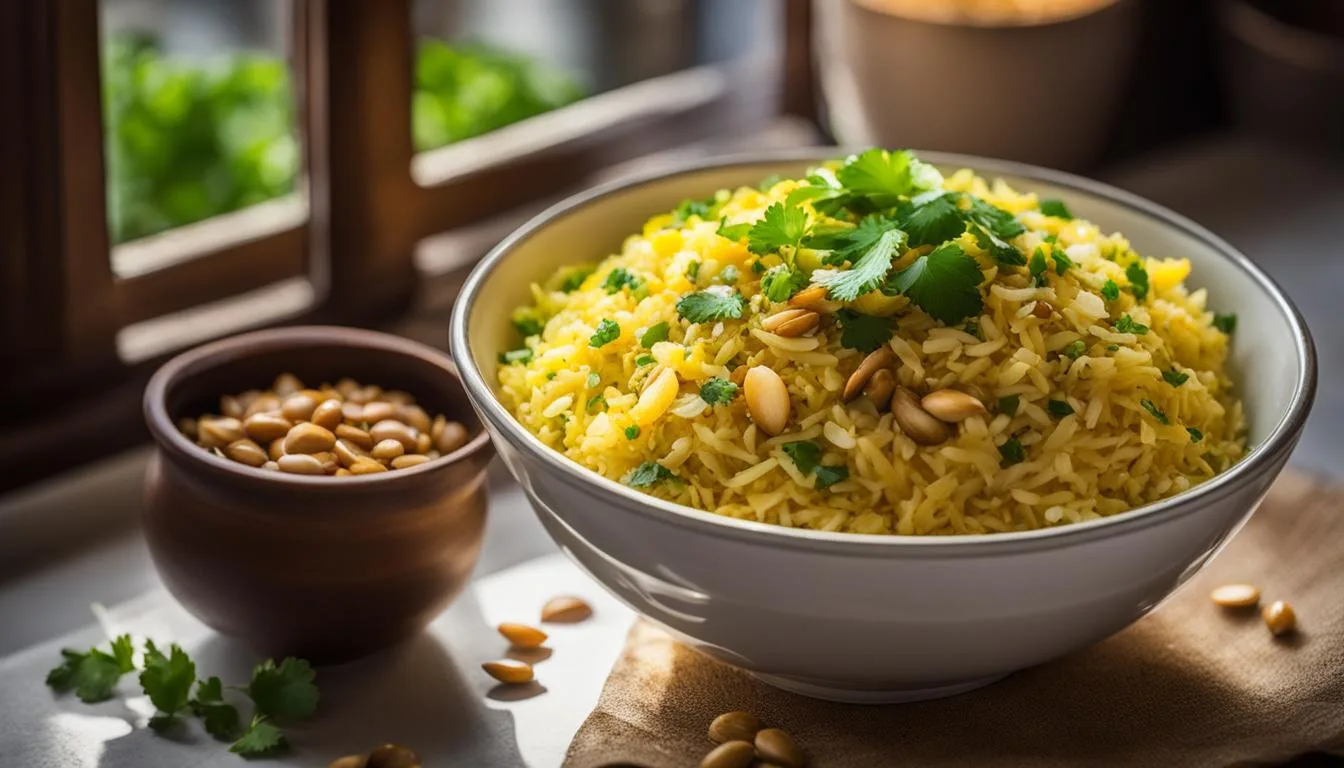
In this article, we will explore an easy poha recipe that is a traditional Indian breakfast. Poha, also known as flattened rice, is a popular breakfast option in India, loved for its simplicity and delicious flavors. Whether you’re looking for a quick and healthy breakfast, a vegetarian option, or a simple and satisfying meal, poha ticks all the boxes.
Made with ingredients like onions, potatoes, spices, and flattened rice flakes, poha can be easily customized to suit your taste preferences and dietary needs. It’s a versatile dish that can be enjoyed by people of all ages, and it’s perfect for busy mornings when you need something quick and nutritious to start your day.
Special recommendation
You can pair you plate full of poha with the below accompaniments:
Yogurt: The creamy and cooling effect of yogurt complements the spiciness of poha, creating a harmonious balance of flavors.
Chutney: Whether it’s a tangy coconut chutney or a spicy green chutney, adding a dollop of chutney enhances the taste of poha.
Pickle: The tangy and sour taste of pickles adds a punch of flavor to every bite of poha, making it a perfect combination.
Papad: Crispy and crunchy papads offer a delightful texture contrast to the softness of poha, making it a satisfying meal.
Sev: Sprinkling some sev on top of poha not only adds a delightful crunch but also enhances the visual appeal of the dish.
Delving into the Flavors of Easy Poha Recipe
What is Poha?
In order to understand the versatility of poha, let’s first explore what this traditional Indian recipe entails. Poha, also known as flattened rice, is a popular dish that is commonly enjoyed for breakfast in India. It is made by processing rice into flattened flakes, resulting in a light and easily digestible ingredient.
The Use of Flattened Rice in Poha
Flattened rice, or poha, is made by parboiling rice grains and then drying them before flattening them into thin flakes. These flakes can be easily rehydrated and cooked to create a soft and fluffy texture. Poha is an essential ingredient in poha recipes, providing a delicious and satisfying base for the dish.
Ingredients for Poha recipe
Ingredients
Quantity
Flattened rice
1 cup
Finely chopped onion
1 medium
Boiled and diced potato
1 small
Finely chopped green chili
1
Mustard seed
1 teaspoon
Turmeric powder
1/2 teaspoon
Curry leaves
Handful
Peanuts
1/4 cup
Oil
2 tablespoons
Salt
To taste
Coriander leaves
few chopped for garnishing
Preparation of Poha
Rinse the flattened rice: Place the flattened rice in a colander and rinse it under cold water for a few seconds. Gently fluff the rice with your fingers to separate any clumps. Set it aside to drain.
Prepare the tempering: Heat oil in a pan over medium heat. Add mustard seeds and let them splutter. Then, add the curry leaves, green chili, and peanuts. Sauté them for a minute until the peanuts turn golden brown.
Add the onions: Add the finely chopped onions to the pan and sauté until they turn translucent.
Season with spices: Sprinkle turmeric powder and salt over the sautéed onions. Mix well to evenly coat the onions with the spices.
Add the potatoes: Now, add the boiled and diced potatoes to the pan. Gently mix everything together.
Combine with flattened rice: Add the rinsed flattened rice to the pan. Using a light hand, mix all the ingredients together until the flattened rice is well-coated with the spices.
Cook until heated through: Cover the pan and let the poha cook for 2-3 minutes on low heat, allowing all the flavors to meld together.
Garnish and serve: Remove the lid and give the poha a final mix. Garnish with freshly chopped coriander leaves. Your homemade poha is now ready to be served!
Enjoy your delicious homemade poha for a satisfying breakfast or snack. It’s a versatile dish that can be enjoyed on its own or paired with a hot cup of masala chai. Bon appétit!
For more such delicious recipes please click below:
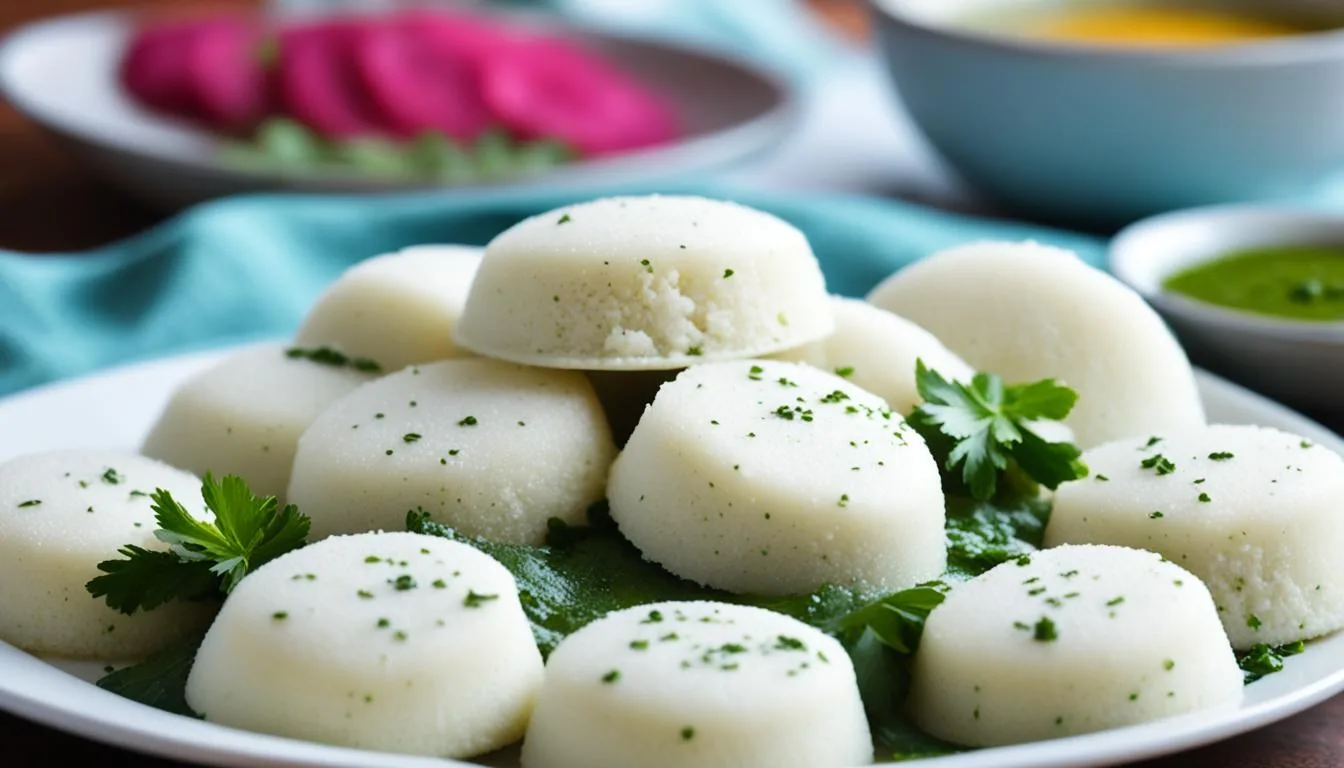
Welcome to our blog, where we are delighted to share with you an authentic idli recipe that you can easily make at home. Idli is a traditional South Indian delicacy loved for its soft and fluffy texture. With our easy idli recipe, you can recreate this classic dish in your own kitchen, without any special ingredients or equipment.
Idlis are not only a delicious breakfast option but also a versatile dish that can be enjoyed for lunch, dinner, or as a snack. Whether you are a fan of traditional recipes or love exploring new flavors, our homemade idli recipe is perfect for you. Get ready to savor the authentic taste of these delectable treats.
Table of Contents
Key Takeaways
Make perfect idlis at home with our easy and authentic idli recipe.
Enjoy soft and fluffy idlis without any special ingredients or equipment.
Idlis make a versatile dish that can be enjoyed for any meal or as a snack.
Try our homemade idli recipe to experience the traditional flavors of South India.
Savor the deliciousness of idlis with your favorite chutneys and sambar.
The Art of Creating Perfect Idli Batter
In order to achieve the perfect texture and taste of idlis, it is crucial to create the right idli batter. The batter serves as the foundation for creating soft, fluffy, and delicious idlis. Understanding the key factors in making a good idli batter will help you master the art of idli making at home.
The first step in creating idli batter is to carefully select the ingredients. The main components of idli batter are rice and lentils. It is important to choose the right type of rice and lentils to ensure the desired texture and flavor of the final product. Long-grain parboiled rice and skinned black gram lentils (urad dal) are commonly used in traditional idli batter recipes.
After selecting the ingredients, the next step is to soak them. Soaking the rice and lentils overnight or for a few hours helps soften them and make them easier to grind. The soaking time may vary depending on the climate and the rice and lentil varieties used.
Once the rice and lentils are soaked, it’s time to grind them. Grinding the soaked ingredients to a smooth paste is crucial for achieving the desired texture of the idli batter. Traditionally, stone grinders were used to grind the ingredients, but nowadays, blenders and food processors are commonly used for convenience.
After grinding, the batter needs to undergo fermentation. Fermentation is a key step in idli making as it imparts the characteristic tanginess and lightness to the idlis. The batter should be left to ferment in a warm place for several hours or overnight, depending on the temperature and climate. The ideal fermentation temperature is around 80°F (27°C).
During the fermentation process, the naturally occurring bacteria in the batter break down the carbohydrates and proteins, making it more digestible and light. Fermented idli batter will have a slightly sour aroma and frothy texture, which is a sign of a well-fermented batter.
Once the batter is fermented, it is ready to be used for making idlis. The fluffy and airy texture of the fermented batter will result in soft and spongy idlis. Remember to gently mix the batter before using it to ensure a consistent texture throughout.
Now that you know the art of creating perfect idli batter, you can confidently make homemade idlis that are as good as those served in restaurants. The next section will explore the basics of idli and its cultural significance.
Understanding the Basics: What is an Idli?
An idli is a popular South Indian dish that is known for its soft and fluffy texture. It is a type of savory rice cake that is made from a fermented batter consisting of rice and lentils. Idlis are typically served as a breakfast dish or a light meal.
The Origin and Cultural Significance of Idli
Idli has a rich history and is believed to have originated in the southern parts of India, specifically in the states of Karnataka and Tamil Nadu. It has been a staple in South Indian cuisine for centuries and is deeply ingrained in the culture and traditions of the region.
Traditionally, idlis were made by grinding soaked rice and lentils together using a grinding stone called a “ultra” or “attukal.” This labor-intensive process resulted in a fine batter, which was then fermented overnight. The fermentation process not only adds flavor but also makes the idlis light, soft, and easily digestible.
“Idlis are an integral part of our South Indian culture. They are often served during religious ceremonies, festivals, and special occasions. Idli-making is a skill that has been passed down through generations, and each family has their own unique recipe and techniques.”
Nutritional Benefits: Is Idli a Healthy Choice?
Idlis are not only delicious but also offer several nutritional benefits. They are low in fat, cholesterol-free, and rich in essential nutrients, making them a healthy choice for breakfast or a snack.
Some key nutritional benefits of idlis include:
High in protein: The combination of rice and lentils in idli batter provides a good amount of protein, which is essential for muscle growth and repair.
Good source of fiber: Idlis are made from whole grains, which contain dietary fiber that aids in digestion, promotes satiety, and helps maintain healthy blood sugar levels.
Low in calories: Idlis are relatively low in calories, especially when compared to other breakfast options. They are a satisfying meal that keeps you energized without adding extra weight.
Rich in vitamins and minerals: Idlis contain various vitamins and minerals, such as vitamin B, iron, and calcium, which are essential for overall health and well-being.
Overall, idlis not only satisfy your taste buds but also provide a nutritious start to your day.
The Two Approaches to a Fluffy Idli Recipe
When it comes to making fluffy idlis, there are two main approaches: the traditional method and modern techniques. Each method has its own unique characteristics and benefits, allowing you to create the perfect idli to suit your preferences.
1. Traditional Idli Recipe:
The traditional idli recipe involves stone grinding the batter and a longer fermentation process. Stone grinding helps achieve a fine texture and consistency, resulting in soft and fluffy idlis. The longer fermentation period allows the batter to develop a tangy flavor and enhances the overall taste.
Although the traditional method requires some additional time and effort, many people prefer it for its authentic taste and texture. It retains the essence of the age-old idli-making process, thereby preserving the cultural heritage and traditional flavors.
2. Modern Idli Recipe:
In contrast, modern techniques for making idlis utilize kitchen appliances like blenders and instant pots. These methods offer convenience and save time without compromising on taste and texture.
With modern techniques, you can achieve similar results to the traditional method in less time. Blenders provide a quick and efficient way to grind the batter, while instant pots allow for faster fermentation. This makes the modern idli recipe a popular choice among busy individuals who want to enjoy homemade idlis without spending too much time in the kitchen.
By comparing the two approaches, you can decide which method suits your preferences and lifestyle. If you prefer a traditional and authentic idli experience, the traditional method would be your best choice. On the other hand, if convenience and time-saving are your priorities, modern techniques are a great option.
It’s worth noting that both approaches yield delicious and fluffy idlis. The choice ultimately depends on your personal taste and the resources available to you.
To visualize the differences between the traditional and modern approaches, refer to the table below:
Note: The table represents a visual comparison of the traditional and modern approaches to a fluffy idli recipe.
Key Ingredients for the Authentic Idli Recipe
In order to make delicious and authentic idlis, it is essential to use the right ingredients. The key components of idli batter include idli rice and urad dal, along with the crucial element of fermentation.
Choosing the Right Type of Rice and Lentils
When it comes to idli rice, it is recommended to use a specific variety known as idli rice. This rice is specially processed to have a smooth and fine texture, which contributes to the softness of the idlis. You can find idli rice easily at most Indian grocery stores.
The second vital ingredient is urad dal, also known as black gram lentils. Urad dal is responsible for adding a creamy texture and richness to the idli batter. It is crucial to use whole urad dal, preferably with the skin intact, as it aids in the fermentation process. Split urad dal may not yield the same results.
The Role of Fermentation in Idli Making
Fermentation plays a crucial role in achieving the characteristic texture and taste of idlis. The natural fermentation process not only enhances the flavor but also makes the idlis soft and fluffy. During fermentation, the natural bacteria present in the environment break down the carbohydrates in the batter, resulting in the production of carbon dioxide gas. This gas gets trapped in the batter, causing it to rise and ferment.
The fermentation process usually takes around 8 to 12 hours, depending on the temperature and climate. It is recommended to place the batter in a warm and draft-free spot, as the bacteria thrive in such conditions. The result is a well-fermented batter that yields light, airy, and flavorful idlis.
Now that we understand the importance of the key ingredients and the role of fermentation, let’s move on to exploring the different cooking techniques for making idlis.
Traditional vs. Modern Cooking Techniques for Idli
In this section, we will explore the contrasting approaches to cooking idlis: the traditional method and the modern technique. Both methods have their own unique advantages and disadvantages, and understanding them can help you choose the best technique for your idli-making process. Let’s dive in!
The Stone Grinding Technique
The traditional method of making idli batter involves using a stone grinder to grind the rice and lentils. This age-old technique has been passed down through generations and is believed to yield superior results. The stone grinder, also known as a wet grinder, slowly grinds the ingredients to create a smooth and creamy batter. This slow grinding process allows the rice and lentils to retain their nutrients and flavors, resulting in deliciously authentic idlis.
Using the stone grinding technique requires time and patience as the batter needs to be soaked, ground, and fermented over a period of hours or even overnight. The fermentation process enhances the taste and texture of the idlis, making them light, fluffy, and full of flavor.
Utilizing Modern Kitchen Appliances
In recent years, modern kitchen appliances have gained popularity for making idli batter quickly and conveniently. Appliances like blenders and food processors offer a convenient alternative to stone grinding. With these appliances, you can easily grind the rice and lentils into a smooth batter in a matter of minutes.
The use of modern kitchen appliances reduces the time required for preparation. However, it is important to note that the texture and taste may differ slightly compared to idlis made using the traditional stone grinding technique. Some enthusiasts claim that the traditional method yields idlis with a better texture and flavor.
Ultimately, the choice between traditional and modern cooking techniques comes down to personal preference and the time you have available. If you appreciate the authenticity and traditional flavors of idlis, then the stone grinding method is worth exploring. On the other hand, if convenience and time-saving are your priorities, modern kitchen appliances can be a great option.
idli recipe: Step by Step Guide to the Perfect Mix
In this section, we will provide a detailed step-by-step guide to making the perfect idli batter. Creating the ideal batter is crucial for achieving fluffy and delicious idlis, so we will break down each step of the process to ensure success.
1. Soaking the rice and lentils:
Start by measuring out the rice and lentils according to the recipe. Rinse them thoroughly under cold water to remove any impurities. Place them in separate bowls and cover with enough water. Let them soak separately for at least 4 hours or overnight. This soaking process helps soften the grains and aids in the fermentation process.
2. Grinding the batter:
After soaking, drain the water from both the rice and lentils. Transfer them to a blender or wet grinder. Begin by adding a small amount of water and grind them into a smooth paste. Gradually add water as needed to achieve a thick, creamy consistency. A well-ground batter is key to achieving the perfect texture of idlis.
3. Fermenting the batter:
Transfer the batter to a large container, making sure there is enough room for it to expand during fermentation. Cover the container with a clean cloth or lid and let it ferment for 8 to 12 hours, or until the batter has doubled in volume. Fermentation is a crucial step as it helps develop the characteristic tangy flavor and airy texture of idlis.
Tip: To aid fermentation, place the container in a warm place or use a fermentation function if available on your appliance.
4. Preparing the idlis:
Before steaming the idlis, give the fermented batter a gentle stir to incorporate any settled solids. Grease the idli molds with a little oil or ghee. Fill each mold about three-fourths full with the batter. Steam the idlis in a steamer or idli cooker for about 10 to 12 minutes, or until they are cooked through and springy to the touch.
5. Serve and enjoy:
Once the idlis are cooked, remove them from the steamer and let them cool for a few minutes. Use a spoon or knife to gently loosen the idlis from the molds. Serve hot with your favorite chutney, sambar, or any other accompaniments of your choice.
Navigating the Fermentation Process: Tips and Tricks
In order to achieve soft and fluffy idlis, proper fermentation of the idli batter is crucial. In this section, we will provide you with some helpful tips and tricks to navigate the fermentation process successfully.
Best Temperature for Fermentation
The ideal temperature for fermenting idli batter is around 80°F to 90°F (27°C to 32°C). This temperature range promotes the growth of beneficial microorganisms, which helps in the fermentation process. It is important to maintain a consistent temperature throughout the fermentation period to ensure optimal results.
There are a few ways to maintain the proper temperature for fermentation:
Use a warm place in your kitchen: Find a warm spot in your kitchen, such as near the oven or on top of the refrigerator, where the temperature is relatively stable and warm.
Utilize a hot water bath: Place the container with the idli batter in a larger container filled with warm water. This helps to regulate the temperature and provides a consistent environment for fermentation.
Use a fermentation appliance: If you have a fermentation appliance, such as a yogurt maker or a proofing box, you can use it to create the ideal temperature for fermenting the idli batter.
By maintaining the proper temperature, you can ensure that the fermentation process occurs at an optimal rate, resulting in light and airy idlis.
Dealing with Fermentation in Different Climates
The fermentation process can be influenced by the climate in which you live. If you live in a hot and humid climate, the batter may ferment faster. On the other hand, if you live in a colder climate, the fermentation process may take longer.
Here are some tips for dealing with fermentation in different climates:
Hot and humid climate: In hotter climates, fermentation can happen quickly. Keep a close eye on the batter and check for the sour aroma and small air bubbles on the surface, indicating that the fermentation is complete.
Cold climate: In colder climates, fermentation may take longer. Place the batter in a warm place, such as near a warm appliance or use a warm water bath to speed up the process. Be patient and allow the batter to ferment until it develops the desired tangy aroma.
Remember, the fermentation time may vary depending on the climate, so it is essential to observe the visual and olfactory cues to determine when the batter is ready for making idlis.
Proper fermentation is key to achieving soft and fluffy idlis. By following these tips and tricks, you can navigate the fermentation process with confidence and enjoy delicious homemade idlis every time.
The Secret to Soft and Fluffy Idli
To achieve soft and fluffy idlis, there are a few secrets and tips that can make all the difference in the final result. Here are some additional techniques you can incorporate into your idli-making process:
Adjusting the consistency of the batter: The consistency of the idli batter plays a crucial role in determining the texture of the idlis. If the batter is too thick, the idlis might turn out dense and heavy. On the other hand, if the batter is too watery, the idlis might not hold their shape. Aim for a batter that is smooth and slightly thick, but still easily pourable.
Steaming techniques: The way you steam the idlis can also impact their softness and fluffiness. Ensure that the steamer is properly preheated before placing the idli molds inside. Steam the idlis on medium heat for the optimum time, typically around 10-12 minutes, or until a toothpick inserted into the center comes out clean.
Storing leftover batter: If you have leftover idli batter, do not let it go to waste. It can be refrigerated and used within a couple of days. When using leftover batter, make sure to bring it to room temperature before steaming to ensure the idlis turn out soft and fluffy.
By keeping these secrets and tips in mind, you can elevate your idli-making skills and enjoy delicious, soft, and fluffy idlis every time.
Essential Complements: Chutney and Sambar Recipes
As idlis are a staple in South Indian cuisine, they are typically served with flavorful accompaniments that enhance their taste. Chutney and sambar are the quintessential side dishes that perfectly complement the soft and fluffy idlis.
Chutneys are versatile condiments made with a variety of ingredients, such as coconut, tomatoes, and mint. They provide a burst of flavor and add a delicious contrast to the mildness of idlis. Here are three easy and delicious chutney recipes that you can try:
Coconut Chutney Recipe
This coconut chutney is a classic accompaniment to idlis. It has a creamy texture and a subtle nutty flavor that pairs beautifully with the softness of the idlis.
Tomato Chutney Recipe
This tangy tomato chutney adds a vibrant burst of flavor to your idlis. It is made with ripe tomatoes, onions, and a blend of spices, creating a perfect balance of sweet, tangy, and spicy flavors.
Mint Chutney Recipe
Mint chutney is a refreshing and aromatic condiment that complements the mildness of idlis. Made with fresh mint leaves, coriander, and green chilies, this chutney adds a burst of freshness to every bite.
In addition to chutneys, sambar is another popular side dish that pairs exceptionally well with idlis. Sambar is a flavorful lentil-based stew cooked with vegetables and spices. It adds a savory and tangy element to the idlis. Here is a simple and aromatic sambar recipe to try:
Sambar Recipe
This sambar recipe is packed with the goodness of lentils and a medley of vegetables. It has a rich and tangy flavor profile that perfectly complements the soft idlis. The aromatic blend of spices adds depth to the dish, making it a delightful accompaniment.
By serving your idlis with these flavorful chutneys and sambar, you can elevate your breakfast or meal to a whole new level of taste and satisfaction. The combination of soft idlis with these delicious accompaniments is a match made in culinary heaven. Give these recipes a try to experience the true flavors of South Indian cuisine.
Conclusion
After exploring the art of creating a perfect idli batter, understanding the basics of idli, and comparing traditional and modern techniques, we hope you now feel confident to embark on your homemade idli-making journey. With our easy-to-follow recipe and handy tips, making fluffy idlis at home is within your reach.
Idlis have a rich cultural significance in South Indian cuisine and are enjoyed for breakfast or as a light meal. Not only are they delicious, but they also pack a nutritional punch, being a great source of protein and fiber.
Remember, the key to achieving soft and fluffy idlis lies in properly fermenting the batter and selecting the right ingredients. Whether you choose the traditional stone grinding technique or opt for modern kitchen appliances, the end result will be equally satisfying.
We encourage you to unleash your culinary creativity by pairing your homemade idlis with a variety of flavorful chutneys and a delicious sambar. By making idlis at home, you can customize the flavors to suit your preferences and enjoy a wholesome and satisfying meal.
FAQ
What is the key to making perfect and fluffy idlis?
The key to making perfect and fluffy idlis lies in the idli batter. The right ratio of rice and lentils, the soaking and grinding process, and proper fermentation are all crucial factors in achieving the desired texture and taste.
How important is fermentation in making idlis?
Fermentation plays a vital role in idli making. It not only adds a tangy flavor to the batter but also helps in making the idlis soft and fluffy. Proper fermentation allows the batter to rise and become light, resulting in airy and delicious idlis.
What are the traditional and modern approaches to making idlis?
The traditional method of making idlis involves stone grinding the batter and longer fermentation. Modern techniques, on the other hand, utilize kitchen appliances like blenders and instant pots, which offer more convenience and time-saving options.
What are the key ingredients for authentic idlis?
The key ingredients for authentic idlis include rice and lentils. It’s important to choose the right type of rice and lentils, such as idli rice and urad dal, to ensure the best results. The fermentation process also plays a crucial role in achieving the desired texture and taste.
What are the traditional and modern cooking techniques for making idlis?
The traditional cooking technique involves stone grinding the batter, which helps in achieving a smooth and fine texture. Modern techniques utilize kitchen appliances like wet grinders and blenders, which offer convenience and speed up the process.
Can you provide a step-by-step guide to making idli batter?
Of course! To make idli batter, you need to soak the rice and lentils, grind them into a smooth paste, and then ferment the batter overnight. It’s essential to follow the proper measurements and process to achieve the best results. Check out our detailed instructions in the article for a step-by-step guide.
How do I know if the idli batter is properly fermented?
The idli batter should rise and become light and frothy during fermentation. It should have a slight tangy aroma and a bubbly texture. You can perform a simple spoon test by dropping a spoonful of batter into a bowl of water. If it floats, it means the batter is well-fermented and ready to use.
What are some additional tips for achieving soft and fluffy idlis?
Apart from proper fermentation, achieving soft and fluffy idlis also depends on the consistency of the batter. It should be thick yet pourable. Steaming the idlis in a well-greased steamer and using fresh ingredients can also contribute to better results. You can find more helpful tips and techniques in our article.
What are the essential complements to idlis?
Chutney and sambar are the essential complements to idlis. They add flavor and enhance the overall dining experience. Popular chutney options include coconut chutney, tomato chutney, and mint chutney. A delicious and aromatic sambar also pairs well with idlis.
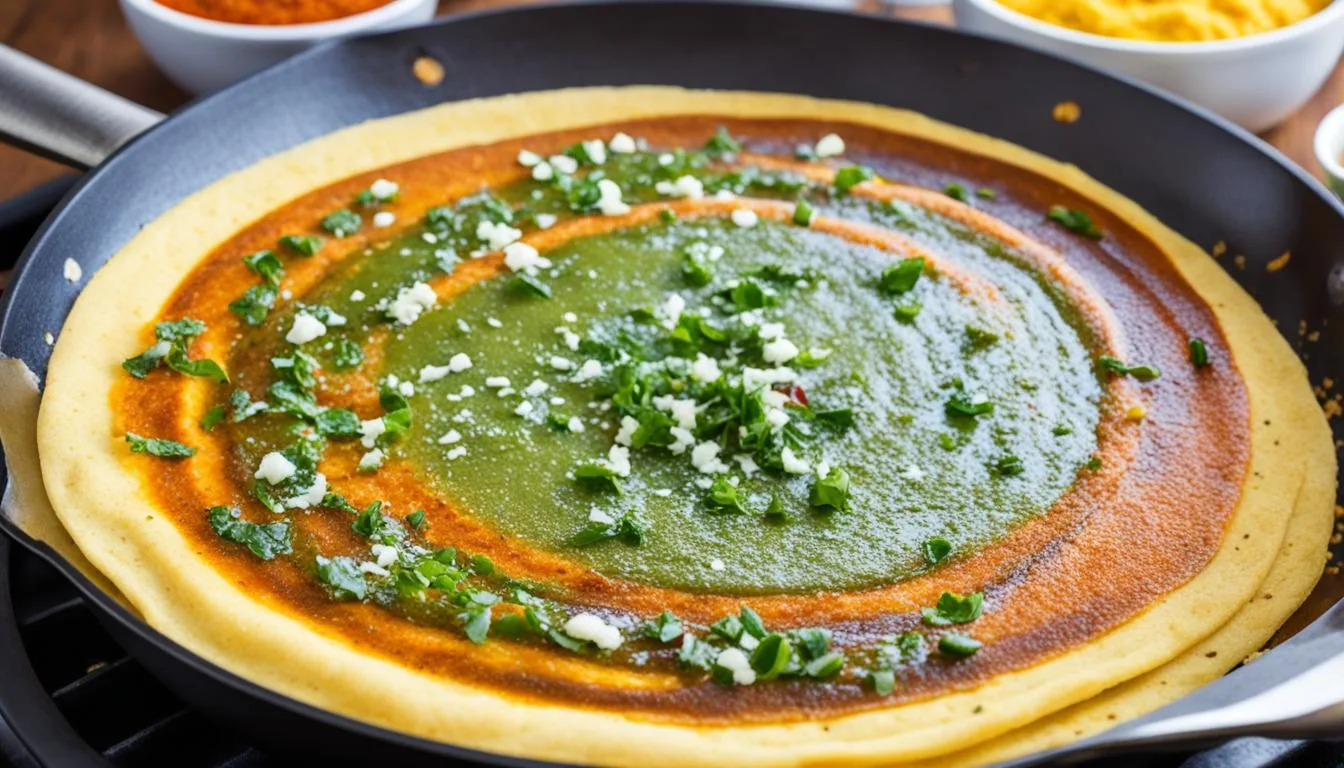
Welcome to our easy dosa recipe guide! If you’ve always wanted to try making dosa at home but felt intimidated by the process, this recipe is perfect for you. We’ve simplified the steps so that even beginners can create a delicious and crispy dosa from scratch. Say goodbye to store-bought mixes and impress your family and friends with your homemade dosa making skills!
Dosa is a beloved South Indian dish that has gained popularity worldwide. It is a thin and crispy crepe made from fermented rice and lentil batter. With our easy dosa recipe, you’ll be able to recreate this authentic South Indian favorite in your own kitchen.
From understanding the essential ingredients to mastering the art of spreading dosas and cooking them to perfection, we will guide you through every step of the process. You’ll learn how to create the perfect dosa batter, achieve the ideal consistency, and cook dosas that are golden brown and crispy.
Not only will you learn the traditional plain dosa recipe, but we’ll also show you how to make a delicious masala dosa filled with spiced potatoes. Along the way, we’ll explore different variations and serving suggestions to add variety to your dosa repertoire.
So why wait? Let’s get started on your dosa-making journey and enjoy the authentic taste of this popular South Indian dish right at home. The aroma of the dosas cooking on the griddle and the satisfaction of creating these delicious pancakes from scratch will make every bite worth it!
Table of Contents
Key Takeaways:
Our easy dosa recipe is perfect for beginners looking to make dosa at home.
Dosa is a popular South Indian dish made from fermented rice and lentil batter.
We will guide you through the process of creating the perfect dosa batter and cooking dosas to perfection.
Learn how to make traditional plain dosa as well as delicious masala dosa with spiced potatoes.
Explore different variations and serving suggestions to add variety to your dosa experience.
Introducing the South Indian Favorite: Dosa
Dosa is a beloved South Indian dish that has gained popularity worldwide. It is a thin and crispy crepe made from fermented rice and lentil batter. Dosa is typically served with chutney and sambar, and it can be enjoyed for breakfast, lunch, or dinner.
Discover the rich history and cultural significance of dosa as you embark on your journey to make this delicious dish at home. With our authentic dosa recipe, you’ll be able to recreate the flavors of South India and enjoy a crispy dosa that will tantalize your taste buds.
Understanding the Essential Ingredients for Your Dosa Homemade
The key to making the perfect dosa lies in using the right ingredients. In this section, we will explore the essential components that go into creating a delicious and authentic homemade dosa.
Choosing the Right Rice
When it comes to dosa, the type of rice you use plays a crucial role in determining the texture and taste of the final dish. Traditionally, a variety of rice called “dosa rice” or “idli rice” is used, as it has a higher starch content and lends a distinct flavor to the dosa. However, if you cannot find dosa rice, you can also use regular raw rice or parboiled rice. Just ensure that the rice you choose is of good quality and suitable for dosa-making.
The Role of Urad Dal in Your Dosa
Urad dal, also known as black gram lentils, is another essential ingredient in dosa batter. It not only adds a rich, creamy texture to the batter but also aids in the fermentation process. Urad dal provides the necessary proteins and enzymes that help the batter ferment and develop the characteristic tangy flavor of dosa. It is important to use whole urad dal and not split urad dal for best results.
To better understand the importance of these dosa ingredients, take a look at the visual guide below:
Comparison of Dosa Rice Types
Dosa Rice Type
Characteristics
Availability
Dosa Rice/Idli Rice
Higher starch content, distinct flavor
Available in Indian grocery stores
Raw Rice
Widely available, milder taste
Available in most grocery stores
Parboiled Rice
Partially boiled, grains are firmer
Available in most grocery stores
With a good understanding of the dosa ingredients, you are well-equipped to create a delicious homemade dosa. In the next section, we will delve into the process of creating the perfect dosa batter recipe.
The Perfect Blend: Creating Your Dosa Batter Recipe
Mastering the art of creating the perfect dosa starts with the batter. Follow our step-by-step recipe to ensure your dosa batter is well-prepared and ready to cook.
Soaking the Ingredients
Begin by soaking the rice and urad dal in water for at least 4-6 hours, or overnight. This process is crucial as it helps soften the grains and make them easier to grind. Rinse the soaked ingredients thoroughly before grinding to remove any impurities.
Grinding the Batter
Grind the soaked rice and urad dal separately using a wet grinder or blender. Add water intermittently to achieve a smooth and thick consistency. The grinding process may take some time, but it’s essential for achieving the desired texture of the dosa batter. Aim for a batter that is neither too thick nor too runny.
Fermentation Tips for the Best Results
Once the batter is well-ground, transfer it to a large bowl or container. Cover the container with a clean cloth or plastic wrap and let it ferment for 8-12 hours, or overnight, in a warm place. Fermentation is a crucial step as it helps develop the unique flavor and texture of dosa.
During fermentation, the batter will rise and double in volume. It should have a slightly sour aroma and a bubbly texture. If your kitchen is colder, you can place the batter in an oven with the pilot light on or use a fermentation box to maintain the ideal temperature.
After fermentation, give the batter a gentle mix to combine any separated liquids. Your dosa batter is now ready to be transformed into crispy and flavorful dosas.
Mastering the Art of Spreading Dosas
When it comes to creating the perfect dosa, spreading the batter evenly on the griddle is crucial. This technique ensures that your dosa becomes thin, crispy, and delicious. But how do you achieve that even, smooth spread?
Here are some tips to master the art of spreading dosas:
Preheat the griddle: Begin by preheating your griddle on medium heat. This will help the batter spread evenly.
Use the right amount of batter: Take a ladleful of dosa batter and pour it in the center of the griddle.
Spread in circular motions: Using the back of the ladle or a flat-bottomed cup, gently spread the batter in circular motions from the center towards the edges of the griddle. Keep rotating your wrist to create a thin and even layer.
Avoid gaps: Ensure that there are no gaps or holes in the dosa by filling them with a little extra batter.
Achieve the perfect thickness: To achieve the desired thickness, spread the batter thinly for a crispy dosa or leave it slightly thicker for a softer dosa.
Practice makes perfect: Spreading dosas takes practice, so don’t be discouraged if your first attempts are not perfect. With time, you’ll develop the right technique and be able to spread dosas like a pro.
With these tips and a little practice, you’ll be able to create beautiful dosas that are both visually appealing and delicious. So, roll up your sleeves, grab your ladle, and start spreading dosas with confidence!
Cooking Techniques for Crispy Dosa Recipe
When it comes to cooking dosa, attention to detail and proper techniques are key to achieving a crispy and perfectly cooked outcome. In this section, we will explore two important aspects of cooking dosa: temperature and timing, and the right cookware to use.
Temperature and Timing
The right temperature is crucial for cooking dosas to perfection. Too low, and your dosa will turn out soggy; too high, and it will burn. The ideal temperature for cooking dosas is medium-high heat. This allows the batter to cook gradually, ensuring a crispy texture and even browning.
Timing also plays a vital role in cooking dosas. It takes practice to determine the right amount of time needed to cook each side of the dosa. Generally, it should take around 2-3 minutes for the first side and 1-2 minutes for the second side. Keep an eye on the color and texture of the dosa to gauge when it’s ready to be flipped.
Using the Right Cookware
The type of cookware you use can greatly affect the outcome of your dosa. For crispy and evenly cooked dosas, it is recommended to use a non-stick flat skillet or a cast-iron griddle. These types of cookware distribute heat evenly, ensuring that the dosa cooks uniformly and doesn’t stick to the pan.
When cooking dosas, it is essential to use a flat ladle or spatula to spread the batter evenly on the pan. A curved spatula may result in uneven thickness and shape. Additionally, make sure to use a wide and shallow pan to allow for easy flipping of the dosa without breaking it.
Now that we’ve covered the importance of temperature and timing, as well as the right cookware to use, you’re ready to create delicious and crispy dosas. Follow these cooking techniques to ensure that your dosas turn out golden brown and irresistible.
Exploring Different Variations with Your Homemade Dosa Recipe
Get creative with your dosa-making by exploring different variations of this classic dish. Adding a twist to your homemade dosa recipe allows you to customize the flavors and create unique dosa experiences. Two popular variations of dosa that you can try are the Classic Plain Dosa and the Masala Dosa with Spiced Potatoes.
Classic Plain Dosa
The Classic Plain Dosa is a simple yet delicious variation that highlights the flavor of the fermented rice and lentil batter. It is a crispy and golden dosa that can be enjoyed on its own or paired with coconut chutney and sambar. The secret to making a perfect plain dosa lies in achieving a thin and evenly spread batter on the griddle.
Masala Dosa with Spiced Potatoes
For a more indulgent dosa experience, try the Masala Dosa with Spiced Potatoes. This variation features a filling of spiced mashed potatoes wrapped in a crispy dosa. The aromatic blend of spices and the creamy texture of the potatoes complement the crispy exterior of the dosa beautifully. Serve it with coconut chutney, sambar, and a side of tomato or onion chutney for a complete meal.
Variation
Description
Serving Suggestion
Classic Plain Dosa
A crispy dosa made with fermented rice and lentil batter
Pair with coconut chutney and sambar
Masala Dosa with Spiced Potatoes
A dosa filled with spiced mashed potatoes
Serve with coconut chutney, sambar, and chutneys of your choice
Dosa from Scratch vs. Store-bought Ready Mixes
When it comes to making dosa, you have two options: creating it from scratch or using store-bought ready mixes. Each method has its own advantages and considerations to keep in mind. Let’s take a closer look at both options to help you make an informed decision.
Homemade Dosa:
Control over ingredients: Making dosa from scratch allows you to have full control over the ingredients used. You can choose high-quality rice and lentils, ensuring that your dosa is prepared with the freshest and most nutritious ingredients.
Customizable flavor: Homemade dosa provides the opportunity to customize the flavor according to your taste preferences. You can experiment with different ratios of rice and lentils, as well as add spices and herbs to enhance the taste.
Dosa Mixes:
Convenience: Dosa mixes offer a convenient alternative, especially for those with busy schedules. They come pre-packaged with the necessary ingredients, saving you time and effort in measuring and grinding.
Potential trade-offs: While dosa mixes are convenient, they may not deliver the same authentic taste and texture as homemade dosas. The flavor and quality of the mixes can vary, and some may contain preservatives or additives.
Ultimately, the choice between homemade dosa and store-bought ready mixes depends on your priorities and preferences. If you value full control over ingredients and the ability to customize flavors, making dosa from scratch is the way to go. On the other hand, if convenience is a top priority, dosa mixes can be a time-saving option. Consider your needs and decide which method aligns best with your dosa-making goals.
Serving Suggestions: Complementing Your Dosa Pancake Recipe
Enhance the flavors of your homemade dosa with a variety of delicious accompaniments. To truly elevate your dosa experience, we recommend serving it with traditional coconut chutney and sambar. These classic pairings perfectly complement the taste and texture of dosa, adding a burst of flavor to every bite.
To make the coconut chutney, blend fresh grated coconut, roasted chana dal, green chilies, ginger, and a dash of lemon juice in a mixer. Season with salt and temper with mustard seeds, urad dal, curry leaves, and dried red chilies in hot oil. This creamy and tangy coconut chutney is the perfect accompaniment for your dosas.
Sambar, a flavorful and tangy lentil stew, is another must-have accompaniment for dosa. To make sambar, cook pigeon peas (toor dal), tamarind pulp, and a medley of vegetables such as onions, tomatoes, drumsticks, carrots, and eggplant in a fragrant blend of spices. Finish off the dish with a tempering of mustard seeds, asafoetida, curry leaves, and dried red chilies. The rich and aromatic sambar complements the dosas perfectly, adding a flavorful contrast to every bite.
If you’re feeling adventurous, you can also explore non-traditional accompaniments for your dosas. Experiment with different types of chutneys, such as mint chutney, tomato chutney, or peanut chutney. You can even try pairing your dosas with tangy tomato salsa or spicy cilantro sauce for a fusion twist.
The possibilities are endless when it comes to serving dosas. Let your creativity run wild and discover unique combinations that suit your palate. The key is to find accompaniments that balance the flavors of dosa and enhance your dining experience.
Storing and Reheating Tips for Your Indian Crepe Recipe
When it comes to enjoying dosas, it’s not always possible to devour them all at once. That’s why we’re here to share some valuable tips on how to store and reheat your leftover dosas. With these practices, you can ensure that your dosas maintain their texture and flavor, so you can savor them later without compromising on taste and quality.
Storing Dosas:
Allow the dosas to cool completely before storing them. This helps prevent them from becoming soggy.
Place the dosas in an airtight container or wrap them in aluminum foil, ensuring they are tightly sealed to maintain freshness.
Store the dosas in the refrigerator to extend their shelf life. They can typically be stored for up to 2-3 days.
Reheating Dosas:
Heat a non-stick pan or tawa over medium heat.
Place the dosas on the heated pan and cook for a few minutes on each side until they become warm and crispy.
You can also reheat dosas in a microwave by placing them on a microwave-safe plate and heating them for 30 seconds to 1 minute, or until they are warm.
Now that you know how to store and reheat your dosas, you can enjoy them whenever you crave that fresh-out-of-the-pan taste. Don’t let your delicious dosas go to waste – follow these tips to make the most of your homemade Indian crepes!
Conclusion
As we come to the end of our dosa-making journey, let’s recap the key points and takeaways from this article. We’ve emphasized the importance of using authentic ingredients to ensure the true flavors of dosa. By choosing the right rice and understanding the role of urad dal, you can create a batter that produces delicious and crispy dosas every time.
We’ve also delved into the techniques of batter preparation and cooking. From soaking the ingredients to grinding the batter to perfection, every step plays a crucial role in achieving the desired texture and taste of dosa. And let’s not forget the art of spreading dosas and mastering the cooking techniques, which ensure that our dosas turn out golden brown and irresistibly crispy.
Throughout this article, we’ve encouraged you to explore different variations of dosa and suggested serving ideas to enhance your dosa experience. From classic plain dosas to flavorful masala dosas, the possibilities are endless. And with traditional coconut chutney and sambar as well as non-traditional accompaniments, you can create a truly satisfying meal.
Now, it’s time for you to roll up your sleeves and try making your own dosas at home. Enjoy the process of preparing the batter, spreading it on the griddle, and savoring the aroma as the dosas cook to perfection. Embrace the joy of creating this beloved South Indian dish and delight your family and friends with your dosa-making skills. We hope you have a wonderful culinary journey as you embark on the dosa adventure!
FAQ
What is dosa?
Dosa is a thin and crispy crepe made from fermented rice and lentil batter. It is a popular South Indian dish that can be enjoyed for breakfast, lunch, or dinner.
What are the key ingredients for making dosa at home?
The key ingredients for making dosa at home are rice and urad dal. Different types of rice can be used, and urad dal plays a crucial role in creating the texture and flavor of dosa.
How do I make dosa batter from scratch?
To make dosa batter from scratch, you need to soak the rice and urad dal, grind them to a smooth paste, and allow the batter to ferment. The fermentation process is important for developing the unique flavor and texture of dosa.
What are some tips for spreading dosa batter on the griddle?
To spread the dosa batter evenly on the griddle, use a circular motion and start from the center, moving outward. Tilt the griddle to spread the batter into a thin and even circle. Practice and patience will help you perfect your spreading technique.
How do I cook dosa to achieve a crispy texture?
To achieve a crispy dosa, make sure the griddle is hot before pouring the batter. Cook the dosa on medium heat and flip it when the edges turn golden brown. Cook the other side until it becomes crispy. Using a non-stick griddle or a cast-iron skillet can also help achieve a crispy texture.
Can I make different variations of dosa?
Absolutely! You can make different variations of dosa. Some popular variations include plain dosa and masala dosa, which is filled with spiced potatoes. You can get creative and customize your dosas according to your preferences by adding various fillings or toppings.
Should I make dosa from scratch or use a ready mix?
Making dosa batter from scratch allows you to control the ingredients and customize the flavor. However, using a ready mix is more convenient. It’s a personal choice, depending on your preference for taste, quality, and convenience.
What are some traditional accompaniments for dosa?
The traditional accompaniments for dosa are coconut chutney and sambar. Coconut chutney is made with grated coconut, lentils, and spices, while sambar is a lentil-based vegetable stew. These complement dosa perfectly, but you can also try different chutneys, sauces, or fillings.
How do I store and reheat leftover dosas?
To store leftover dosas, place them in an airtight container or wrap them in foil. Store them in the refrigerator and consume within a day or two. To reheat dosas, warm them on a griddle or in a microwave until heated through. This will help maintain their texture and flavor.
What are the key takeaways from this article?
The key takeaways from this article are the importance of using authentic ingredients, mastering the techniques of batter preparation and cooking, and exploring different variations and serving suggestions. We encourage you to try making dosas at home and experience the joy of creating this beloved South Indian dish.
Welcome to our kitchen, where we’ll be sharing a comforting homemade kadhi chawal recipe with you. There’s something truly special about this dish – it has the power to bring warmth and comfort to any meal. Picture a bowl of tangy yogurt curry, paired with fluffy rice, creating the ultimate combination of flavors that soothes the soul. It’s the perfect dish for a cozy meal at home, and we can’t wait to show you how to make it.
Table of Contents
Key Takeaways:
Homemade kadhi chawal is a comforting and flavorful dish that combines tangy yogurt curry with fluffy rice.
It is the perfect recipe for a cozy meal at home.
Stay tuned as we delve into the history, step-by-step preparation, regional variations, health benefits, and serving suggestions of kadhi chawal.
Preserve the authenticity of the recipe by using traditional cooking techniques and ingredients.
We invite you to try the recipe and share your feedback and experiences with us.
The Heartwarming Roots of Kadhi Chawal
Let’s take a journey into the heartwarming history and cultural significance of the beloved dish, kadhi chawal. Kadhi chawal is a traditional Indian delicacy that holds a special place in the hearts and palates of millions of people. Its origins can be traced back to ancient times, where curd or yogurt, one of the main ingredients of kadhi, has been a staple in Indian diets for centuries.
The use of curd in Indian cuisine can be attributed to its numerous health benefits and its ability to add a creamy tanginess to dishes. Kadhi chawal has been prepared and enjoyed in households across India for generations, with each region adding its own unique touch to the recipe.
“The combination of tangy yogurt curry and fluffy rice creates a symphony of flavors that evoke feelings of comfort and love. Memories of enjoying kadhi chawal with family and loved ones during festive occasions or lazy Sunday afternoons bring a sense of warmth and nostalgia.”
From the spiced kadhi with pakoras in North India to the delicate mor kuzhambu made with coconut in South India, kadhi chawal has countless variations. This dish has gracefully withstood the test of time, capturing the essence of Indian culinary traditions.
Each region’s twist on kadhi chawal reflects the local flavors, ingredients, and cultural influences, making it a truly diverse and versatile dish. Whether it’s the jaggery-laced kadhi from Gujarat or the fragrant kokum kadhi from Maharashtra, every version of kadhi chawal tells a story and paints a picture of the rich Indian culinary heritage.
The history and evolution of kadhi chawal highlight the significance of food in Indian culture. As we explore the roots of this cherished dish, we celebrate the traditions and flavors that have been passed down through generations, creating a sense of belonging and connection.
The Beauty of Tradition and Comfort
The appeal of kadhi chawal lies not just in its delicious taste but also in the emotions it evokes. It brings back memories of gathering around the dining table with loved ones, sharing stories, and savoring the flavors of home.
In the next section, we will uncover the secrets to creating the perfect homemade kadhi chawal. We will explore the ingredients, techniques, and steps that will help you recreate this comforting dish in your own kitchen.
Anatomy of the Perfect Homemade Kadhi Chawal Recipe
When it comes to creating the perfect homemade kadhi chawal, every ingredient and step plays a crucial role. From selecting the right ingredients to preparing the flavorful kadhi and guilt-free pakoras, attention to detail is key. Let’s dive into the anatomy of this classic dish and discover the secrets behind its comforting flavors.
Selecting the Right Ingredients
To create an authentic and delicious kadhi chawal, it’s essential to choose the right ingredients. Here are the key components that will elevate your dish:
Curd (yogurt): Fresh and tangy curd forms the base of the kadhi, adding a creamy and luscious texture.
Gram flour (besan): This nutty and aromatic flour acts as a thickening agent, giving the kadhi its signature consistency.
Spices: A blend of flavorful spices such as turmeric, cumin, mustard seeds, and fenugreek seeds infuse the kadhi with their distinct flavors.
Vegetables: Diced onions, ginger, and green chilies add a delightful crunch and enhance the overall taste.
To make your kadhi chawal truly exceptional, opt for high-quality ingredients that bring out the best flavors.
Preparing the Kadhi: Combining Culture and Curd
Making the kadhi involves a seamless combination of cultural traditions and the star ingredient, curd. Here’s a step-by-step guide to preparing this comforting curry:
In a bowl, whisk together the curd and gram flour until smooth, ensuring there are no lumps.
Add water gradually, whisking continuously to achieve the desired consistency.
Heat oil in a pan and add mustard seeds, cumin seeds, and fenugreek seeds. Allow them to splutter and release their aroma.
Add onions, ginger, and green chilies, sautéing until golden brown.
Pour in the curd and gram flour mixture, stirring gently to blend everything together.
Season with turmeric, red chili powder, and salt, adjusting the flavors to suit your taste.
Simmer the kadhi on low heat, allowing it to thicken and develop its flavors for about 15-20 minutes.
Your kadhi is now ready to be served with fluffy rice, bringing comfort and satisfaction to every bite.
The process of making kadhi is not only a culinary adventure but also a tribute to the rich cultural heritage of Indian cuisine.
Frying Up Flavorful Pakoras Without the Guilt
No kadhi chawal is complete without the addition of crispy pakoras. While deep-frying pakoras is the traditional method, you can make them guilt-free with a few modifications. Here’s how:
In a bowl, combine gram flour, chopped onions, coriander leaves, green chilies, and spices like turmeric, cumin, and red chili powder.
Add water gradually to form a thick batter, ensuring it coats the onion mixture evenly.
Instead of deep-frying, opt for baking or air frying the pakoras for a healthier alternative.
Place spoonfuls of the batter on a lined baking sheet or in an air fryer basket.
Bake or air fry the pakoras until golden brown and crispy, flipping them halfway through cooking.
Once cooked, gently place the pakoras in the simmering kadhi, allowing them to absorb the flavors.
With these modifications, you can enjoy the delightful crunch of pakoras without compromising on your health.
Ingredients
Quantity
Curd (yogurt)
1 cup
Gram flour (besan)
1/4 cup
Turmeric
1/2 teaspoon
Cumin seeds
1 teaspoon
Mustard seeds
1/2 teaspoon
Fenugreek seeds
1/4 teaspoon
Onions
1 medium, diced
Ginger
1-inch piece, grated
Green chilies
2, chopped
Red chili powder
1/2 teaspoon
Salt
To taste
With these key ingredients and step-by-step instructions, you’re well-equipped to create the perfect homemade kadhi chawal. Let’s move on to exploring the regional variations of this beloved dish.
The Regional Twists of Kadhi Across India
India is a land of diverse cultures and cuisines, and kadhi is no exception. This tangy yogurt-based curry has many regional variations that showcase the unique flavors and traditions of different states. Let’s explore the fascinating world of regional kadhi variations!
Kadhi from South India: Coconut-based Mor Kuzhambu
In South India, kadhi takes the form of a creamy coconut-based curry known as Mor Kuzhambu. This variation includes a medley of spices, curry leaves, and coconut milk, resulting in a rich and flavorful dish. Mor Kuzhambu is often served with steamed rice, and the combination of tangy yogurt and coconut brings a delightful balance to the meal.
Kadhi from Gujarat: Jaggery-laced Kadhi
Gujarat, known for its vibrant and sweet flavors, has its own unique twist on kadhi. Here, the tanginess is complemented by the sweetness of jaggery, a traditional unrefined sugar. The addition of jaggery gives the kadhi a distinct taste and a hint of caramelized flavor. This lip-smacking kadhi pairs perfectly with hot rotis or steamed rice.
Kadhi from Punjab: Pakora Kadhi
Punjab, the land of hearty and indulgent flavors, offers its signature variation of kadhi with pakoras. The kadhi is enriched with pakoras, which are deep-fried dumplings made of chickpea flour and spices. These crispy pakoras add a delightful texture to the kadhi, making it a comforting and satisfying meal. It is often enjoyed with freshly cooked basmati rice and a side of pickles.
State
Regional Variation
South India
Coconut-based Mor Kuzhambu
Gujarat
Jaggery-laced Kadhi
Punjab
Pakora Kadhi
These are just a few examples of the regional twists on kadhi across India. Each state brings its own distinct flavors, ingredients, and cooking techniques to this beloved dish, making it an integral part of their culinary heritage. Exploring these regional variations allows us to appreciate the gastronomic diversity that India has to offer.
Health Benefits of Incorporating Curd in Your Diet
Incorporating curd, also known as yogurt, into your diet can provide numerous health benefits. Curd is a rich source of probiotics, calcium, and protein, making it a valuable addition to a balanced eating plan.
One of the key advantages of consuming curd is its probiotic content. Probiotics are live bacteria and yeasts that promote a healthy gut microbiome. They play a crucial role in improving digestion by maintaining a balanced intestinal flora and aiding in the absorption of nutrients.
Furthermore, curd is an excellent source of calcium, which is essential for maintaining strong bones and teeth. Including curd in your diet can help prevent osteoporosis and reduce the risk of fractures, especially in older individuals.
Another benefit of curd is its high protein content. Protein is crucial for building and repairing tissues, supporting muscle growth, and promoting satiety. Consuming curd as a part of your diet can help you meet your daily protein needs and keep you feeling full and satisfied.
Additionally, curd is known to boost immunity due to its rich nutrient profile. It contains vitamins such as vitamin B12, which plays a vital role in immune system function, as well as vitamin D, which is crucial for supporting immune health.
Incorporating curd into your meals, such as in the comforting homemade kadhi chawal recipe, not only enhances the taste but also adds nutritional value. By including curd in your diet, you can enjoy its health benefits and support your overall well-being.
Step-by-Step Guide to Making Comforting Homemade Kadhi Chawal
Are you ready to recreate the warmth and comfort of homemade kadhi chawal in your own kitchen? Follow our step-by-step guide to create this flavorful and satisfying dish that will transport you to the streets of India. With a tangy yogurt curry and fluffy rice, kadhi chawal is the ultimate comfort food for any occasion.
Cooking the Rice to Perfection
To start your kadhi chawal journey, it’s crucial to cook the rice just right. Here’s how:
Wash the rice thoroughly under running water until the water runs clear.
In a pot, combine the rinsed rice with the appropriate amount of water. For every cup of rice, use two cups of water.
Bring the water to a boil over medium heat, then reduce the heat to low and cover the pot with a tight-fitting lid.
Cook the rice for 15-20 minutes, or until all the water is absorbed and the rice is fluffy. Remove from heat and let it sit, covered, for 5 minutes before fluffing it with a fork.
Creating the Aromatic Kadhi Base
Now, let’s dive into the creation of the aromatic kadhi base:
In a bowl, whisk together yogurt and gram flour until no lumps remain. Gradually add water and continue whisking until you achieve a smooth, pourable consistency.
In a separate pan, heat oil or ghee over medium heat. Add cumin seeds and let them sizzle for a few seconds.
Add chopped onions and sauté until they turn translucent.
Next, add minced garlic, ginger, and green chili. Sauté for another minute, until fragrant.
Pour in the yogurt and gram flour mixture, stirring continuously to avoid lumps.
Season with turmeric, red chili powder, coriander powder, and salt. Stir well to incorporate the spices.
Allow the kadhi to simmer over low heat for 15-20 minutes, stirring occasionally, until it thickens slightly and the flavors meld together.
Achieving the Ideal Consistency for Your Kadhi
The perfect kadhi should have a creamy and smooth consistency. Follow these tips to ensure you achieve the ideal texture:
If your kadhi gets too thick, simply add a little water and stir to loosen it up.
If it’s too thin, continue simmering over low heat until it thickens to your desired consistency.
Adjust the seasoning, adding more salt or spices if needed.
For an extra touch of richness, you can temper the kadhi with a tadka of ghee, cumin seeds, and dried red chilies.
Now that you have mastered the art of making comforting homemade kadhi chawal, it’s time to sit back, relax, and savor the flavors of this beloved traditional Indian dish. Enjoy!
Sharing the Love: How to Serve Kadhi Chawal to Your Family
Serving Kadhi Chawal with Traditional Accompaniments
When it comes to serving kadhi chawal to your family, incorporating traditional accompaniments can elevate the overall dining experience. These companions not only enhance the flavors but also add variety to the meal. To truly share the love through this comforting dish, consider these suggestions:
1. Papad: Crispy and flavorful, papad is a popular choice to pair with kadhi chawal. These thin, round lentil wafers provide a delightful crunch and complement the creamy texture of the kadhi.
2. Pickle: Tangy and spicy, pickles are an indispensable part of an Indian meal. Whether it’s mango pickle, lemon pickle, or mixed vegetable pickle, adding a small portion to your plate can harmonize the flavors of kadhi chawal.
Garnishing kadhi chawal also adds visual appeal to the dish. A sprinkle of freshly chopped cilantro or a drizzle of fragrant ghee can create an inviting presentation. Additionally, consider arranging crispy fried pakoras on top of the kadhi for an extra burst of flavor and texture.
By serving kadhi chawal with these traditional accompaniments and adding thoughtful garnishes, you can make your family’s dining experience truly special. It’s not just about the delicious taste but also about the memories and traditions that come with sharing this heartwarming meal.
Conclusion
Tips for Preserving the Authenticity of the Recipe
As we conclude our journey into the world of comforting homemade kadhi chawal, it’s important to remember a few tips for preserving the authenticity of this beloved recipe. Firstly, embrace the use of traditional cooking techniques and ingredients. This will help you create a kadhi chawal that truly captures the essence of this classic dish.
Secondly, take the time to understand the regional variations of kadhi chawal. Explore the diverse flavors and techniques from different states in India, and let these influences inspire your own culinary creations. By staying true to the roots of this dish, you can ensure an authentic and enriching experience.
We also invite you to try our recipe and share your feedback and experiences. Your thoughts matter to us, and we would love to hear how our kadhi chawal recipe turned out for you. Feel free to engage with us through our social media platforms, where you can connect with fellow food enthusiasts and share your own variations of kadhi chawal.
FAQ
What is kadhi chawal?
Kadhi chawal is a comforting homemade dish that consists of a tangy yogurt curry called kadhi and fluffy rice. It is a popular traditional Indian dish known for its warmth and delicious flavors.
How is kadhi chawal prepared?
To make kadhi chawal, you need to prepare the kadhi base by combining curd, gram flour, and spices. The rice is cooked separately to achieve fluffy and separate grains. The kadhi and rice are then served together, creating a satisfying and flavorful meal.
Are there any regional variations of kadhi chawal?
Yes, kadhi chawal has different variations across India. For example, in South India, there is a coconut-based variation called mor kuzhambu. In Gujarat, kadhi is often laced with jaggery. Each variation adds its own unique twist to this classic dish.
What are the health benefits of incorporating curd in kadhi chawal?
Curd is a good source of probiotics, calcium, and protein. It aids digestion, boosts immunity, and promotes bone health. By including curd in your kadhi chawal, you can add nutritional value to your meal.
How do I serve kadhi chawal to my family?
Kadhi chawal can be served with traditional accompaniments such as papad and pickle. You can garnish the dish with fresh coriander leaves and serve it on a plate to make it visually appealing. Sharing this comforting meal with your loved ones is a joyful experience.
How can I preserve the authenticity of the kadhi chawal recipe?
To preserve the authenticity of the kadhi chawal recipe, you can use traditional cooking techniques and ingredients. This ensures that the dish stays true to its roots and maintains its delicious flavors. Experimentation is always encouraged, but preserving the essence of the recipe is key.
Can I share my feedback and variations of kadhi chawal with the author?
Absolutely! The author welcomes your feedback and encourages you to share your own variations of kadhi chawal. You can engage with the author through social media platforms and share your experiences, tips, and suggestions. Your input is valuable and contributes to the kadhi chawal community.
Welcome to our culinary adventure, where we bring the vibrant flavors of authentic chicken tandoori right into your kitchen. We’re excited to guide you through a home-cooked Indian cuisine experience that promises a tasty tandoori chicken dish without spending hours in preparation. Whether you have a bustling schedule or you’re a fan of flavor-packed meals, our quick chicken tandoori recipe makes it easier than ever to enjoy this traditional favorite at your convenience.
Join us as we delve into the rich heritage of this dish and unveil the secrets to creating that perfect char and juicy interior. With our instructions, you’ll learn to master an authentic chicken tandoori that could rival the best Indian restaurants, all from the comfort of your home.
Table of Contents
Key Takeaways
Discover how to make an authentic chicken tandoori with ease at home.
Embrace quick and efficient cooking methods without sacrificing taste.
Explore the essential spices and techniques for restaurant-style tandoori chicken.
Learn the versatility of this dish across various cooking appliances.
Gain tips for pairing your tandoori chicken with the perfect condiments and sides.
The Rich History of Chicken Tandoori
Tandoori Murgh history is as rich and vibrant as the flavors this dish boasts. It traces its origins to the times of Mughal cuisine, a period known for its luxurious and aromatic dishes. The story goes that Kundan Lal Gujral, a man whose culinary expertise has become a legend, was the creator of this delectable dish at the renowned Moti Mahal in Peshawar. Before the partition of India, Gujral had the vision to experiment with the traditional Indian cooking methods and unearthed a recipe that would intrigue taste buds for generations.
Tandoori Chicken, or as it is affectionately known in India, Tandoori Murgh, was traditionally prepared in a Tandoor, a type of clay oven that generates heat with wood fire or charcoal. This unique preparation method lent the chicken a signature smoky flavor that has become synonymous with the dish. Today, although we don’t all have a Tandoor at home, we channel the spirit of historical culinary excellence to replicate this traditional meal in our modern kitchens.
Feature
Description
Originating Chef
Kundan Lal Gujral
Location of Origin
Moti Mahal, Peshawar
Era
Mughal Cuisine
Cooking Method
Traditional Clay Tandoor Oven
Signature Flavor
Smoky, Derived from Wood Fire or Charcoal
Global Recognition
Icon of Traditional Indian Cooking
But why, you might ask, does this piece of culinary history matter to us? It is because to truly appreciate Chicken Tandoori, one must understand the care, creativity, and cultural significance that has shaped this dish over the centuries. Kundan Lal Gujral’s legendary contribution to traditional Indian cooking is not just about food; it’s about preserving a piece of history, one sumptuous bite at a time.
Understanding Authentic Chicken Tandoori Recipe
The magic of an authentic Chicken Tandoori dish can be found within its marination. It’s a combination of flavors and tenderizing techniques that make it a standout in Indian cuisine. Below, we’ll delve into the traditional marination process and the essential spices that make this dish truly special.
The Traditional Tandoori Marination Process
The cornerstone of our Tandoori chicken marinade is a thick, creamy base of Greek yogurt. This isn’t just any yogurt—it’s packed with beneficial bacteria that help break down the protein fibers in the chicken, resulting in meat that’s soft and tender. We also mix in generous amounts of ginger garlic paste, creating an aromatic foundation that’s crucial for that depth of flavor. For best results, we always recommend an overnight marination, granting ample time for the flavors to seep deep into every crevice of the chicken.
Key Spices That Make Tandoori Chicken Authentic
When it comes to spices, we rely on no more than four core ingredients to lend the marinade its earthy and smoky notes. See the table below detailing these essential tenderizing spices.
Spice
Notes
Benefits
Garam Masala
A complex blend contributing warmth and sweetness
Contributes to complexity and aroma of the dish
Red Chili Powder
Offers color and varying degrees of heat
Adds vibrancy and enhances the spice profile
Kasuri Methi (Dried Fenugreek Leaves)
Delivers a subtle bitterness and characteristic flavor
Aids in creating the trademark taste and aroma
Coriander Powder
Brings a citrusy, tangy essence
Balances and rounds out the flavor palate
Each of these spices plays a role not just in flavoring, but also in tenderizing and coloring the chicken. The outcome? A dish that’s as visually appealing as it is rewarding to the palate. Remember, authentic Tandoori chicken is all about letting these spices do the work, so don’t rush the process—overight marination with these carefully curated spices will set the stage for a culinary masterpiece.
Essential Ingredients for an Authentic Taste
When it comes to preparing Tandoori Chicken, the symphony of ingredients used is as crucial as the melody in a song. We understand how important it is to strike the right notes for that authentic taste. Here, each ingredient, like a perfectly tuned instrument, brings its unique flavor, resulting in a dish that sings with traditional Indian taste. The Tandoori chicken ingredients play a pivotal role in delivering this culinary delight to your taste buds.
A proper Greek yogurt marinade is rich and thick, ensuring the chicken absorbs all the flavorful spices. The zest of lemon juice not only adds a tangy punch, but also works together with the yogurt to tenderize the meat, making every bite succulently soft. And we must not forget the bold and nutty essence imparted by mustard oil, an ingredient synonymous with authenticity in many Indian kitchens.
The secret to a beautifully marinated Tandoori Chicken lies in the time-tested combination of spices, marinade, and tender care during preparation.
But what exactly are these indispensable elements? Let’s lay them out:
Skinless chicken thighs or legs—preferably with bone in for added moisture and flavor
Greek yogurt, which blankets the chicken in its creamy, tangy marinade
Freshly squeezed lemon juice for that essential zippy undertone
Rich, aromatic mustard oil to give it that distinctive Tandoori character
Below is a table that encapsulates the core components of our Tandoori Chicken recipe:
Ingredient
Role in Dish
Authentic Touch
Chicken thighs/legs
Meatiness and juiciness
Skinless, with bone
Greek Yogurt
Base for marinade
Thick and tangy
Lemon Juice
Provides tang and aids in tenderization
Freshly squeezed
Mustard Oil
Distinctive aroma and flavor
Essential for authentic aroma
Together, these create the unmistakable profile of Tandoori Chicken that we all crave. As we venture further into this recipe, keep in mind how each of these ingredients contributes to the marinated masterpiece that is Tandoori Chicken.
Preparing Your Chicken for Tandoori
Before we dive into seasoning and cooking, the initial steps involve getting the poultry ready for its flavorful journey. Proper chicken preparation stands at the heart of creating the most authentic tandoori experience. Let’s explore how to prime your chicken for its tandoori transformation.
Cleaning and Cutting the Chicken
Our first task in chicken preparation is to ensure our clean poultry reaches its most absorbent state. Starting with pat drying, we remove excess moisture, paving the way for the spices to cling to the meat. Following this, we move onto scoring chicken, making intentional deep cuts into the flesh. These aren’t just for show; they are integral to our process, inviting the marinade deep into the chicken, thereby reducing cooking times and enhancing flavor distribution. Check out the method we swear by:
Step
Action
Reason
1
Rinse Chicken
Removal of any debris and surface impurities.
2
Pat Dry
Ensures spices and marinade stick better to the surface.
3
Score Meat
Allows deep penetration of marinade and even cooking.
Marinating Timeframes for Optimal Flavour
The secret to achieving that rich, heartwarming taste comes down to the marinating period. As a rule of thumb, we advise a minimum of 6 hours to let the flavors meld and meat tenderize. For the best results, leaving it to marinate overnight will often yield the most succulent and richly flavored chicken tandoori. The below guide outlines our recommended timeframes for marinating:
6 Hours: The bare minimum to infuse the chicken with basic flavor and increase tenderness.
12 Hours: A notable improvement in taste depth and texture.
Overnight: The ultimate flavor infusion, resulting in chicken that is thoroughly seasoned and exceptionally tender.
Remember, patience truly is a virtue when it comes to marination. Rushing this step could mean robbing your dish of its potential to sing with spices and charm the palate with its tenderness. So, give your chicken the time it deserves to absorb every ounce of the rich tandoori marinade you’ve prepared.
Cooking Chicken Tandoori: Alternatives to Tandoor
When we think of Tandoori Chicken, the image of a traditional clay tandoor might spring to mind. However, not everyone has the luxury of owning a tandoor oven. Fortunately, there are several alternative cooking methods that can deliver that distinctive tandoori zest using indoor appliances or conventional grilling techniques. Let’s explore some of these methods that can help you create oven-roasting tandoori chicken and more within the comfort of your home.
Oven-Roasted Chicken Tandoori
One of the most effective ways to replicate the tandoori cooking process is via oven-roasting. This method makes good use of the broiling technique, which is essential for achieving the iconic char and flavor. We’ll preheat the oven to a toasty 470°F (240°C) and position the marinated chicken on a wire rack over a tray to ensure heat circulates evenly. Remember, basting is key—applying a layer of chili oil or melted butter adds richness midway through roasting and just before broiling for that final touch of authenticity.
Stovetop Griddle Cooking Method
When you’re craving that sear but prefer staying indoors, the stovetop griddle comes to the rescue as a great indoor tandoori recipe. It requires a bit of attentiveness as the chicken must be cooked evenly, requiring flipping and basting with marinade and chili oil. Achieving that tantalizing char is all part of the fun, signaling a hearty meal that’s just about ready to be served.
Air Fryer Chicken Tandoori Quick Recipe
If you’re looking for a healthier alternative that doesn’t skimp on taste, the air fryer is your ally. Set at 390°F (200°C), it works wonders on the marinated chicken, resulting in a rapid preparation that keeps the juicy flavor of tandoori intact. Keeping an eye on the internal temperature, which should reach 165°F, guarantees a fully-cooked yet moist delight.
Grilling Over Direct Fire
For the traditionalists out there or those who love outdoor cooking, grilling over direct fire remains a steadfast method. Whether you’re using charcoal for infusion of smoky tones or a gas grill for convenience, this technique involves a dance of basting and turning the chicken. It requires patience, but the reward is a visually and tastefully satisfying grilled tandoori chicken that rivals any restaurant offering.
By exploring these varied cooking approaches, we ensure the joy of tandoori chicken isn’t confined to the tandoor alone. Even when cooking indoors, with these techniques, every home chef can proudly serve up tandoori chicken with its signature savory smokiness.
Step-by-Step Cooking Instructions
Embarking on your cooking journey to master the art of the classic tandoori chicken begins with a robust and easy to follow cooking guide. Our mission is to provide you with tandoori chicken steps that are fuss-free and filled with culinary joy. Below, we lay out practical recipe instructions that ensure even novice chefs can produce a dish that sings with authenticity and flavor.
Marinade Preparation: In a large mixing bowl, combine Greek yogurt, freshly squeezed lemon juice, ginger-garlic paste, and the aromatic spices – cayenne, garam masala, turmeric, and any additional seasonings you fancy.
Marinating the Chicken: After cleaning and patting the chicken dry, make deep cuts into the flesh to enhance flavor absorption. Submerge it fully in the marinade, ensuring it reaches into every slit and crevice.
Setting Time: Place the marinated chicken in the refrigerator. For the best infusion of flavors, allow it to marinate for at least 6 hours, though overnight is preferred.
Cooking the Chicken: When ready to cook, decide on your method:
Method
Preparation
Cooking
Final Touch
Oven Roasting
Preheat to 470°F (240°C).
Roast on a wire rack over a tray, basting with oil midway.
Broil for a charred finish.
Stovetop
Heat a grill pan or skillet with oil.
Cook while flipping frequently, basting with marinade.
Rest before serving.
Air Fryer
Preheat to 390°F (200°C).
Air fry until the internal temperature reads 165°F.
Brush with melted butter for sheen.
Direct Fire Grill
Preheat grill to medium-high.
Grill, turning and basting regularly.
Finish with a sprinkle of chat masala.
Once your chicken has beautifully cooked through with a glorious char on the outside, it’s all about the finishing touches. A light brush of melted butter or ghee will add a glistening sheen and an extra layer of flavor that can elevate your tandoori chicken from simply cooked to perfection.
We can’t emphasize enough the value of patience and attention to detail throughout the cooking process. Keep an eye on the chicken as it cooks; this ensures you capture that ideal balance of juicy on the inside and charred on the outside, iconic to a well-made tandoori chicken.
As we commence the cooking, let’s not forget the visual delight and anticipation that comes with watching your tandoori chicken turn into a gastronomic masterpiece.
Now, with our guide in hand and these steps fresh in your mind, we believe you’re well-equipped to grace your dinner table with an authentic and mouthwatering tandoori chicken that promises to transport you to the heart of Indian cuisine right from the comfort of your home.
How to Achieve the Signature Smoky Flavor
One of the hallmarks of authentic Indian cuisine is the rich, smoky essence we love in our tandoori dishes. For many of us who are recreating this magic at home, it might seem challenging to mimic that traditionally fire-kissed taste especially when we’re working with an indoor kitchen setup. But fear not, as there are effective methods to infuse that coveted homemade tandoori smoke.
Indoor Smoking Technique
Imagine achieving that rustic, smoked Indian chicken flavor within the confines of your kitchen. It’s possible with a clever trick that doesn’t require an outdoor grill. To create a homemade smoky environment for your indoor chicken tandoori, begin by heating up a piece of coal until it’s red-hot. Place this coal in a small, heatproof bowl containing a tablespoon of oil. As the oil heats up, it will produce smoke. Immediately place this bowl inside a covered pot or pan with your cooked tandoori chicken, and seal the lid. This will capture the smoke and let it permeate the chicken, imparting flavors that are remarkably close to those achieved with traditional methods.
Enhancing Flavor with Charcoal
For those who can step outside and harness the power of an open flame, using charcoal is the way to go. The charcoal method is all about cooking your chicken directly over the hot embers. The key here is in the juices from the chicken; as they drip onto the coals, they create smoke that engulfs your meat, infusing the tandoori with that irresistible smoky aroma we all crave. This is the ninth wonder in achieving traditional tandoori flavors—the magic of charcoal and fire.
Smoking Technique
Advantages
Tools Required
Indoor Smoking Method
Can be done inside, convenient for apartment living
Heatproof bowl, coal, oil, stove
Charcoal Smoking
Authentic taste, engaging and traditional method
Charcoal grill, charcoal
Whether you choose the indoor smoking technique or the outdoor charcoal method, both approaches promise to elevate your homemade tandoori to new heights. Don’t let the absence of a tandoor dissuade you from chasing that smoky flavor. Achieving the perfect smoked Indian chicken is more than doable—it’s a culinary adventure that brings the essence of Indian cooking right into the heart of your home.
Chicken Tandoori Recipe Cooking Tips
Our kitchen is always buzzing with the succulent aromas of spices and fresh ingredients, particularly when we’re spilling our secret insights on creating the perfect Chicken Tandoori. It’s all about mastering the art of marination and knowing your kitchen’s hot spots to ensure a dish bursting with flavor and cooked just right.
Marination Insights
Engaging in effective marinating techniques is more than a step; it’s the soul of Chicken Tandoori. For that perfect tandoori marinade, you’ll want consistency that’s reminiscent of a well-blended glaze, thick enough to stick to the chicken pieces, creating a flavorful coat that deeply penetrates each fiber. We always reach for full-fat strained yogurt to avoid a watery marinade that barely holds onto the chicken. A gentle reminder: patience is a virtue with marination. Letting it rest assures that the flavors aren’t just on the surface but are soaked into every bite, delivering those delightful flavorful chicken tips with our tried and true marination mantra.
Cooking Time and Temperature
When the marination masterpiece is complete, it’s time to talk about another critical 10 on the scale of tandoori triumph—an instant-read thermometer, your comrade in the battle against overcooking. Tandoori chicken’s doneness doesn’t just rely on color and aroma; we’re aiming for precision. That means having your oven or grill dialed to the right temperature and keeping an eagle eye on the reading: an internal sweet spot between 165 to 170 F (75 C). Trust us, and you’ll serve up tandoori chicken that’s tender, juicy, and just perfect—never dry, never tough. Every piece, a little symphony of smoky, spiced delight.
How to Serve Your Chicken Tandoori
The magic of a perfectly cooked chicken tandoori not only lies in its flavor but also in how it’s presented and paired. Serving suggestions play a crucial role in turning a simple chicken dish into a feast for the senses.
Accompaniments and Side Dishes
When we bring tandoori chicken to the table, it’s always accompanied by vibrant, traditional sides that elevate the dish. Fresh, cool, and tangy contrasts like Cilantro Chutney or Mint Chutney add layers of flavor, while sides such as Turmeric Rice, Onion Salad, and Cucumber Raita offer a refreshing break from the rich spices. Don’t forget the standard yet essential sliced onions and lemon wedges. These side dishes for tandoori chicken are not just add-ons but essential Indian condiments that complete the tandoori experience.
Creating a Themed Dinner
Imagine a spread that teases the palate with aromatic spices and tantalizes the taste buds with rich flavors. An Indian-themed dinner is an opportunity to delve deep into the culinary culture of India. Begin with a plate of succulent chicken tandoori as the center of attraction, and surround it with a cast of equally enticing dishes – perhaps a creamy Butter Chicken or a robust Chicken Tikka Masala. A simple yet refreshing Onion Salad and Turmeric Rice act as perfect counterparts to these flavorsome curries. Such a full course tandoori dinner is more than just a meal; it’s a ticket to a festive, Indian dinner party right in your home.
We understand that finding a dish that’s both flavorful and nutritious can sometimes be a challenge, which is why we love to highlight the nutritional benefits of Chicken Tandoori. This Indian classic isn’t just about tantalizing your taste buds—it’s a healthy tandoori option that aligns with a well-balanced diet. The key lies in the lean protein it provides, making it a satisfying lean protein meal without a heavy caloric toll.
The preparation of Chicken Tandoori sets it apart as a healthier choice within the realm of Indian cuisine. Traditional recipes call for minimal use of oil, relying on a medley of natural spices and yogurt to imbue the dish with its characteristic flavors. These spices don’t just add depth to the taste; they offer their own set of health benefits, from aiding digestion to anti-inflammatory properties.
Those who are conscientious about their food intake will appreciate that Chicken Tandoori is typically made without the heavy creams and batters found in other dishes. This not only keeps the calorie count in check but also maintains a simplicity that respects the quality of the ingredients.
Whether you’re looking to build muscle, maintain a balanced diet, or simply enjoy a delightful meal without the guilt, Chicken Tandoori is a trustworthy choice. It’s a dish that proves indulgence and wellbeing can go hand in hand, and we’re confident it will earn its place as a staple in your health-conscious menu.
Storing and Reheating Leftovers
Enjoyed a sumptuous Chicken Tandoori meal but find yourself with leftovers? Fret not, as we guide you through the appropriate steps to store and reheat your delightful dinner, ensuring that leftover Indian food remains as delicious as it was when freshly made. Keeping safe food storage in mind is paramount, so let’s dive into the specifics.
Best Practices for Refrigeration
Proper storage is crucial when it comes to extending the life of your storing chicken tandoori leftovers. We recommend placing the tandoori chicken in an airtight container and refrigerating it promptly. This simple practice assists in maintaining the freshness and safety of your food. Here’s a quick reference table for safe food storage:
Type of Food
Refrigeration (up to)
Notes for Optimal Storage
Chicken Tandoori
5 days
Ensure it’s cooled before storing to avoid moisture and bacteria.
Other cooked poultry
3-4 days
Separate from raw food to prevent cross-contamination.
Prepared Indian dishes
2-3 days
Store in shallow containers for quicker cooling.
Reheating for Best Taste and Quality
When it comes to reheating tandoori chicken, it’s essential to proceed with a method that preserves its flavors and moisture. We recommend using your oven or microwave to heat the chicken until it’s adequately warm. If you’re utilizing an oven, a covered dish or foil can help keep the chicken moist. For microwave reheating, short intervals on medium power are best to prevent drying out the chicken.
Remember, the key is to reheat to the point just enough for consumption, retaining the quality and taste of your leftovers.
Conclusion
As we reach the Indian cuisine finale of our culinary exploration, we reflect on the savory journey we’ve shared with you. We have delved into the legacy and craft of creating the perfect tandoori chicken, and it’s our hope that the secrets we’ve unveiled will transform your home kitchen into a haven of aromatic Indian flavors. This recipe is not merely a meal; it’s a passage through time-honored traditions, designed to bring a slice of authenticity to your dining table.
Whether you’re seeking a delicious weekday dinner alternative or a show-stopping centerpiece for your next gathering, this flavorful dish is poised to exceed expectations. By adhering to the marinating expertise, cooking precision, and pairing insights we’ve discussed, satisfaction is guaranteed. Embrace the rich palette of spices, the tender texture of well-marinated chicken, and the irresistible smoky charm that defines this beloved Indian classic.
We cherish the opportunity to have guided you through the steps to achieve a taste that resonates with the depth of Indian gastronomy. With each technique tailored for your convenience, the distinct, robust profile of this tandoori chicken will carry the legacy of a cuisine celebrated worldwide. Remember, the key to perfection lies in the love, patience, and respect for the culinary process—principles that ensure every bite is steeped in history and flavor.
FAQ
What is the origin of Chicken Tandoori?
Chicken Tandoori boasts a rich history that dates back to the Mughal era and is believed to have been invented by Kundan Lal Gujral at Moti Mahal in Peshawar. The traditional Mughal cuisine has been popularized for generations, still holding a significant place in Indian culinary culture.
Can Chicken Tandoori be made without a tandoor oven?
Yes, Chicken Tandoori can be prepared using alternative cooking methods such as an oven, stovetop griddle, air fryer, or grilling over an open fire. Each method provides a way to achieve the distinctive smoky flavor and tenderness associated with this classic dish.
What are the key spices in an authentic Chicken Tandoori marinade?
The traditional Tandoori Chicken marinade includes a blend of spices like garam masala, red chili powder, kasuri methi (dry fenugreek leaves), turmeric, coriander powder, and kashmiri chili powder. These spices create the vibrant flavor profile and traditional red hue of the dish.
What is the recommended marinating time for Chicken Tandoori?
To achieve the richest flavor and ultimate tenderness, it is recommended to marinate the chicken in the yogurt and spice mixture for a minimum of six hours to overnight. Shortening the marination time may not provide the same depth of flavor or succulence once cooked.
How can I get the smoky flavor in Chicken Tandoori if cooking indoors?
To achieve the signature smoky flavor indoors, you can use an indoor smoking technique with a piece of red-hot coal placed in a small bowl of oil, which is then situated in the pan with the chicken and covered to trap the smoke.
What are the essential ingredients for Chicken Tandoori?
The essential ingredients for a traditional Chicken Tandoori recipe include skinless chicken thighs or legs, full-fat Greek yogurt or hung curd for the marinade, a mix of fresh ginger and garlic, a selection of Indian spices, lemon juice, and mustard oil for an authentic aroma.
How do I prepare my chicken for Tandoori cooking?
Start by cleaning the chicken and patting it dry. Then make deep slits in the meat to allow the marinade to penetrate deeply and ensure more even cooking and flavor distribution.
What are some suitable side dishes to serve with Chicken Tandoori?
Chicken Tandoori pairs beautifully with Cilantro or Mint Chutney, sliced onions, and lemon wedges. Additionally, you might serve Turmeric Rice, Onion Salad, and Cucumber Raita for a complete Indian-themed meal experience.
What are the health benefits of eating Chicken Tandoori?
Chicken Tandoori is considered a healthier option within Indian cuisine as it is cooked without heavy creams or batters. The lean protein from the chicken provides nutritional value, and the use of yogurt and natural spices makes it a light yet flavorful dish.
How should I store and reheat leftover Chicken Tandoori?
Leftover Chicken Tandoori should be stored in an airtight container in the refrigerator for up to five days. When reheating, use an oven or microwave until hot without overheating to maintain the dish’s flavor and juiciness.
Welcome to our culinary journey to Bengal, where we unravel the secrets of Chingri Malai Curry – a savory delight that embodies the essence of Bengali cuisine. Known for its creamy coconut-infused gravy and juicy prawns, this authentic recipe is sure to transport your taste buds to the vibrant streets of Kolkata.
In this article, we will take you through the cultural significance of Chingri Malai Curry in Bengali traditions, the select ingredients that contribute to its flavorful profile, and a step-by-stepcooking guide that will enable you to recreate this Bengali masterpiece in your own kitchen.
So, let us embark on this culinary adventure and discover the captivating flavors of Chingri Malai Curry recipe!
Table of Contents
Key Takeaways:
Chingri Malai Curry is a beloved dish from Bengal, known for its creamy coconut-infused gravy and succulent prawns.
This recipe holds cultural significance in Bengali cuisine and is often prepared during festive occasions and celebrations.
The key ingredients for Chingri Malai Curry include fresh prawns and authentic Bengali spices.
Properly cleaning and marinating the prawns is essential to bring out their optimal flavor.
The coconut gravy is the heart of this dish, and achieving the perfect consistency is crucial.
The Cultural Significance of Chingri Malai Curry in Bengali Cuisine
Chingri Malai Curry holds a special place in Bengali cuisine and is often prepared during festive occasions and celebrations. It is considered an elegant Bengali classic and is cherished for its rich flavors and creamy texture.
This iconic dish has deep cultural roots and represents the culinary traditions of Bengal. It showcases the region’s love for seafood and the art of harmonizing spices and flavors to create a remarkable culinary experience.
The cultural significance of Chingri Malai Curry is evident in its association with special events and gatherings. Whether it’s a wedding, religious ceremony, or family gathering, this dish is often the centerpiece of the meal, symbolizing abundance, prosperity, and togetherness.
The popularity of Chingri Malai Curry goes beyond the borders of Bengal, extending to other parts of India and even internationally. It has become a favorite among food enthusiasts who appreciate the unique flavor profile and the cultural tapestry it represents.
Over the years, Chingri Malai Curry has evolved, taking inspiration from different culinary influences, yet staying true to its roots. It continues to delight taste buds and evoke a sense of nostalgia and pride among Bengalis and lovers of Bengali cuisine.
The Select Ingredients That Amplify the Flavor
In order to create a truly delicious and authentic Chingri Malai Curry, it is crucial to carefully select the ingredients that go into the dish. Two key components that play a significant role in enhancing the flavor are fresh prawns and authentic Bengali spices.
The Role of Fresh Prawns
Fresh prawns are the star of the show in Chingri Malai Curry. Their succulent and tender texture adds a delightful bite to the dish. By using fresh prawns, you can ensure that the flavors of the curry are at their best. The sweetness and natural umami of the prawns infuse the gravy, creating a truly memorable dining experience.
Importance of Authentic Spices
Authentic Bengali spices are the secret behind the rich and complex flavors of Chingri Malai Curry. The unique blend of spices, including turmeric, cumin, coriander, and garam masala, adds depth and aromatic notes to the dish. It is important to source high-quality and genuine Bengali spices to achieve the true flavor of this classic curry.
Preparing Prawns – The Right Way to Clean and Marinate
Properly preparing prawns is essential to ensure their freshness and optimal flavor in Chingri Malai Curry. Follow these step-by-step instructions on how to clean and devein prawns, as well as tips on marinating them for maximum flavor absorption.
Cleaning Prawns:
Start by removing the head of the prawn. Hold the prawn firmly and twist it to detach the head.
Gently peel off the shell by loosening it at the legs and then peeling it away, leaving the tail intact.
Make a shallow cut along the back of the prawn, using a small knife or kitchen shears.
Remove the dark vein running along the back, as this is the prawn’s digestive tract.
Rinse the prawns under cold water to remove any remaining debris.
Note: Cleaning prawns can be time-consuming, but it is crucial for a clean and delicious Chingri Malai Curry.
Marinating Prawns:
Place the cleaned prawns in a bowl.
Add your preferred marinade ingredients, such as ginger-garlic paste, turmeric powder, salt, and lemon juice.
Gently mix the prawns with the marinade, ensuring that each prawn is well-coated.
Cover the bowl and let the prawns marinate in the refrigerator for at least 30 minutes to allow the flavors to penetrate.
Note: Marinating prawns adds depth of flavor and enhances their tenderness, making them even more delicious in Chingri Malai Curry.
By cleaning and marinating prawns properly, you’ll ensure that they contribute to the delectable taste and texture of your Chingri Malai Curry. Give adequate attention to these steps to elevate the overall experience of enjoying this classic Bengali dish.
Mastering the Perfect Coconut Gravy
The creamy coconut gravy is the heart of Chingri Malai Curry. It is what gives this Bengali delight its rich and flavorful base. To ensure your Chingri Malai Curry is a success, it’s essential to master the art of making the perfect coconut-infused gravy. Below, we share some expert cooking tips and techniques to help you achieve the desired consistency and balance of flavors.
To begin, you’ll need to extract fresh coconut milk to use as the base for your gravy. Here’s a simple method to extract coconut milk:
Crack open a mature coconut and remove the white flesh.
Grate the coconut flesh using a fine grater.
Place the grated coconut in a muslin cloth and squeeze out the milk. This will be your first extract.
Add some warm water to the squeezed coconut and repeat the process to obtain a second extract. The first extract will be thicker and creamier.
Once you have your coconut milk, it’s time to infuse it with the flavors of the spices and other ingredients. Here are a few tips:
Use fresh and aromatic spices such as bay leaves, cardamom, cinnamon, and cloves to add depth of flavor to the gravy.
Saute the spices in hot oil or ghee until fragrant before adding the coconut milk. This helps to release their essential oils and enhances their flavors.
Balance the sweetness of the coconut milk with a touch of savory by adding a pinch of salt. This will bring out the flavors of the other ingredients.
For a creamier texture, you can add a teaspoon of cashew paste or grated khoya (dried milk solids) to the gravy.
Once you have added the coconut milk and spices to your liking, it’s time to simmer the gravy until it reaches the desired consistency. Remember to stir occasionally to prevent the bottom from burning. Keep in mind that the gravy will thicken further upon standing, so it’s best to slightly undercook it.
Now that you know the secrets to mastering the perfect coconut gravy, you can confidently prepare a delicious and authentic Chingri Malai Curry. The rich, creamy, and full-bodied flavors of the gravy will complement the succulent prawns, creating a culinary masterpiece that will delight your taste buds with every bite.
Step-by-Step Cooking Guide for Chingri Malai Curry
Now that we have explored the cultural significance of Chingri Malai Curry and the key ingredients that enhance its flavor, it’s time to delve into the step-by-step process of creating this delectable Bengali dish. In this section, we will guide you through the essential techniques required to achieve a flavorful and creamy curry.
Tempering Spices for Enhanced Aromas
To begin, let’s focus on tempering the spices to unlock their aromatic flavors. Follow these simple steps:
Heat a tablespoon of oil in a pan over medium heat.
Add whole spices like cinnamon, cardamom, cloves, and bay leaves to the hot oil.
Sauté the spices for a minute until they release their delightful aromas.
Tempering the spices at the beginning of the cooking process infuses the dish with their rich flavors, creating a foundation of taste for the Chingri Malai Curry.
Sautéing Onions to Golden Perfection
The next crucial step is sautéing the onions to achieve that irresistible golden color and sweet caramelized taste. Follow these steps:
Add finely chopped onions to the pan with the tempered spices.
Sauté the onions over medium heat until they turn golden brown.
Make sure to stir occasionally to ensure even cooking.
The onions not only contribute to the color of the curry but also add depth and sweetness to the overall flavor profile of the dish.
Secrets to a Creamy and Rich Curry
To achieve the signature creamy texture and richness of Chingri Malai Curry, pay attention to the following tips:
Use freshly extracted coconut milk to impart a luscious creaminess to the curry.
Simmer the curry on low heat for a longer duration to allow the flavors to meld together and develop depth.
Add a touch of ghee or butter at the end of the cooking process to enhance the richness of the curry.
By following these secrets, you can create a Chingri Malai Curry that is velvety, indulgent, and bursting with flavor.
Now that we have mastered the step-by-step cooking guide for Chingri Malai Curry, we are well on our way to creating a truly authentic and delicious Bengali dish. In the next section, we will explore the best accompaniments to serve alongside this delightful curry, enhancing the overall dining experience.
Serving Suggestions: Best Accompaniments to Chingri Malai Curry
Chingri Malai Curry, with its creamy and flavorful profile, is elevated by the right accompaniments that complement its taste and texture. To enhance your dining experience, consider serving these delicious side dishes alongside your Chingri Malai Curry:
Steamed Rice: The simplicity of steamed rice perfectly balances the richness of the curry, allowing you to savor the flavors of both.
Pulao: Fragrant and mildly spiced, pulao adds a delightful aromatic element to the meal, harmonizing well with the flavors of the curry.
Naan: Soft and pillowy, naan bread is an excellent choice for scooping up the creamy curry and savoring every bite.
Garnishing and presentation can also play a role in enhancing the visual appeal and overall experience of your Chingri Malai Curry. Consider sprinkling some fresh cilantro leaves on top or adding a squeeze of lime for a burst of freshness. The vibrant colors and enticing aromas will make your dish even more appetizing.
Variations of the Classic Chingri Malai Curry Recipe
While the traditional Chingri Malai Curry recipe is a delight in itself, there are variations that cater to different tastes and dietary preferences. In this section, we will explore alternative seafood options that can be used in place of prawns and a low-fat version of the curry for health-conscious individuals. We will provide detailed instructions and ingredient substitutions for each variation.
Alternative Seafood Options
If you’re looking to switch up the traditional recipe, there are several alternative seafood options that you can use instead of prawns in Chingri Malai Curry. Here are some popular alternatives:
Fish: Opt for firm fleshed fish such as cod, halibut, or tilapia. Cut them into chunks or fillets and follow the same cooking process as prawns.
Scallops: Scallops add a delicate sweetness to the curry. Just sear them separately and add them to the cooked sauce.
Lobster: For a truly indulgent version, replace the prawns with lobster meat. Ensure the lobster is cooked beforehand and add it to the curry towards the end.
Experimenting with different seafood options can bring exciting flavors and textures to your Chingri Malai Curry.
Low-fat Version for Health-Conscious Foodies
If you prefer a healthier option without compromising on taste, you can make a low-fat version of Chingri Malai Curry. Here are some tips:
Use low-fat coconut milk: Swap regular coconut milk with its low-fat alternative to reduce the overall fat content in the curry.
Reduce oil: Cut down on the amount of oil used for tempering and sautéing the ingredients.
Skip cream or yogurt: Omit or reduce the amount of cream or yogurt used in the recipe. You can also use low-fat yogurt as a healthier substitute.
Increase vegetable content: Add more vegetables such as bell peppers, carrots, or peas to the curry. They not only enhance the nutritional value but also add color and texture.
By making these simple adjustments, you can enjoy a lighter yet equally flavorful Chingri Malai Curry.
Tips and Tricks to Nail the Authentic Bengali Flavor
Achieving the authentic flavor of Chingri Malai Curry requires attention to detail and specific techniques. We want to help you master the art of creating an authentic Bengali taste that will leave your taste buds craving for more. Here are a few tips and tricks to ensure your Chingri Malai Curry captures the authentic flavor of Bengal:
Use the right spices: The combination of spices used in Chingri Malai Curry is what gives it its distinct taste. To achieve the authentic flavor, be sure to use traditional Bengali spices like turmeric, cumin, coriander, and garam masala. These spices are the key to creating a flavorful and aromatic curry.
Adjust seasoning: Tasting and adjusting the seasoning as you cook is essential to achieving the perfect balance of flavors. Be mindful of salt, spices, and any additional ingredients you choose to add. Don’t be afraid to experiment to find the right balance that suits your taste buds.
Incorporate traditional cooking methods: Bengali cuisine has its own unique cooking techniques that contribute to its authentic flavor. For example, tempering whole spices in hot oil or ghee at the beginning of the cooking process releases the flavors and aromas. Sautéing onions until they turn golden brown adds depth and sweetness to the curry. Understanding and utilizing these traditional techniques will elevate the taste of your Chingri Malai Curry.
By following these tips and tricks, you can infuse your homemade Chingri Malai Curry with the authentic flavor of Bengal. Experience the rich and intricate flavors that Bengali cuisine is renowned for, and savor every bite of this exquisite dish.
Preserving and Reheating Leftovers – The Correct Way
Chingri Malai Curry is a dish that can be enjoyed over multiple meals. To make the most of your leftovers, it’s important to know how to properly preserve them and reheat them while maintaining their texture and flavor. Follow these guidelines to ensure a delicious and satisfying experience with your reheated Chingri Malai Curry.
Maintaining Texture and Flavor Upon Reheating
When reheating Chingri Malai Curry, it’s essential to preserve its original texture and flavor. Here are some tips to help you achieve the best results:
Reheat gently: To prevent the curry from becoming overly thick and losing its creamy consistency, reheat it gently over low heat.
Avoid excessive stirring: Stir the curry sparingly while reheating to avoid breaking up the prawns and keeping them intact.
Add a splash of water or coconut milk: If the curry appears too dry while reheating, add a small amount of water or coconut milk to restore its original consistency.
Adjust seasoning if necessary: Taste the reheated curry and adjust the seasoning, adding more salt or spices if needed to enhance the flavors.
By following these tips, you can ensure that your reheated Chingri Malai Curry maintains its texture and flavor, allowing you to enjoy it just as much as the first time.
Preserving Leftovers
Reheating Leftovers
1. Store in airtight containers: Transfer the leftover curry to airtight containers and refrigerate it within two hours of cooking. This will help prevent bacterial growth and maintain the freshness of the curry.
1. Stovetop reheating: Transfer the desired portion of Chingri Malai Curry to a saucepan and heat it slowly over low heat. Stir occasionally to ensure even reheating.
2. Label and date: Label the containers with the date the curry was stored to keep track of its freshness. Consume it within 2-3 days.
2. Microwave reheating: Place the desired portion of curry in a microwave-safe dish. Cover with a microwave-safe lid or plastic wrap and heat in short intervals, stirring in between to distribute the heat evenly.
3. Freeze for long-term storage: If you have more leftovers than you can consume within a few days, consider freezing them. Transfer the curry to freezer-safe containers, leaving some space for expansion. Use within 2-3 months for the best quality.
3. Oven reheating: Preheat the oven to a low temperature (around 300°F/150°C). Place the curry in an oven-safe dish, cover with foil, and heat for 20-30 minutes or until warmed through.
In conclusion, our exploration of Chingri Malai Curry has revealed the rich cultural significance and mouthwatering flavors of this Bengali delight. We’ve discussed the key ingredients that enhance its taste, the step-by-step cooking guide to recreate it at home, and the best accompaniments to elevate your dining experience.
Throughout the article, we’ve emphasized the importance of using fresh prawns and authentic Bengali spices to achieve an authentic flavor. We’ve also provided variations that cater to different tastes and dietary preferences, ensuring that everyone can enjoy this culinary masterpiece.
By following our expert tips and tricks, you can confidently create a creamy, coconut-infused gravy that will transport you to the vibrant streets of Bengal. Preserving and reheating leftovers correctly will allow you to savor the flavors of Chingri Malai Curry over multiple meals.
Now that you are equipped with the knowledge and guidance to prepare this delightful Bengali dish, we encourage you to embark on your own culinary journey. Experience the joy of indulging in Chingri Malai Curry and share the flavors of Bengal with your loved ones!
FAQ
What is Chingri Malai Curry?
Chingri Malai Curry is a traditional Bengali dish known for its creamy, coconut-infused gravy and succulent prawns.
What is the cultural significance of Chingri Malai Curry in Bengali cuisine?
Chingri Malai Curry holds a special place in Bengali cuisine and is often prepared during festive occasions. It is considered an elegant Bengali classic and cherished for its rich flavors and creamy texture.
What are the key ingredients that enhance the flavor of Chingri Malai Curry?
Fresh prawns play a crucial role in enhancing the flavor and texture of the dish, while authentic Bengali spices add depth and complexity to Chingri Malai Curry.
How do you properly clean and marinate prawns for Chingri Malai Curry?
To properly clean prawns, remove the shells and devein them before marinating. Marinate the prawns with a combination of spices and aromatics for maximum flavor absorption.
What are the secrets to mastering the perfect coconut gravy for Chingri Malai Curry?
The secrets to mastering the perfect coconut gravy include techniques for extracting coconut milk, balancing flavors, and achieving the desired consistency for a rich and creamy curry.
Can you provide a step-by-step cooking guide for making Chingri Malai Curry?
Yes, we have a detailed, step-by-step cooking guide that covers essential techniques such as tempering spices, sautéing onions, and achieving a creamy and rich curry. Each step is accompanied by expert tips and tricks.
What are the best side dishes to serve with Chingri Malai Curry?
Chingri Malai Curry pairs perfectly with steamed rice, pulao, or naan. These side dishes complement the flavors and textures of the curry. We will also provide ideas for garnishing and presentation to elevate your dining experience.
Are there any variations of the classic Chingri Malai Curry recipe?
Yes, there are variations of Chingri Malai Curry that cater to different tastes and dietary preferences. We will explore alternative seafood options that can be used in place of prawns, as well as a low-fat version of the curry for health-conscious individuals.
What are some tips and tricks to nail the authentic Bengali flavor in Chingri Malai Curry?
Some tips and tricks to nail the authentic Bengali flavor in Chingri Malai Curry include using the right spices, adjusting seasoning, and incorporating traditional cooking methods.
How can I properly preserve leftover Chingri Malai Curry?
To properly preserve leftover Chingri Malai Curry, store it in an airtight container in the refrigerator. We will provide guidelines on storage, reheating methods, and precautions to ensure the best possible eating experience.
Welcome to our article on an easy Hilsa recipe for a perfect dinner treat! Whether you’re hosting a dinner party or simply want to enjoy a special meal at home, this recipe is sure to impress. The Hilsa, also known as the “king of fish,” is a highly prized and sought-after delicacy in Bengali cuisine. With its rich flavors and delicate texture, it’s no wonder why Hilsa holds a special place in the hearts of seafood lovers.
In this section, we will provide you with a step-by-step guide to create a delicious Hilsa dish that will tantalize your taste buds. So, let’s get ready to indulge in the flavors of Hilsa and embark on a delightful culinary adventure!
Table of Contents
Key Takeaways:
Discover an easy and delicious Hilsa recipe for a perfect dinner treat
Learn about the rich flavors and delicate texture of the Hilsa fish
Understand the cultural significance of Hilsa in Bengali cuisine
Explore marination techniques and essential ingredients for enhancing the flavor of Hilsa
Get step-by-step instructions to master the traditional Bengali dish, Bhapa Ilish
Introduction to Hilsa: The King of Fish
Hilsa, also known as the “king of fish,” is a highly prized and sought-after fish in Bengali cuisine. Known for its rich flavor and delicate texture, hilsa holds a special place in the hearts of seafood lovers.
In this section, we will delve into the various aspects of hilsa, including its taste, texture, and cultural significance. Let’s explore what makes hilsa the king of fish.
The Historical Significance of Hilsa in Bengali Cuisine
Hilsa, a beloved fish in Bengali cuisine, holds immense historical significance and is deeply intertwined with various cultural traditions and festivals. Understanding the deep-rooted connection between hilsa and Bengali culture enhances our appreciation for this delectable delicacy.
Connection to Biswakarma Puja and Festivities
One such festival where hilsa takes center stage is Biswakarma Puja, a celebration dedicated to the revered god of architecture and engineering. During this auspicious occasion, hilsa is considered a symbol of prosperity and is an integral part of the festive feasts. Its inclusion in the menu is believed to bring luck and good fortune to the devotees, making it a significant culinary offering.
Cultural Traditions: Arandhan and No Cooking Day
Alongside festivals, hilsa also plays a prominent role in cultural traditions such as Arandhan and No Cooking Day. Arandhan, a unique cooking tradition, sees hilsa prepared with minimal spices and cooked in a clay oven, resulting in a distinct flavor that showcases the natural taste of the fish. On No Cooking Day, hilsa is not cooked at all. Instead, it is marinated with spices and served raw, allowing the delicate flavors to unfold.
These traditions highlight the versatility of hilsa in Bengali cuisine and showcase the reverence for this fish in local customs and practices.
Tagore’s Influence: Celebrating Craftsmanship and Industry
Bengali culture has been greatly influenced by the renowned poet and philosopher, Rabindranath Tagore, and his appreciation for craftsmanship and industry. Tagore’s love for hilsa is well documented, and he often used hilsa as a metaphor for celebrating the artistry and skill of craftsmen.
Through Tagore’s influence, hilsa has become more than just a fish. It has become a symbol of the beauty and creativity that permeates Bengali culture, elevating its historical significance to new heights.
As we explore the historical roots of hilsa in Bengali cuisine, we gain a deeper understanding of the cultural traditions, festivals, and artistic influences that have made this fish an integral part of the region’s culinary heritage.
Source: Google
Celebrating Hilsa: Ingredients and Marination Techniques
To truly celebrate hilsa, it is essential to understand the key ingredients and marination techniques that enhance its flavor. In this section, we will explore the essential ingredients used in hilsa recipes and discover the marination techniques that bring out the best in this flavorful fish. From spices to herbs, we will cover everything you need to know to create a memorable hilsa dish.
Mastering the Bhapa Ilish: A Step-by-Step Guide
Bhapa Ilish is a popular and traditional Bengali preparation of hilsa that is known for its succulent flavors. If you want to recreate this delicious dish at home, we’ve got you covered with our step-by-step guide.
Preparing Your Ingredients
Before you start cooking, it’s important to gather all the necessary ingredients for Bhapa Ilish. Here’s a list of what you’ll need:
Fresh hilsa fish
Mustard paste
Poppy seed paste
Green chili paste
Turmeric powder
Salt
Mustard oil
Banana leaves or aluminum foil
Make sure to clean and prepare the hilsa fish properly before proceeding with the recipe.
The Art of Steaming Hilsa in the Microwave
If you prefer a quicker method, you can steam the hilsa fish using a microwave. Follow these steps:
Place the cleaned hilsa fish in a microwave-safe dish.
In a separate bowl, mix together mustard paste, poppy seed paste, green chili paste, turmeric powder, salt, and mustard oil.
Spread this mixture evenly over the hilsa fish, ensuring that it is well-coated.
Cover the dish with a microwave-safe lid or use microwave-safe plastic wrap to create a seal.
Place the dish in the microwave and cook on high for about 10-12 minutes, or until the fish is cooked through and tender.
Once cooked, remove from the microwave and let it rest for a few minutes before serving.
Traditional Stovetop Method for Bhapa Ilish
If you prefer a more traditional approach, you can steam the hilsa fish on the stovetop. Here’s how:
Wrap the cleaned hilsa fish in banana leaves or aluminum foil, ensuring that it is well-covered.
In a steamer or a large pot, add water and bring it to a boil.
Place the wrapped hilsa fish in the steamer or pot and cover it with a lid.
Steam the fish for approximately 15-20 minutes, or until it is cooked through and easily flakes with a fork.
Once cooked, carefully remove the fish from the steamer and unwrap it.
Serve the Bhapa Ilish hot with steamed rice or your choice of accompaniments.
With these step-by-step instructions, you’ll be able to master the art of Bhapa Ilish and enjoy the rich flavors of this traditional Bengali delicacy.
Exploring Different Hilsa Dishes: A Culinary Adventure
Hilsa, the versatile fish with its rich flavors and delicate texture, offers a world of culinary possibilities. In this section, we invite you to embark on a culinary adventure as we explore a variety of hilsa dishes. From traditional curries to innovative preparations, there’s something to tantalize every taste bud.
1. Hilsa Biriyani: Indulge in the exquisite flavors of Hilsa Biriyani, where fragrant basmati rice and succulent hilsa come together in a perfect harmony of spices.
2. Hilsa Shorshe: Experience the tangy and zesty flavors of Hilsa Shorshe, a traditional Bengali dish where hilsa is marinated in a mustard sauce and steamed to perfection.
3. Hilsa Paturi: Delight in the smoky and aromatic notes of Hilsa Paturi, a dish where hilsa is marinated in a paste of mustard seeds, green chilies, and coconut, wrapped in banana leaves, and grilled to perfection.
4. Hilsa Jhol: Warm your soul with the comforting flavors of Hilsa Jhol, a light curry that combines hilsa with a delicate blend of spices, tomatoes, and green chilies.
5. Hilsa Korma: Indulge in the creamy and rich flavors of Hilsa Korma, where hilsa is cooked in a velvety sauce made with cashews, yogurt, and aromatic spices.
6. Hilsa Bhaja: Crisp up your taste buds with the delightful flavors of Hilsa Bhaja, where hilsa is marinated with spices, coated in a light batter, and deep-fried to perfection.
“Hilsa dishes offer a delightful blend of flavors, showcasing the versatility of this prized fish. Whether you prefer traditional recipes or want to venture into more creative preparations, exploring hilsa dishes is a true culinary adventure.”
To get you even more excited about the diverse hilsa dishes, take a look at this mouthwatering image of a sumptuous Hilsa Biriyani:
How to Source Fresh Hilsa: Tips and Tricks
Sourcing fresh hilsa is crucial to ensure the best flavor and quality in your hilsa dishes. Here, we provide valuable tips and tricks to help you source fresh hilsa for your culinary adventures.
Identifying Freshness in Hilsa Fish
To ensure you’re getting the freshest hilsa, it’s important to know how to identify freshness in the fish. Look for the following signs:
Appearance: Fresh hilsa should have bright and clear eyes, shiny and metallic-looking scales, and a firm and elastic texture.
Smell: A fresh hilsa should have a mild and pleasant aroma. Avoid fish with a strong, fishy smell.
Gills: The gills of a fresh hilsa should be bright red or pink in color. Avoid fish with dull or discolored gills.
By carefully examining these features, you’ll be able to identify fresh hilsa and ensure a delicious and enjoyable culinary experience.
Best Times and Places to Buy Hilsa
Knowing the best times and places to buy hilsa can make a significant difference in the quality of the fish. Consider the following factors:
Season: Hilsa is typically available during the monsoon season in Bangladesh, which falls between June and September. This is when hilsa is most abundant and of the highest quality.
Local Fish Markets: Visit your local fish markets early in the morning to get the freshest catch of the day. Engage with trusted fishmongers who have a reputation for selling fresh hilsa.
Fishing Communities: Connect with fishing communities in coastal regions who have direct access to freshly caught hilsa. This ensures you’re getting the fish straight from the source.
By considering these factors and planning your hilsa purchases accordingly, you’ll have access to the freshest hilsa and elevate your culinary creations.
Ilish fish of Southeast Asia, Source: Google
Adapting Hilsa Recipes for American Kitchens
When preparing hilsa recipes in American kitchens, it’s important to make some adjustments to suit local ingredients and palates. In this section, we will provide insights into how you can adapt hilsa recipes to cater to American tastes. We will discuss the art of substituting ingredients and adjusting spices and flavors to ensure that your hilsa dishes are a perfect fit for American palates.
Substituting Ingredients
One of the key aspects of adapting hilsa recipes for American kitchens is substituting ingredients that may not be readily available. While hilsa is traditionally cooked with specific spices and herbs, you can experiment with local alternatives to achieve a similar flavor profile. For example, if you’re unable to find a specific spice, consider using a similar spice that complements the dish. Be open to trying different combinations and flavors to create a unique twist on the traditional hilsa recipes.
Adjusting Spices and Flavors to Suit Palates
American palates vary in their preferences for spices and levels of spiciness. To adapt hilsa recipes for American kitchens, it’s crucial to adjust the spices and flavors accordingly. You may need to reduce the spice levels or add additional spices to enhance the flavor profile. Consider the preferences of your intended audience and adjust the spices and flavors to suit their taste buds. It’s all about striking the right balance and creating a dish that will be enjoyed by everyone.
With a little creativity and flexibility, you can successfully adapt hilsa recipes for American kitchens, allowing everyone to experience the flavors of this exquisite fish. Keep in mind that the goal is to create a dish that not only pays homage to the traditional hilsa recipes but also appeals to the diverse American palate.
So let’s dive in and explore the art of adapting hilsa recipes for American kitchens!
The Health Benefits of Hilsa: More Than Just Delicious
Hilsa not only delights the taste buds but also offers numerous health benefits. This delectable fish is a powerhouse of nutrients, including omega-3 fatty acids, vitamins, and minerals that contribute to your overall well-being.
Omega-3 fatty acids are essential for brain health, reducing inflammation, and promoting cardiovascular health. Hilsa is an excellent source of these beneficial fats, making it an ideal addition to a balanced diet.
In addition to omega-3s, hilsa is rich in vitamins such as vitamin B12, which is essential for maintaining proper brain function and producing red blood cells. The fish also provides minerals like iron and calcium, necessary for healthy bones and blood circulation.
Furthermore, hilsa contains high-quality proteins that support muscle growth, repair tissues, and boost the immune system. These proteins, combined with the omega-3 fatty acids, make this fish a nutritious choice for individuals of all ages.
Whether you’re looking to improve brain function, maintain a healthy heart, or support overall well-being, incorporating hilsa into your diet can provide you with the health benefits and nutritional value your body needs.
Source: Google
Enhancing the Hilsa Recipe: Pairing with Sides and Wines
To enhance the flavors of your hilsa recipe, it is essential to pair it with suitable sides and wines. The right combination of complementary flavors can elevate your hilsa dish to a whole new level. In this section, we will provide suggestions for side dishes that perfectly complement the rich flavors of hilsa. We will also explore the art of pairing hilsa with different wines, allowing you to create a complete dining experience that tantalizes the taste buds.
When choosing sides to accompany your hilsa recipe, it’s important to consider flavors that enhance and balance the natural richness of the fish. Here are some ideas to inspire you:
Steamed Vegetables: Lightly steamed vegetables such as broccoli, carrots, and asparagus provide a fresh and healthy side that complements the flavors of hilsa.
Citrus Salad: A refreshing citrus salad with oranges, grapefruits, and tangy vinaigrette adds a burst of acidity that cuts through the richness of hilsa.
Roasted Potatoes: Golden and crispy roasted potatoes seasoned with herbs like rosemary and thyme provide a comforting and hearty side dish.
Coconut Rice: Fragrant coconut rice cooked with aromatic spices like cardamom and cloves adds a tropical touch to your hilsa meal.
Now let’s move on to the exciting world of wine pairing. Choosing the right wine can elevate the flavors of hilsa, creating a harmonious dining experience. Here are some wine recommendations to enhance your hilsa recipe:
Wine
Flavor Profile
Pairing Suggestions
Chardonnay
Rich, buttery, and oaky
Perfectly complements the creamy texture of hilsa
Riesling
Sweet, aromatic, and slightly acidic
Contrasts the richness of hilsa with its sweetness and acidity
Hilsa is a treat for seafood lovers, and its unique taste sets it apart from other fish. In this section, we will discuss why hilsa stands out among other seafood options, highlighting its exceptional taste and texture. Prepare to immerse yourself in the world of hilsa and discover why it is a favorite among seafood enthusiasts.
Why Hilsa Stands Out Among Seafood
Hilsa is renowned for its distinct flavor and delicate texture, making it a standout choice among seafood. Unlike other fish, hilsa offers a rich, buttery taste that is both indulgent and satisfying. Its melt-in-your-mouth texture adds an irresistible quality to any dish, making hilsa a highly sought-after delicacy.
What sets hilsa apart from other fish is its unique combination of rich flavors and delicate flesh. This fish offers a perfect balance of taste, creating a memorable dining experience for seafood lovers. Whether grilled, steamed, or prepared in a curry, hilsa brings a unique and delightful flavor that is unmatched by any other seafood.
Experiencing the Unique Taste of Hilsa
To truly understand the uniqueness of hilsa, one must experience its taste firsthand. The flavor of hilsa is distinct, with a subtle sweetness that pairs perfectly with spices and seasonings. Each bite of hilsa offers a burst of flavor that is both delicate and complex, leaving a lasting impression on your palate.
When cooked to perfection, hilsa releases a rich, natural oil that enhances the overall taste of the dish. This oil not only adds depth and richness but also intensifies the unique flavors of hilsa. Whether you prefer traditional recipes or innovative preparations, hilsa provides a culinary experience that is sure to satisfy even the most discerning seafood connoisseur.
Sharing the Hilsa Experience: Serving and Presentation Tips
Serving hilsa is not just about the taste; it is also about creating a memorable dining experience. In this section, we will share serving and presentation tips that will elevate your hilsa experience. From plating techniques to garnishing ideas, we will provide insights into how to make your hilsa dish visually appealing and enjoyable for all the senses.
When it comes to serving hilsa, presentation plays a crucial role in making the dish more enticing. By considering the following tips, you can create a visually stunning presentation that enhances the overall dining experience:
Use a large, elegant serving platter to showcase the hilsa. Opt for a white or neutral-colored platter that allows the vibrant colors of the fish to stand out.
Arrange the hilsa fillets neatly on the platter, ensuring they are evenly spaced. This will create an organized and visually appealing display.
Add a pop of color by garnishing the dish with fresh herbs, such as cilantro or dill. This not only enhances the visual appeal but also adds a touch of freshness to the dish.
Consider incorporating other visually appealing elements, such as lemon slices or thinly sliced vegetables, around the hilsa fillets. These additions not only add aesthetic value but also provide a delightful burst of flavor.
Remember, the goal is to create an eye-catching presentation that reflects the elegance of the hilsa dish.
Now, let’s take a look at the image below, which demonstrates an example of a beautifully presented hilsa dish:
Source: Google
As you can see, the hilsa fillets are gracefully arranged on a white platter. The addition of fresh herbs and lemon slices adds a pop of color, making the dish visually pleasing. This kind of presentation will surely impress your guests and elevate their hilsa experience.
Conclusion
In conclusion, hilsa is a fish that holds great cultural significance and culinary delight. Its rich flavors, delicate texture, and versatility make it a perfect choice for a memorable dinner treat. Throughout this article, we have provided valuable insights, recipes, and tips to help you embark on your own hilsa culinary adventure.
By exploring the historical significance of hilsa in Bengali cuisine, mastering the art of preparing Bhapa Ilish, and delving into different hilsa dishes, you can truly savor the unique taste of this king of fish. We have also shared valuable information on sourcing fresh hilsa, adapting recipes for American kitchens, and enhancing the flavors of hilsa with suitable sides and wines.
We hope that this article has equipped you with the knowledge and inspiration to create unforgettable meals with hilsa. Whether you’re hosting a dinner party or simply indulging in a special meal at home, hilsa is sure to impress your guests and satisfy your taste buds. So go ahead, enjoy the flavors, savor the experience, and let hilsa take you on a culinary journey like no other.
FAQ
How can I make a delicious hilsa recipe for a perfect dinner treat?
We have an easy hilsa recipe that will impress your guests and satisfy your taste buds. Stay tuned for the recipe!
What makes hilsa the “king of fish” in Bengali cuisine?
Hilsa is highly prized for its rich flavor and delicate texture, making it a favorite among seafood lovers in Bengali cuisine.
What are some cultural traditions associated with hilsa?
Hilsa holds historical significance in Bengali culture, including its connection to Biswakarma Puja, the traditions of Arandhan and No Cooking Day, as well as the influence of Tagore in celebrating craftsmanship and industry.
What are the essential ingredients and marination techniques for celebrating hilsa?
We will provide insights into the essential ingredients used in hilsa recipes and the marination techniques that enhance its flavor.
How can I master the traditional Bengali preparation of Bhapa Ilish?
Our step-by-step guide will walk you through the preparation of Bhapa Ilish, including details on how to steam hilsa using both the microwave and traditional stovetop methods.
What are some other delicious hilsa dishes I can try?
We will take you on a culinary adventure, exploring different hilsa recipes ranging from traditional curries to innovative preparations such as Hilsa Biriyani and Hilsa Shorshe.
Where can I source fresh hilsa?
We will provide valuable tips and tricks for sourcing fresh hilsa, including how to identify freshness in hilsa fish and insights into the best times and places to buy hilsa.
How can I adapt hilsa recipes for American kitchens?
We will offer insights into how to adapt hilsa recipes to suit American kitchens, including tips on substituting ingredients and adjusting spices and flavors to cater to American palates.
What are the health benefits of hilsa?
Discover the nutritional value of hilsa and its health benefits, from omega-3 fatty acids to vitamins and minerals.
What are some suitable sides and wines to pair with hilsa?
We will provide suggestions for side dishes that complement the rich flavors of hilsa and explore the art of pairing hilsa with different wines to create a complete dining experience.
What makes hilsa stand out among other seafood options?
We will discuss the exceptional taste and texture of hilsa, highlighting why it is a favorite among seafood enthusiasts.
What are serving and presentation tips for hilsa?
We will share tips on how to serve and present hilsa, including plating techniques and garnishing ideas to create a memorable dining experience.
Welcome to our comprehensive guide on making delicious palak paneer from scratch! In this article, we will take you through each step of the process, from understanding the cultural significance of this classic Indian dish to learning the key ingredients and essential tools needed for cooking. Whether you’re new to cooking or a seasoned chef, our easy-to-follow instructions and tips will help you create a creamy and flavorful palak paneer right in your own kitchen.
Table of Contents
Key Takeaways:
Learn how to make a delicious palak paneer dish from scratch.
Understand the cultural significance of palak paneer in Indian cuisine.
Discover the key ingredients and essential tools needed for cooking palak paneer.
Get tips and tricks for creating a creamy and flavorful spinach sauce.
Explore serving suggestions and customization options for palak paneer.
Introduction to Palak Paneer
In this section, we will introduce you to palak paneer and explore its cultural significance. Palak paneer is a popular vegetarian dish in Indian cuisine, known for its creamy spinach sauce and chunks of paneer (Indian cottage cheese).
The Cultural Significance of Palak Paneer
Palak paneer holds a special place in Indian culture and cuisine. The dish is often associated with traditions and celebrations, and it is commonly served during festivals and gatherings. Its vibrant green color symbolizes auspiciousness and fertility, making it a popular choice for festive occasions.
The cultural significance of palak paneer extends beyond its visual appeal. As a vegetarian dish, it aligns with the principles of Ayurveda, the ancient Indian system of medicine and holistic wellness. Ayurveda promotes the consumption of fresh and natural ingredients, such as spinach and paneer, for their nutritional benefits and positive impact on overall well-being.
Moreover, palak paneer represents the rich culinary heritage of India, showcasing the country’s diverse flavors and culinary techniques. It exemplifies the use of spices and herbs to create harmonious flavor profiles and exemplifies the art of balance in Indian cooking.
Understanding the Key Ingredients
To fully appreciate palak paneer, it is essential to understand the key ingredients that give this dish its unique taste and texture.
Key Ingredients
Cultural Significance
Spinach
Spinach, known as “palak” in Hindi, is the star of this dish. It is revered for its vibrant green color and nutritional value. Spinach is a great source of vitamins, minerals, and antioxidants, making it a healthy addition to any diet.
Paneer
Paneer, a type of Indian cottage cheese, adds a creamy and rich texture to palak paneer. It is made by curdling milk and then straining it to separate the solid cheese from the liquid whey. Paneer is a versatile ingredient that absorbs the flavors of the spices and spinach sauce, creating a delicious combination.
Spices
Aromatic spices like cumin, coriander, turmeric, garam masala, and fenugreek leaves are essential for enhancing the flavors of palak paneer. They add depth, warmth, and complexity to the dish, creating a well-rounded and satisfying culinary experience.
Essential Tools and Equipment for Cooking Palak Paneer
To create the perfect palak paneer, it is important to have the right tools and equipment in your kitchen. Having the proper tools will make the cooking process easier and more enjoyable.
From Skillets to Blenders: What You Need
Here are some essential tools and equipment you will need to cook palak paneer:
A skillet: A high-quality skillet is essential for pan-frying the paneer until it turns golden and crispy. Look for a skillet that is non-stick and has a thick bottom for even heat distribution.
A blender: A good blender is necessary for creating a smooth and creamy spinach sauce. It will help you achieve the perfect consistency without any lumps of spinach.
A cutting board and sharp knife: You will need a cutting board and a sharp knife to chop the spinach and other ingredients for the recipe.
A spatula or tongs: These tools will come in handy for flipping the paneer while it’s being pan-fried.
A saucepan or pot: You will need a saucepan or pot to blanch or sauté the spinach before blending it into a puree.
Measuring cups and spoons: Accurate measurements are crucial for achieving the right balance of flavors in palak paneer, so make sure you have a set of measuring cups and spoons on hand.
With these essential tools and equipment, you’ll be well-prepared to cook delicious palak paneer in your own kitchen.
Selecting the Best Spinach for Palak Paneer
The quality of the spinach used in palak paneer can greatly impact the taste and texture of the dish. When selecting spinach for your palak paneer recipe, you have two options: fresh spinach or frozen spinach.
For those who prefer using fresh ingredients, fresh spinach is an excellent choice. Look for young and tender spinach leaves, as they are more flavorful and have a smoother texture. You can find fresh spinach in the produce section of your local grocery store or at farmer’s markets.
If fresh spinach is not readily available or you prefer the convenience of using frozen spinach, it is a suitable alternative for making palak paneer. Frozen spinach is pre-washed and blanched, making it easy to use in your recipe. It retains much of its nutritional value and can provide consistent results.
Regardless of whether you choose fresh or frozen spinach, it is essential to properly store and prepare the spinach before using it in your palak paneer. Fresh spinach should be washed thoroughly and any tough stems or wilted leaves removed. Frozen spinach should be thawed and excess moisture squeezed out before cooking.
By carefully selecting the best spinach and following proper preparation techniques, you can ensure that your palak paneer is filled with vibrant flavors and a delightful texture.
How to Make Palak Paneer at Home
Now, it’s time to dive into the step-by-step process of making palak paneer at home. We will start with paneer preparation tips, including how to cut and pan-fry the paneer to achieve a golden crust. Then, we will guide you through cooking the perfect spinach sauce, from blanching or sautéing the spinach to blending it into a smooth puree. The combination of properly prepared paneer and a flavorful spinach sauce is the key to a delicious palak paneer.
Paneer Preparation Tips
Before adding paneer to your palak paneer dish, it’s important to prepare it correctly to enhance its flavor and texture. Here are some tips:
Cut the paneer into bite-sized cubes or rectangular shapes.
Heat a skillet with a drizzle of oil and pan-fry the paneer until it turns golden brown on all sides.
Remove the pan-fried paneer from the skillet and set it aside for later use in the recipe.
Cooking the Perfect Spinach Sauce
The spinach sauce forms the base of palak paneer and contributes to its vibrant green color. Follow these steps to create a delicious spinach sauce:
Blanch or sauté fresh spinach until it wilts and becomes tender.
Transfer the cooked spinach to a blender and blend it into a smooth puree.
In a separate pan, sauté onions, garlic, and ginger until they turn golden brown.
Add spices like turmeric, cumin, and garam masala to the sautéed onions for added flavor.
Pour the spinach puree into the pan and simmer the sauce until it thickens.
Once the spinach sauce is ready, you can add the pan-fried paneer to it and allow the flavors to meld together, resulting in a delicious palak paneer dish.
Pan Frying Paneer to Golden Perfection
Pan-frying paneer is a crucial step in creating the perfect palak paneer dish. This technique imparts a delightful golden and crispy texture to the paneer, elevating its taste and overall appeal. We will guide you through the process of pan-frying paneer, ensuring that every bite showcases the irresistibly crispy exterior and tender interior of this delectable cheese.
To begin, heat a skillet over medium heat until it’s hot enough to sizzle the paneer when added. You can use a non-stick skillet or a cast-iron pan for this purpose, as both work well in achieving the desired golden outcome.
Next, season the paneer with your choice of spices to enhance its flavor profile. Common options include turmeric, cumin, coriander, and black pepper. Gently toss the paneer cubes in the seasoning until they are evenly coated.
When the skillet is ready, add a small amount of oil or ghee to prevent the paneer from sticking to the surface. Place the seasoned paneer in a single layer on the skillet, ensuring that the cubes do not touch each other. This allows for even browning and crispy edges.
Cook the paneer for about 2-3 minutes on each side, or until it turns golden brown. Use a spatula to carefully flip the cubes, ensuring that they are evenly cooked.
Once the paneer reaches the desired crispiness and golden color, remove it from the skillet and place it on a plate lined with paper towels. Blot any excess oil to maintain the texture and avoid an overly greasy end result. Your beautifully golden and crispy paneer is now ready to be added to the luscious spinach sauce and create the perfect palak paneer dish.
Remember, pan-frying paneer is a crucial step in achieving the desired texture and flavor. Take your time, follow these instructions, and savor the satisfaction of perfectly crispy and golden paneer in your palak paneer dish.
Crafting the Creamy Spinach Sauce
The creamy spinach sauce is the heart of a palak paneer dish. It is what gives this classic Indian recipe its rich, velvety texture and vibrant green color. In this section, we will guide you through the process of crafting the perfect spinach sauce that will elevate your palak paneer to new heights of deliciousness.
Steps to Achieve the Ideal Consistency
Creating a spinach sauce with the ideal consistency is essential for a well-balanced palak paneer. Follow these steps to achieve the perfect texture:
Start by cooking finely chopped onions and garlic in a skillet until they turn translucent and slightly golden. This will add a savory base to the sauce.
Add a blend of aromatic spices, such as cumin, coriander, turmeric, and garam masala, and cook them for a minute or two until their flavors are released.
Next, add the spinach puree to the skillet. You can achieve the puree by blanching the spinach leaves in boiling water for a few minutes, then blending them until smooth. Simmer the sauce gently to allow the flavors to meld together.
While simmering, stir occasionally to prevent the sauce from sticking to the bottom of the skillet. Continue cooking until the sauce thickens slightly and reaches the desired consistency.
Once the sauce is ready, season it with salt and add a dollop of butter or cream for an extra touch of richness.
Additions and Substitutes for Dietary Restrictions
If you have dietary restrictions or preferences, there are various additions and substitutes you can make to customize your palak paneer. Here are a few ideas:
To add some extra protein, you can incorporate tofu or chickpeas into the dish. They provide a delicious alternative to paneer and make the palak paneer suitable for vegetarians and vegans.
If you prefer a creamier sauce without using cream, you can substitute it with coconut milk or cashew cream. These alternatives impart a luscious texture and a delightful nutty flavor to the spinach sauce.
For those who enjoy a bit of heat, you can include finely chopped green chilies or a pinch of red chili flakes to add a spicy kick to the sauce.
To enhance the overall flavor profile, you can add a squeeze of fresh lemon juice or a sprinkle of kasuri methi (dried fenugreek leaves) at the end of cooking.
By incorporating these additions and substitutions, you can create a palak paneer recipe that suits your dietary needs and taste preferences, while still maintaining the creamy and vibrant essence of the dish.
Now that you know how to craft the creamy spinach sauce with the ideal consistency and customize it to your liking, it’s time to move on to the next step: combining the sauce with the pan-fried paneer to create the final palak paneer masterpiece.
Combining Ingredients for the Final Dish
With the paneer and spinach sauce prepared, it’s time to bring all the ingredients together for the final palak paneer dish. In this section, we will guide you on how to incorporate the paneer with the spinach sauce to create a harmonious blend of flavors and textures. We will also discuss the importance of making final seasoning adjustments to ensure the dish is perfectly balanced.
To combine the paneer with the spinach sauce, start by gently folding the pan-fried paneer into the simmering spinach sauce. The paneer should be evenly distributed throughout the sauce, allowing it to absorb the flavors and become tender. Be careful not to overmix, as you want to maintain chunks of paneer in the dish for added texture.
Once the paneer is incorporated, it’s time to make final seasoning adjustments to enhance the taste of the palak paneer. Start by tasting the dish and adding salt and pepper as needed. Keep in mind that the flavors of the dish may intensify as it simmers, so it’s best to start with a conservative amount of seasoning and gradually adjust to your preference.
In addition to salt and pepper, you can also consider adding other spices or herbs to elevate the flavors of the dish. Common spices used in palak paneer include cumin, coriander, and garam masala. Sprinkle these spices sparingly and taste the dish after each addition to ensure a well-balanced and aromatic palak paneer.
“Combining the paneer with the spinach sauce is a crucial step in creating the perfect palak paneer. The gentle folding technique ensures that the paneer absorbs the flavors of the creamy spinach sauce, resulting in a delightful blend of textures and tastes.”
Once the paneer is incorporated and the final seasonings are adjusted, cover the dish and allow it to simmer for a few more minutes. This will further enhance the flavors and help the paneer infuse with the spinach sauce. Remember to periodically stir the dish to prevent it from sticking to the bottom of the pan.
Now that you have successfully combined the ingredients and made final seasoning adjustments, your palak paneer is ready to be served! The creamy spinach sauce paired with the tender paneer will delight your taste buds and leave you craving more. Get ready to enjoy a satisfying and flavorful Indian dish that showcases the perfect marriage of spinach and paneer.
Serving Suggestions for Palak Paneer
Palak paneer is a versatile dish that can be paired with a variety of grains and breads. Here are some serving suggestions to enhance your palak paneer experience:
Pairing with Grains and Breads
1. Basmati Rice: Serve a fragrant bowl of steamed basmati rice alongside your palak paneer. The fluffy texture and subtle aroma of basmati rice perfectly complement the creamy spinach sauce.
2. Naan Bread: Enjoy palak paneer with freshly baked naan bread. Tear off a piece of naan and use it to scoop up the flavorful spinach sauce and tender chunks of paneer. The soft and chewy naan is an ideal accompaniment to this classic Indian dish.
3. Roti: Opt for roti, a traditional Indian whole wheat bread, to savor with palak paneer. The slightly crispy and light texture of roti provides a delightful contrast to the rich and creamy spinach sauce.
Making a Complete Indian Meal
For a complete Indian meal, consider incorporating other dishes and accompaniments that complement the flavors of palak paneer:
1. Dal: Serve a bowl of dal, such as dal makhani or yellow dal, alongside palak paneer. The lentils contribute to a well-rounded meal by providing protein and additional flavors.
2. Raita: Prepare a cooling raita with yogurt, cucumber, and spices. The refreshing and tangy raita serves as a palate cleanser and balances the richness of the palak paneer.
3. Papad: Include crispy papad, a thin lentil-based wafer, as a crunchy and enjoyable side dish. The papad adds texture and a burst of flavor to complement the creamy palak paneer.
With these serving suggestions, you can create a complete and satisfying Indian meal centered around the delicious flavors of palak paneer. Enjoy!
Storage and Reheating Tips for Leftover Palak Paneer
If you find yourself with leftover palak paneer, don’t worry! With the right storage and reheating techniques, you can enjoy this delicious dish again and again. Here are some tips to help you store and reheat your leftover palak paneer:
Storing Palak Paneer: Place the leftover palak paneer in an airtight container and store it in the refrigerator. This will help maintain its freshness and prevent any contamination.
Reheating Leftover Palak Paneer: There are a few methods you can use to reheat your palak paneer:
Microwave: Transfer the desired portion of palak paneer to a microwave-safe dish and cover it with a microwave-safe lid or microwave-safe plastic wrap. Heat it in the microwave for 1-2 minutes, stirring occasionally, until heated through.
Stovetop: Transfer the leftover palak paneer to a saucepan and add a splash of water or milk to prevent it from sticking to the pan. Heat it over medium-low heat, stirring occasionally, until heated through.
Enjoying Leftover Palak Paneer: Once your leftover palak paneer is heated, it’s ready to be enjoyed! Serve it with freshly cooked rice, naan bread, or roti for a satisfying meal.
By following these tips, you can ensure that your leftover palak paneer tastes just as delicious as when it was freshly made. Don’t let any leftovers go to waste!
Customizing the Palak Paneer Recipe to Your Preference
While the traditional palak paneer recipe is delicious on its own, it can also be customized to suit your taste preferences and dietary needs. In this section, we will explore how to adjust the spice levels and creaminess of the dish to your liking. We will also provide suggestions for vegan variations of the classic recipe, using alternative ingredients that still maintain the rich and creamy flavors of palak paneer.
Adjusting Spice Levels and Creaminess
One of the advantages of making palak paneer at home is the ability to control the spice levels according to your preference. If you enjoy a mild dish, reduce the amount of green chilies or omit them altogether. On the other hand, if you prefer a spicier version, add an extra chili or two.
To adjust the creaminess of your palak paneer, you can vary the amount of cream or yogurt used in the recipe. Adding more cream will result in a richer and creamier sauce, while reducing or omitting it will yield a lighter and healthier dish.
“Customizing the palak paneer recipe allows you to create a dish that suits your taste buds perfectly.”
Vegan Variations on the Classic Recipe
If you follow a vegan diet or prefer plant-based alternatives, you can still enjoy the flavors of palak paneer. There are several substitutions you can make to create a vegan version of this classic dish.
Instead of paneer, you can use tofu as a substitute. Firm tofu works well in palak paneer, providing a similar texture to paneer. Simply cube the tofu and pan-fry it before adding it to the spinach sauce.
To replace dairy cream, you can use coconut milk or cashew cream. Both options add a creamy and rich texture to the dish. Coconut milk adds a subtle coconut flavor, while cashew cream provides a smooth and nutty taste.
Note: If using coconut milk, choose the canned full-fat version for the best results.
Incorporating these vegan variations into the palak paneer recipe allows individuals with dietary restrictions to enjoy this beloved Indian dish without compromising on taste or texture.
Common Misconceptions about Palak Paneer and Saag Paneer
There are often misconceptions about palak paneer and saag paneer, two popular dishes in Indian cuisine. These misconceptions can lead to confusion about the differences between the two dishes. In this section, we will clarify these misconceptions and help you understand the distinctions between palak paneer and saag paneer. We will also explore what makes each dish unique, taking into account their ingredients, preparation methods, and flavors.
Understanding the Differences
Palak paneer and saag paneer may appear similar at first glance, as both dishes feature a creamy spinach-based sauce and chunks of paneer. However, there are subtle differences that set them apart. Palak paneer specifically uses spinach, while saag paneer can incorporate a mix of various leafy greens such as spinach, mustard greens, or fenugreek leaves. Additionally, the spices and seasonings used in each dish may vary, creating distinct flavor profiles.
What Makes Each Dish Unique
Palak paneer and saag paneer have their own unique characteristics that contribute to their individuality. Palak paneer is known for its vibrant green color and smooth texture, with the spinach sauce providing a creamy and velvety base for the paneer. On the other hand, saag paneer offers a more diverse range of flavors and textures, with the combination of different leafy greens adding depth and complexity to the dish.
Furthermore, the preparation methods for palak paneer and saag paneer differ slightly. Palak paneer typically involves blanching or sautéing the spinach before blending it into a puree. Saag paneer, on the other hand, often requires blanching the greens, followed by sautéing and blending them to create a textured sauce. These variations in cooking techniques contribute to the distinct characteristics of each dish.
While both palak paneer and saag paneer are delicious vegetarian dishes that showcase the richness of Indian cuisine, understanding their differences allows you to appreciate and enjoy each dish for its unique qualities.
Conclusion
Reflecting on the journey of cooking palak paneer, we have equipped you with the skills and knowledge to create a delicious and authentic Indian dish right in your own kitchen. Through our comprehensive guide, you have learned about the cultural significance of palak paneer and the key ingredients that give it its unique flavor profile. We have also provided essential tips on selecting the best spinach, using the right cooking equipment, and preparing the paneer to achieve perfection.
Now, it’s time to take what you have learned and try the palak paneer recipe at home. Embrace the joy of culinary creation and share this flavorful dish with your loved ones. Whether you’re a novice cook or an experienced chef, our easy-to-follow instructions will empower you to master the art of making palak paneer and leave a lasting impression on your family and friends.
So, go ahead and embark on your palak paneer cooking adventure. Immerse yourself in the rich flavors and vibrant colors of this classic Indian dish. Trust your instincts, enjoy the process, and savor the satisfaction of creating a homemade masterpiece. Get ready to experience the delight of every bite and the warmth of authentic Indian flavors right at your dining table.
FAQ
What is palak paneer?
Palak paneer is a popular vegetarian dish in Indian cuisine. It consists of a creamy spinach sauce with chunks of paneer, which is Indian cottage cheese.
What are the key ingredients in palak paneer?
The key ingredients in palak paneer include spinach, paneer (Indian cottage cheese), and a variety of spices that add depth and flavor to the dish.
What tools and equipment do I need to make palak paneer?
You will need skillets for pan-frying the paneer and blenders for creating a smooth spinach sauce. These are essential tools for making palak paneer.
What is the best type of spinach to use for palak paneer?
The best type of spinach to use for palak paneer is young and tender spinach leaves. You can use fresh spinach or frozen spinach, but make sure it is of good quality.
How do I prepare the paneer for palak paneer?
To prepare the paneer for palak paneer, you need to cut it into cubes and then pan-fry it to achieve a golden crust on each side. This adds texture and flavor to the dish.
How do I make the creamy spinach sauce for palak paneer?
To make the creamy spinach sauce, you need to cook the onions and spices, then simmer the sauce with the spinach puree. This will create a flavorful and smooth sauce.
How do I pan-fry the paneer to golden perfection?
To pan-fry the paneer, you need to heat the skillet properly, season the paneer, and cook it until it has a golden and crispy texture. This will enhance the flavor of the paneer.
How do I achieve the ideal consistency of the spinach sauce?
To achieve the ideal consistency of the spinach sauce, you need to simmer it until it thickens to your liking. You can also add ingredients like cream or coconut milk for a creamier texture.
What are some serving suggestions for palak paneer?
Palak paneer can be paired with basmati rice, naan bread, or roti. These grains and breads complement the flavors of the dish. You can also serve it as part of a complete Indian meal with other dishes.
How should I store and reheat leftover palak paneer?
To store leftover palak paneer, you should refrigerate it in an airtight container. When reheating, you can do so on the stovetop or in the microwave until it is heated through.
Can I customize the palak paneer recipe to my liking?
Yes, you can customize the palak paneer recipe to suit your taste preferences and dietary needs. You can adjust the spice levels and creaminess of the dish, and there are also vegan variations available.
What is the difference between palak paneer and saag paneer?
Palak paneer specifically refers to a dish made with spinach, while saag paneer is a more generic term for a dish made with any type of greens. The main difference lies in the specific greens used and the flavors they impart.
How should I reflect on my journey of cooking palak paneer?
As you embark on the journey of cooking palak paneer, take pride in the skills you have acquired along the way. Embrace the joy of creating a delicious and authentic Indian dish in your own kitchen.
Global Flavors, Global Recipes: Your Culinary Journey.