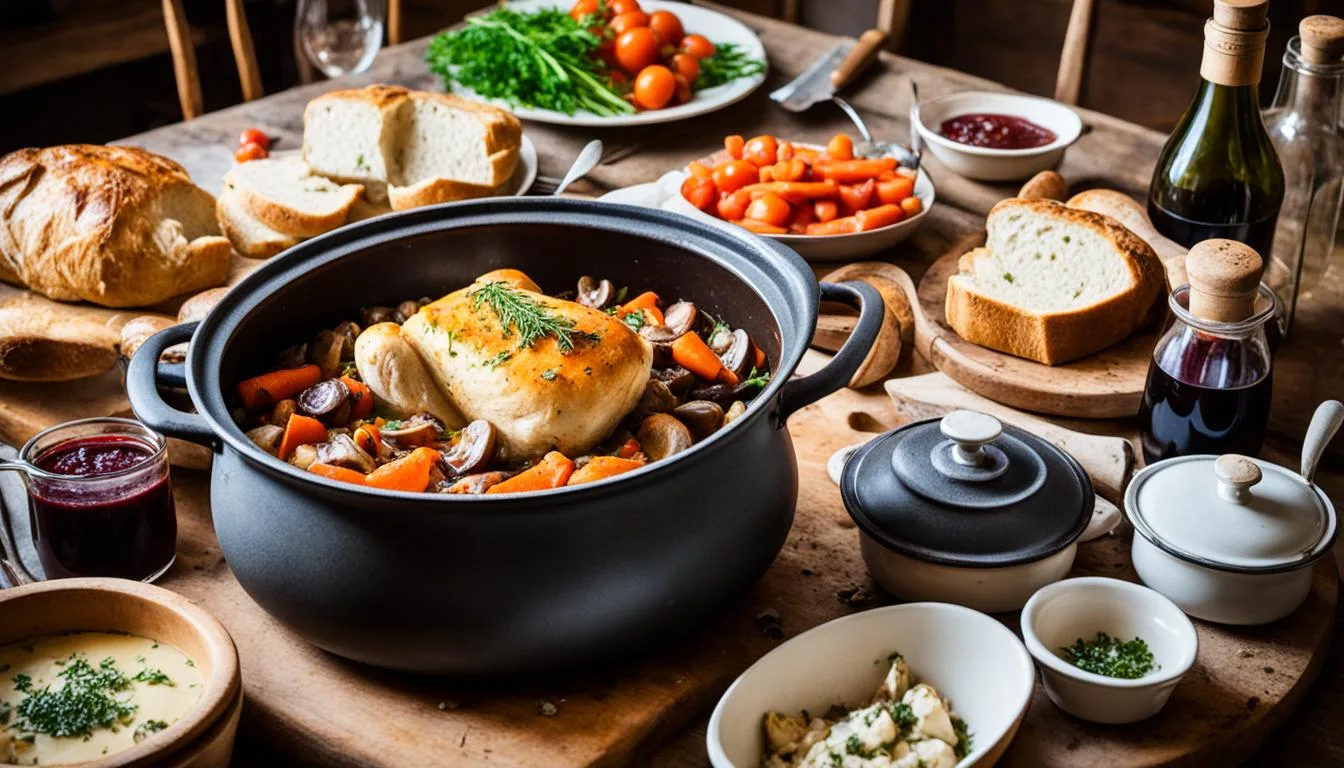
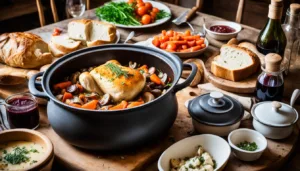
Coq au vin is as synonymous with French culture as hamburgers are with American. Hardly we can find a French who did not grew up having this dish. This is surely a comfort food with mom’s magic. Sauce it up with red wine and you will have the melting chicken in your mouth. This is of course more impressive than your average chicken recipe. (Coq au Vin)
It’s perfect for a dinner party, because it actually tastes better the next day, so you can make the entire recipe the day before and then gently reheat it as your guests arrive. Add a baguette for dunking and you’ve got an ideal cold-weather meal.
Special recommendation
How to serve Coq au Vin?
Pair it with anything starchy that can soak up the wine sauce, preferably potatoes or French bread
Goes very well with tangy salads, bitter greens like mustard or Kale.
Traditionally whole rooster is used, but if that’s not accessible chicken thighs and drumsticks can be used
Coq au Vin is always tastier the next day
Traditional Coq au Vin recipes call for a whole cut-up chicken, but using all dark meat gives you a particularly succulent dish without the risk of overcooked white meat. However, if you would rather substitute a whole cut-up bird, just add the breasts in the last 30 minutes of simmering.
Selecting the Right Ingredients for Authentic Coq au Vin
This recipe and ingredients will serve 4.
Ingredients
Quantity
Chicken (combination of legs, thighs, breasts, and wings)
3 lb skin-on, bone-in chicken legs
Kosher Salt
To taste
Freshly ground black pepper
To taste
Bay leaf
1
Carrot
1 peeled and diced
Garlic
2 minced cloves
Tomato paste
11/2 teaspoons
All purpose flour
2 tablespoons
Unsalted butter
2 tablespoons
Red wine
3 cups
Onions
1 diced
Bacon
4 ounces diced
Mushrooms
8 oz button mushrooms, trimmed and quartered
Thyme
2-4 fresh thyme sprigs
Flat leaf parsley
1/4 cup chopped
How to cook?
Season the chicken with salt and pepper. In a large bowl, combine the chicken with the wine, bay leaf, and thyme. Cover and marinate at least 30 minutes and up to one day.
In a large pot set over medium heat, cook the bacon until browned and crispy, about 10 minutes. Remove from heat and use a slotted spoon to transfer bacon to a plate lined with paper towels, reserving the fat in the pot.
Remove the chicken from the wine marinade and pat dry with paper towels. Reserve the marinade. Return the pot to the stovetop and heat the bacon fat over medium heat until it shimmers. Add the chicken, skin side down, in a single layer and cook until golden brown, about 5 minutes. Flip and cook until brown on the other side, about 4 more minutes. Transfer the seared chicken to a plate.
Add the diced onion, carrot, and mushrooms to the Dutch oven and season with salt. Cook until the vegetables are lightly browned, about 8 minutes.
Add the garlic and tomato paste and cook for about 1 minute, until it’s fragrant. Add the reserved marinade. Bring to a boil over medium-high heat and reduce liquid to about half.
Add the chicken and half of the bacon. There should be enough liquid to just cover the chicken—if not, add a little water or chicken stock. Cover and simmer over low heat until the chicken is tender, about 1 hour. Uncover, transfer chicken to a plate, and continue to simmer, about 10 minutes.
Meanwhile, whisk the flour and butter together into a smooth paste. Whisk the beurre manié into the stew to thicken. Continue to simmer until the sauce is thick enough to lightly coat the back of a spoon, about 2 more minutes.
Taste and season with salt and pepper if needed. Return the chicken to Dutch oven and simmer until warmed through, no more than 5 minutes. Remove from heat and garnish with remaining bacon and parsley.
For more such finger licking dishes please do try the below recipes:
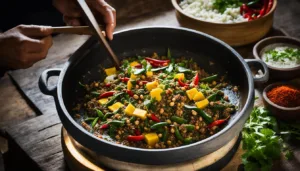
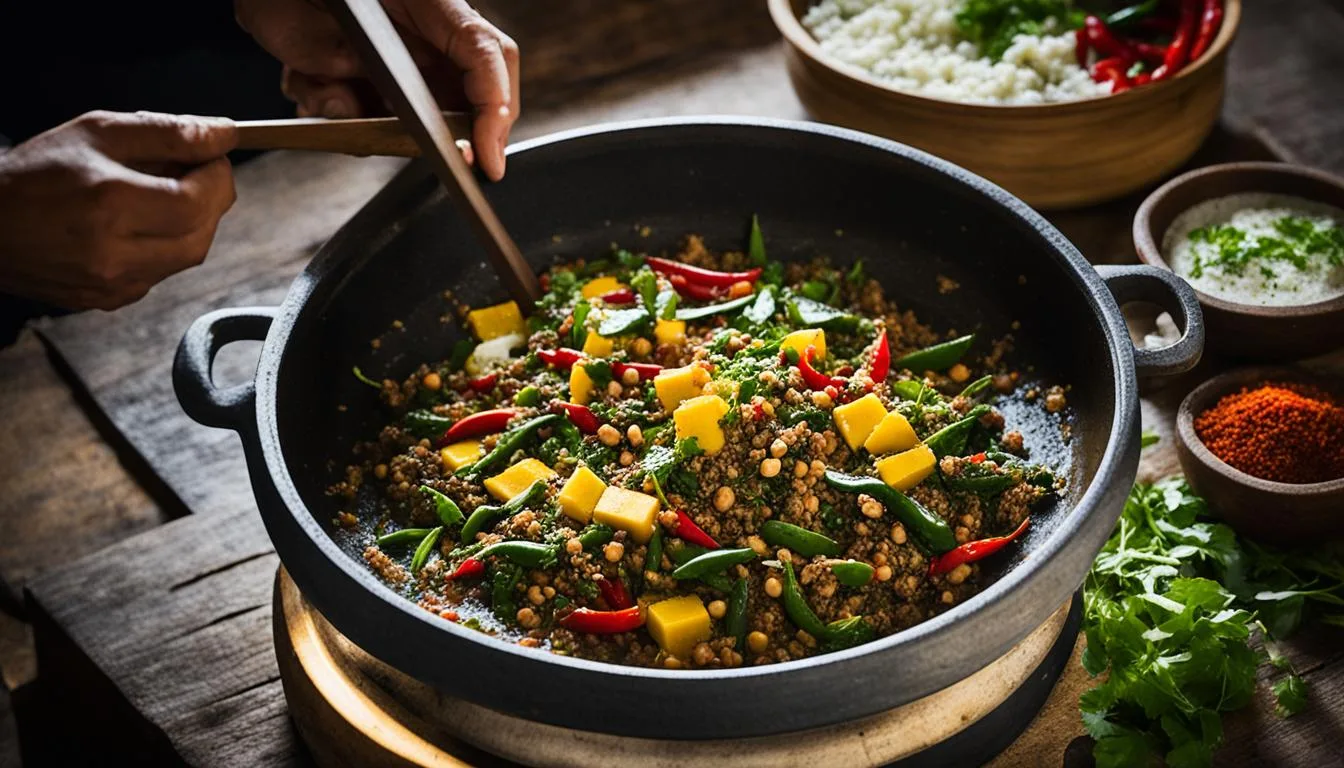
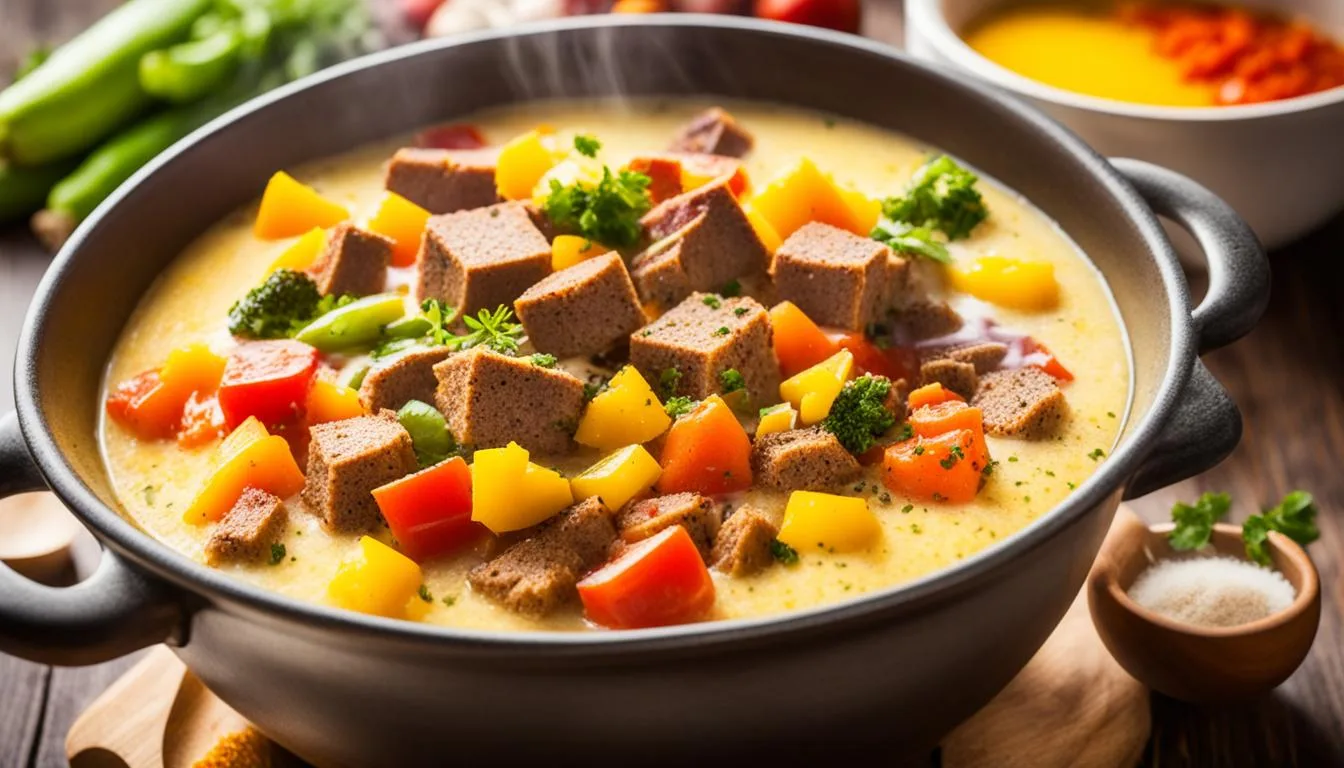
Bhutanese cuisine is known for its unique and flavorful dishes. Recognized as a national dish, Ema Datshi is a famous stew made from hot chili peppers and cheese. Ema Datshi recipe comes in a variety of flavours, and everyone has their tastes. Some people prefer it cheesy and without soup, while others prefer it soupier. you can find this dish every where you go in Bhutan. Can be easily clubbed with rice, fried rice, roti, puri, bread or as a snacks with your favourite drink.
Special recommendation for Ema Datshi recipe
Try to use Datshi, homemade cheese from cow’s or yak’s milk. If not available you can use blue cheese or gorgonzola cheese, fontina or brie might be good.
Try to use very spicy chilies as this dish is too spicy
You could top steamed Bhutanese red rice with it or serve on top of buckwheat noodles
Selecting the right ingredients for Ema Datshi recipe
This recipe and ingredients will serve 4.
Ingredients
Quantity
Tomato
1 large
Garlic
2 cloves
Green bell pepper
1
Jalapeno Pepper
1 large
Pasilla Chile(optional)
1
Serrano pepper
1 large
Small onion
1
Butter
2 tablespoon
Jack cheese
4 oz., cut into 1-inch cubes
Gorgonzola or other blue cheese
1 to 2 oz.
(Ema Datshi recipe)
How to cook Ema Datshi?
Slice up all the vegetables into strips and remove some of the seeds from the chilies for less heat if desired.
Slice the onions and the tomatoes too.
In a saucepan add the vegetables along with about one-quarter cup of water. Bring to a simmer, and cover and cook over low heat for about 10 minutes, or until the vegetables are cooked. It takes about 10 to 12 minutes for the sauce to be prepared.
Add the butter and the cheese cubes by placing on top of the vegetables. Cover the pot and simmer for just a couple more minutes, until the cheese is melted. Remove the lid and stir until combined, pour out onto a platter. Garnish with a few more blue cheese crumbles.
For more such delicious recipe do visit the below links:
Choosing the Right Chili Peppers for Ema Datshi recipe
Chili Peppers
Characteristics
Thai Green Chilies
Spicy and vibrant flavor
Thai Red Chilies
Intense heat with a hint of fruitiness
Jalapeños
Moderate heat and slightly sweet flavor
Incorporating Various Cheeses for Ema Datshi recipe
When it comes to incorporating different cheeses in your ema datshi, the possibilities are endless. Here are some cheese variations you can experiment with:
Feta cheese: Its tangy and salty flavor adds a delightful twist to the dish.
Cheddar cheese: The creamy and sharp flavor of cheddar pairs well with the spiciness of ema datshi.
Farmers cheese: This mild and soft cheese enhances the texture and creaminess of the curry.
What to Serve with Ema Datshi?
Ema datshi is a flavorful dish that pairs well with a variety of side dishes. To fully appreciate its deliciousness, it is best served with traditional Bhutanese red rice. This nutty-flavored rice has a slightly chewy texture that perfectly complements the spiciness of the ema datshi curry. The combination of the two creates a harmonious balance of flavors in every bite.
In addition to red rice, there are other side dish options that can enhance the ema datshi experience. One popular choice is daal, a lentil soup that adds a hearty, protein-rich element to the meal. The creamy consistency of daal helps counterbalance the boldness of the spicy curry. Another option is stir-fried vegetables, such as broccoli, carrots, and bell peppers. These fresh and vibrant veggies provide a refreshing contrast to the rich and spicy ema datshi.
No matter which side dishes you choose, they will add depth and variety to your ema datshi meal. Each bite becomes a symphony of flavors, bringing out the best in this beloved Bhutanese dish. Feel free to experiment and find your own perfect pairing to create a memorable dining experience.
Nutrition Value
Serving size – 1 bowl (300 g)
Calories – 275 cal, Fat – 18 g, Saturated fat – 11.3 g, Sodium – 850 mg, Total carbohydrates – 14 g, Sugars – 8 g, Protein – 14 g
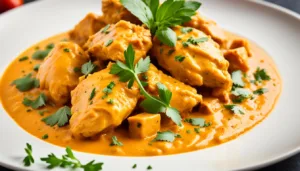
Whether you’re a fan of authentic Indian cuisine or simply looking to try something new, our homemade recipe is guaranteed to impress. Chicken butter masala recipe (Murgh Makhani) is one of the most popular curries in the world and yet happens to be one of the easiest! It’s made with spiced tomato and butter. The curry was developed at the Moti mahal restaurant in the Daryaganj neighbourhood of Old Delhi in the 1950s
Chicken marinated for several hours is either cooked in a tandoor, grilled, oven-roasted or even pan fried. Do try our recipe and enjoy the restaurant style dish at home with friend and family!
Special recommendation (Chicken butter masala recipe)
How can you serve the Chicken butter masala?
Fluffy Rice: Basmati rice or steamed jasmine rice provides a neutral base to soak up the flavorful sauce.
Buttery Naan: Garlicky or plain naan bread adds a soft and chewy texture that pairs well with the creamy curry.
Refreshing Raita: A side of yogurt-based raita with cucumber, mint, and spices offers a cool and tangy contrast to the richness of the dish.
Crunchy Papadums: These thin and crispy lentil crackers provide a delightful crunch and a touch of spiciness.
Side Salad: A simple salad with fresh greens, tomatoes, and onions can add a dose of freshness to your meal.
(Chicken butter masala recipe)
Choosing the right ingredients is important for Chicken butter masala recipe
Ingredients
Quantity
Chicken Thighs
1 kg skinless and boneless , cut into 1.5 inch pieces (or use bone-in Chicken pieces
Oil
1 tablespoon
Ingredients(for the marinade)
Quantity
Hung Curd
1/2 cup
Kashmiri chili powder
1 tablespoon
Coriander Powder
1 tablespoon
Turmeric
1/2 teaspoon
Ginger Garlic Paste
1 1/2 tablespoons
Garam Masala powder
1 teaspoon
Salt
1 teaspoon
Ingredients(for the gravy)
Quantity
Oil
1 tablespoon
Butter
1 tablespoon
Cinnamon
1 inch
Green Cardamom Pods
2
Cloves
3
Kashmiri Red Chillies dried chillies
5
Garlic Cloves
6
Onion roughly chopped
1
Cashew Nuts
1/4
Tomatoes roughly chopped
500 gms
Red Chilli Powder
1/2 teaspoon
Ketchup
2 tablespoons
Dried fenugreek leaves
1 tablespoons
Salt
to taste
Fresh cream
3-4 tablespoons
Ingredients for Chicken butter masala recipe
How to prepare?
Marinade
Mix all the ingredients under marinade, add the chicken and set aside for 30 minutes.
For the gravy
Heat 1 tablespoon oil and 1 tablespoon butter in a pan.
Add cinnamon, cardamom, cloves, whole red chilies and garlic and for a minute or so till fragrant.
Add onions and saute on high heat for 2-3 minutes till pink and translucent.
Now add tomatoes and cashew nuts. Mix once, reduce the flame to a simmer and cover and cook for 10-15 minutes till the tomatoes start breaking down and becoming pulpy.
Switch off the flame. Cool completely and transfer to a blender or liquidiser, and blend till smooth.
Final preparation (Chicken butter masala recipe)
In a pan heat a tablespoon of oil. Add the chicken pieces and sear them on each side for 2-3 minutes on high heat, till there is a char on them. Remove them from the pan and set aside.
Add the puree back to the pan, add chilli powder, ketchup, salt and ¼ cup water. Bring this to a boil and reduce the flame to low, and cover and cook for 15-20 minutes.
At this stage add the chicken pieces and simmer for 10 minutes. Stir in the kasuri methi and fresh cream.
To add a smoky flavour to it place a small steel bowl in the middle of the butter chicken while it’s still in the pan. Heat a piece of charcoal or lump coal on an open flame till red hot and then place it in the bowl. Pour a teaspoon of oil or ghee over it, and as soon as it starts smoking, cover the pan with a lid. Smoke for 3-4 minutes and remove the bowl.
Serve it according to your taste buds. You can choose any recommendation from above.
For more such appetizing dishes please do visit the below links:
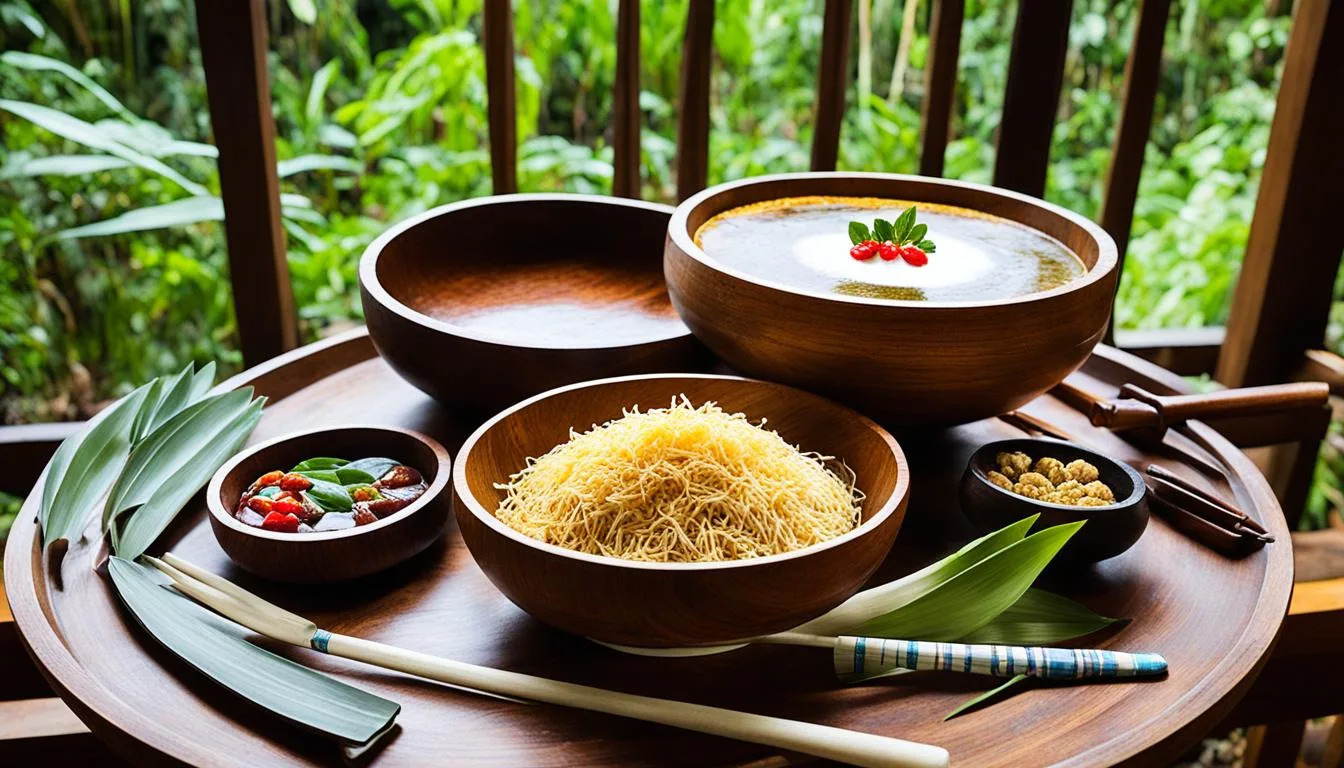
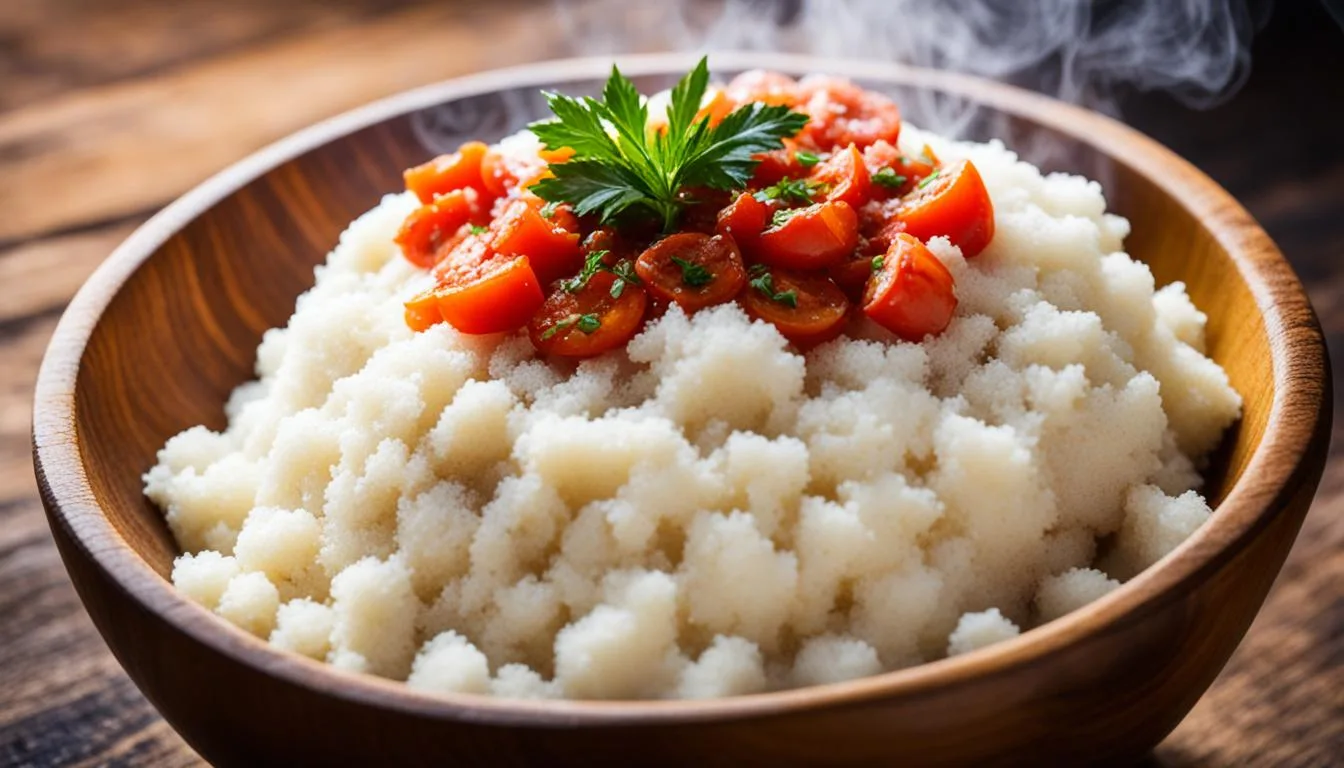
Welcome to our article on the ambuyat recipe, a traditional Bruneian delicacy that has gained popularity worldwide. Ambuyat is a unique dish made from the interior trunk of the sago palm and is a staple in Brunei’s culinary heritage. In this article, we will take you on a journey through the history and cultural significance of ambuyat, and provide you with a step-by-step guide on how to make this delightful dish at home.
Ambuyat is a dish derived from the interior trunk of the sago palm. It is a starchy bland substance, similar to tapioca starch. Ambuyat is the national dish of Brunei, and a local specialty in the Malaysian states of Sarawak, Sabah, and the federal territory of Labuan, where it is sometimes known as linut.
“Ambuyat is not just a dish; it’s a cultural experience. It embodies the essence of Brunei, its history, and the values we hold dear. Sharing a meal of ambuyat is a celebration of our heritage and our love for our land.” – Bruneian food enthusiast
Special Recommendation for Ambuyat Recipe
Making ambuyat involves specific tools and techniques to ensure the best results. To create this traditional Bruneian delicacy, you will need the following tools and equipment:
A large pot: This is used to cook the ambuyat mixture and create the desired texture.
A whisk or wooden spatula: These tools are essential for whisking the starch and water, ensuring a smooth and lump-free mixture.
A bamboo fork or “chandas”: This traditional eating utensil is used to pick up the viscous ambuyat and enjoy it with different dips and side dishes.
A serving plate or bowl: Ambuyat is typically served on a large communal plate or in individual bowls for each diner.
Special Ambuyat recipe
The Ooey Gooey Ingredients for Ambuyat Recipe
Ingredients
Quantity
Sago starch
1 lb
Water
2 1/2 cups
Thai chilli pepper
1
Shrimp paste
1 tablespoon
Dried shrimp
1 tablespoon
Durian sauce
1 tablespoon
Ingredients for Ambuyat Recipe
How to make it?
Add some cool water to the sago starch and set aside in a bowl for few minutes
Heat the water in the kettle and slowly pour the hot boiled water in the container with the starch.
If you feel the starch to be sticky, you can utilize a wooden spoon to start whisking it together. Once it is done, the Ambuyat will now be starchy and sticky.
Shrimp-flavoured tempoyak or Durian sauce needs to be prepared to be served with the ambuyat.
Crumble the dried shrimp with Thai chili pepper, you can use a mortar and pestle.
Then add the shrimp paste to the pepper mixture and minced shrimp. You need to sprinkle a bit of salt to taste. Transfer to a bowl and stir in a little hot water slowly to the durian and shrimp mixture.
Serve the Ambuyat dish of Brunei while still hot with the shrimp sauce for dipping. You can also enjoy this dish with vegetables, fried belutak, fried fish fillets, and sweet and sour sauces.
Sago plays a crucial role in the making of ambuyat. Its unique properties contribute to the texture and taste of this traditional Bruneian dish. Made from the interior trunk of the sago palm, sago starch is the key ingredient that gives ambuyat its signature smooth and gelatinous consistency.
Sago starch has a neutral flavour, allowing it to absorb the flavours of the accompanying sauces and side dishes. This makes ambuyat a versatile dish that can be enjoyed with a wide variety of flavours and ingredients. The texture of sago starch transforms into a sticky and viscous mass when mixed with water, creating the distinctive texture of ambuyat that is loved by locals and visitors alike.
Are you ready to embark on a culinary journey filled with aromatic spices and mouth-watering flavours? Look no further because we have the perfect recipe for you – an Authentic Mutton Biryani Recipe that is both easy to make and incredibly flavourful.
At Our Kitchen, we believe that cooking should be a joyous and satisfying experience. That’s why we have carefully crafted this step-by-step mutton biryani recipe to ensure that even novice chefs can recreate this traditional favourite with ease.
Whether it’s a festive occasion or a cozy family dinner, our authentic mutton biryani recipe is sure to impress your loved ones and become a staple in your culinary repertoire. So, let’s dive in and discover the magic of this beloved dish together.
(Authentic Mutton Biryani Recipe)
Special recommendation
Selecting the Best Mutton cuts for Flavourful Mutton Biryani Recipe
Shoulder: This cut is perfect for biryani as it contains a good amount of fat, which helps keep the meat tender and juicy during the cooking process.
Ribs: Lamb ribs are known for their rich flavor and are often used to add depth to the mutton biryani.
Leg: The leg of lamb or mutton is a popular choice for biryani due to its firm texture and flavorful meat.
Chops: Mutton chops are tender and flavourful, making them an excellent option for biryani.
What you need for Authentic Mutton Biryani Recipe
Ingredients
Quantity
Mutton
500g
Basmati Rice
2 cups
Onions, thinly sliced
2
Tomatoes, chopped
2
Yogurt
1/2 cup
Ginger-Garlic Paste
2 tablespoons
Biryani Masala
2 tablespoons
Cumin Powder
1 teaspoon
Cardamom Pods
4-5
Cinnamon Stick
1
Bay Leaves
2
Saffron Strands
A pinch
Coriander Leaves, chopped
A handful
Mint Leaves, chopped
A handful
Ghee
4 tablespoons
Salt
To taste
Water
4 cups
Marination Secrets for Tender Mutton
Marinating the mutton is a crucial step in preparing a tender and flavourful biryani. The right combination of spices and marinade ingredients can help tenderize the meat and infuse it with delicious flavours. Here are some marination secrets for achieving tender mutton:
Use yogurt: Yogurt acts as a natural tenderizer and helps to break down the proteins in the meat, resulting in a more tender texture. It also adds a tangy flavor to the mutton biryani.
Add acidic ingredients: Lemon juice, vinegar, or raw papaya can be added to the marinade to further tenderize the meat. These acidic ingredients help in the process of meat tenderization.
Spice it up: Use a combination of aromatic spices such as ginger, garlic, turmeric, red chili powder, and garam masala to enhance the flavor of the marinated mutton.
Allow time for marination: It’s essential to marinate the mutton for at least 2-4 hours, or overnight if possible. This allows the flavours to penetrate the meat and results in a more tender and flavourful biryani.
By following these marination secrets and selecting the best mutton cuts, you can ensure a biryani that is tender, flavourful, and truly satisfying.
Creating Your Biryani Masala from Scratch
Ingredients
Quantity
Kashmiri red chilli, dried
3
Bay leaf
7
Coriander seeds
2 tablespoons
Cumin
1 tablespoon
Caraway seeds
1 tablespoon
Mace
3
Cinnamon stick
2 inches
Nutmeg
1
Cloves
1 teaspoon
Black cardamom
3
Star anise
3
Cardamom
10
Pepper
1 tablespoon
Fennel
1 teaspoon
Turmeric
1/2 teaspoon
Preparation of biriyani masala for Authentic Mutton Biryani Recipe
firstly, in a thick bottomed pan dry roast 3 red chilli and 7 bay leaf till they turn crisp. keep aside.
further dry roast 2 tbsp coriander seeds, 1 tbsp cumin and 1 tbsp caraway seeds till they turn aromatic. keep aside.
also dry roast 3 mace, 2 inch cinnamon stick, 1 nutmeg, 1 tsp cloves, 3 black cardamom, 3 star anise, 10 cardamom, 1 tbsp pepper and 1 tsp fennel
transfer to a blender and allow to cool completely.
also add in ½ tsp turmeric.
blend to fine powder and transfer to the airtight container.
finally, store biryani masala powder in airtight container and use to prepare biryani.
Preparation Tips for Basmati Rice
Preparing basmati rice for biryani requires some extra care to ensure that it turns out fluffy, aromatic, and perfectly cooked. Here are some helpful tips to ensure your basmati rice is a success:
Soak the rice: Before cooking, it’s important to soak the basmati rice for at least 30 minutes. This helps to remove excess starch and allows the grains to cook evenly.
Rice to water ratio: For biryani, the ideal rice to water ratio is 1:1.5. This means for every cup of rice, use 1.5 cups of water. Adjust the quantity according to your recipe, but keep the ratio consistent for best results.
Cooking techniques: There are two popular methods for cooking basmati rice for biryani – the absorption method and the draining method. In the absorption method, the rice is cooked in just enough water, which is absorbed entirely during the cooking process. In the draining method, the rice is partially cooked, then drained of excess water to prevent overcooking.
Avoid overcooking: Basmati rice is delicate and can easily become overcooked and mushy. Keep a close eye on the cooking process and follow the recommended cooking time to achieve perfectly cooked rice.
Fluffing the rice: Once the rice is cooked, let it sit for a few minutes before fluffing it gently with a fork. This helps to separate the grains and prevent clumping.
Mutton Biryani Recipe: Step-by-Step Cooking Guide
Initial Preparations and Marinating Process
Before we dive into the cooking process, it’s essential to make the necessary preparations and marinate the mutton to enhance its flavours. First, gather all the ingredients listed in the recipe. Then, wash and clean the mutton pieces thoroughly. Next, in a mixing bowl, combine the mutton with yogurt, ginger-garlic paste, red chili powder, turmeric powder, garam masala, and salt. Mix well, ensuring that the mutton pieces are evenly coated with the marinade. Allow the mutton to marinate for at least 2 hours or preferably overnight in the refrigerator. This marinating process will tenderize the mutton and infuse it with aromatic flavours.
Cooking Mutton to Perfection
(Authentic Mutton Biryani Recipe)
When it comes to cooking mutton for biryani, achieving the perfect tenderness is crucial. In a large cooking pot, heat oil or ghee. Add whole spices like cinnamon, cloves, cardamom, and bay leaves to the hot oil. Once the spices release their aroma, add finely chopped onions and sauté until golden brown. This will give the mutton a rich and flavourful base. Now, add the marinated mutton and cook on medium-high heat until it changes colour and starts to release its juices. At this point, reduce the heat, cover the pot, and let the mutton simmer until it becomes soft and tender. This slow cooking process will ensure that the mutton is cooked to perfection, resulting in melt-in-your-mouth biryani.
The Art of Mutton Biryani Layering
Biryani Layer
Ingredients
Method
Rice Layer
Basmati rice, cooked
Spread a layer of cooked rice evenly at the bottom of the biryani pot.
Mutton Layer
Mutton, marinated and cooked
Add a layer of tender and flavourful mutton on top of the rice layer.
Fried Onions Layer
Fried onions, thinly sliced
Sprinkle a layer of fried onions on top of the mutton layer to add a caramelized flavor.
Herbs Layer
Cilantro, mint, chopped
Sprinkle a generous amount of fresh herbs on each layer to add a refreshing aroma.
Repeat
Repeat the layering process until all the rice, mutton, fried onions, and herbs are used.
Alternate between the different layers, creating a beautiful and flavorful biryani.
When it comes to elevating the flavours and aromas of mutton biryani, there are two ingredients that stand out: saffron and rose water. These aromatic touches add a unique and delightful sensory experience to the dish, making it truly special.
Saffron in Biryani:
Saffron, with its vibrant colour and intense flavor, is a prized spice that brings a touch of luxury to any dish, including biryani. This exquisite spice is derived from the delicate threads of the Crocus sativus flower, commonly known as the saffron crocus.
In mutton biryani, saffron is often used to add depth and complexity to the rice layer. Soaked in warm milk or water, the saffron infuses the grains with a beautiful yellow hue and a distinct earthy taste. Each bite becomes a fragrant celebration of flavours.
Rose Water in Biryani:
Rose water, derived from rose petals, has been used for centuries to add a delicate floral essence to various cuisines. In mutton biryani, a dash of rose water can transform the dish into a truly aromatic feast.
Adding rose water during the cooking process infuses the biryani with a subtle and delightful fragrance. As the dish simmers, the rose water blends harmoniously with the other spices and ingredients, creating a symphony of aromas that will captivate your senses.
Serving and Presentation of Your Mutton Biryani
Once your flavourful mutton biryani is ready, it’s time to serve and present it in a way that elevates the dining experience. The way you garnish, plate, and pair your biryani can make a significant difference in its overall appeal. Here are some tips to help you serve and present your mutton biryani in a memorable way:
Garnish with Fresh Herbs: Add a pop of freshness and colour to your biryani by garnishing it with fresh herbs like cilantro or mint. Simply chop the herbs and sprinkle them over the top of the biryani before serving.
Layer with Fried Onions: To enhance the flavor and visual appeal of your biryani, layer it with crispy fried onions. These golden, caramelized onions add a delightful crunch and sweetness to the dish.
Plating Techniques: When plating your mutton biryani, use a wide, shallow dish to showcase the layers of rice and meat. Be mindful of the rice-to-meat ratio, ensuring that each serving contains a generous amount of both.
Pairing Accompaniments: Complement your mutton biryani with a variety of accompaniments that enhance its flavours. Serve raita (a yogurt-based side dish) to cool down the spiciness, and add a squeeze of fresh lemon juice for a tangy twist. You can also serve it with a side of pickle or papad (Indian crispy flatbread) for added texture and taste.
Remember, the presentation of your mutton biryani is an opportunity to create a memorable dining experience. Take the time to garnish, plate, and pair it thoughtfully, and you’ll delight your guests with both the visual appeal and the delicious flavor of this traditional dish.
Welcome to our culinary adventure as we delve into the flavors of Barbados and explore the traditional Bajan dish, Cou Cou and Flying Fish recipe. This fish and cornmeal dish holds a special place in Barbadian cuisine, representing the rich cultural heritage and mouthwatering flavors that make Caribbean cuisine so beloved.
At the heart of this Bajan delight is the combination of tender flying fish and a smooth, polenta-like cornmeal cou cou. Together, they create a harmonious blend of textures and flavors that will transport you straight to the sun-soaked shores of Barbados.
Get ready to embark on a culinary journey that celebrates the traditions and flavors of Barbadian cooking.
Special recommendation for Cou Cou and Flying Fish Recipe
In Barbados, cou cou is often served alongside fish, particularly the famous flying fish, to create the iconic cou cou and flying fish dish. The flavors of the cou cou and fish complement each other, resulting in a delicious harmony of taste.
Traditionally, cou cou is served in a mound-like shape, with the fish arranged on top. The combination is often accompanied by a side of pickled cucumber and tomato salad, providing a refreshing contrast to the richness of the dish.
In case you do not have flying fish available, you can replace it with sea Bass.
The Uniqueness of Flying Fish in Barbadian Cuisine
What Makes Flying Fish Special?
Flying fish is a truly unique ingredient that holds a special place in Barbadian cuisine. Known for its distinct characteristics, flying fish adds a touch of authenticity to traditional Barbadian dishes. This agile fish is famous for its ability to glide above the water’s surface, making it a remarkable sight in the Caribbean seas.
The tender and delicate flesh of flying fish has a mild flavor with a hint of sweetness. Its firm texture holds up well in various cooking methods, whether it’s grilled, fried, or steamed. The flavor profile of flying fish perfectly complements the vibrant spices and ingredients found in Barbadian recipes, creating a harmonious blend of tastes.
Barbadians take great pride in this indigenous fish, considering it a symbol of their culture and identity. Flying fish represents the spirit of the Caribbean and is deeply intertwined with the country’s culinary heritage.
For some other lip smacking dishes do visit the below links:
To create the delicious cou cou and flying fish dish, you’ll need a range of ingredients that come together to form its unique flavors and textures. Here is an overview of the key components:
Ingredients for Cou Cou
Ingredients for Flying Fish
Yellow cornmeal
Water
Okra
Onion
Garlic
Thyme
Butter
Salt
Black pepper
Flying fish fillets
Lime juice
Seasoned flour
Vegetable oil
Onion
Garlic
Thyme
Scotch bonnet pepper
Salt
Black pepper
Guide to prepare the dish
Prepping the Seasonings and Sauces
Before we start cooking, let’s prepare the seasonings and sauces that will enhance the flavors of our cou cou and flying fish. Here’s what you need to do:
Finely chop the onions, garlic, thyme, and parsley.
In a small bowl, combine the chopped onions, garlic, thyme, and parsley.
Add salt, pepper, and other desired seasonings to the mixture. Mix well to create a flavorful seasoning blend.
In a separate bowl, combine the tomato paste, vinegar, and hot sauce to create a tangy sauce.
By prepping the seasonings and sauces beforehand, you ensure that the flavors have time to meld together, resulting in a more delicious final dish.
Cooking Techniques for the Perfect Dish
Now that the seasonings and sauces are ready, let’s move on to the cooking techniques that will bring our cou cou and flying fish to life. Follow these steps for a perfectly cooked dish:
Start by marinating the flying fish fillets in the tangy sauce we prepared earlier. Allow them to marinate for at least 30 minutes to soak in all the flavors.
In a deep pan, bring water to a boil and gradually add the cornmeal while continuously stirring. This ensures a smooth texture without any lumps.
Reduce the heat to low and continue stirring the cornmeal mixture until it thickens to a creamy consistency. This step requires patience, as it can take around 20 minutes. Make sure to stir consistently to prevent the mixture from sticking to the pan.
While the cou cou is cooking, heat a separate pan with oil and sauté the seasoned flying fish fillets until they are golden brown and cooked through.
Once the cou cou and flying fish are ready, plate them together for a stunning presentation. You can also garnish with fresh parsley or thyme for an added touch of flavor and aesthetics.
This dish serves as a culinary bridge, connecting generations and preserving cultural traditions. Passed down from one kitchen to the next, this dish carries the stories of our ancestors and the heritage of Barbados.
As younger generations learn to cook and appreciate Bajan cuisine, they become custodians of their cultural legacy. They carry forward the flavors, techniques, and secrets of traditional recipes, ensuring that the emotional connection to Bajan dishes endures. This generational connection is a testament to the
Enhancing Your Meal with a Traditional Drink
When enjoying the cou cou and flying fish dish, consider these traditional Bajan drinks that have been enjoyed for generations:
Rum Punch: Made with the finest Barbadian rum, tropical fruit juices, and a hint of spice, rum punch is a classic beverage to pair with the cou cou and flying fish. Its refreshing sweetness and bold flavors perfectly blend with the dish’s savory and rich taste.
Mauby: This unique Bajan drink is made from the bark of the mauby tree, infused with a variety of spices and sweetened to perfection. Its distinct flavor profile provides a delightful contrast to the flavors of the cou cou and flying fish, creating a harmonious balance.
Sorrel: A popular drink during festive seasons, sorrel is made from the petals of the sorrel flower, ginger, spices, and sweetened with sugar. Its tangy and vibrant taste complements the cou cou and flying fish, bringing a burst of flavor to every bite.
Golden Apple Juice: Made from the tropical golden apple fruit, this refreshing beverage provides a light and fruity accompaniment to the cou cou and flying fish. Its natural sweetness and crispness enhance the overall dining experience.
Welcome to our culinary journey as we explore the flavors of India with an authentic aloo dum recipe. Aloo dum, a popular Indian dish, is known for its rich flavors and simplicity. Whether you’re a novice or an experienced cook, this recipe is guaranteed to impress your taste buds and transport you to the vibrant streets of India.
The aloo dum recipe is known for its unique cooking technique called “dum.” This technique involves slow-cooking the dish in a sealed pot, allowing the flavors to infuse and intensify. The dum cooking method dates back centuries and originated in the royal kitchens of India. It was used to create rich, flavorful dishes that were fit for royalty.
Special recommendation for Aloo Dum Recipe
When selecting potatoes for aloo dum, it is important to choose the variety that holds its shape well during the cooking process.
This ensures that the potatoes remain firm and do not disintegrate, giving the dish a desirable texture. Some of the best potatoes for aloo dum include Yukon Gold, Idaho, or even red-skinned potatoes. These varieties are known for their starchy texture, making them ideal for absorbing the flavors of the dish while maintaining their integrity.
Whole spices, such as cardamom, cinnamon, cloves, and bay leaves, are integral to the authentic flavors of aloo dum.
Ingredients for the Perfect Aloo Dum Recipe
Ingredients
Quantity
Potatoes
4-5 medium-sized
Tomatoes
3-4 ripe
Onions
2 medium-sized
Whole Spices (cardamom, cinnamon, cloves, bay leaves)
5-6 pieces each
Cashews
1/4 cup
With these ingredients in your pantry, you’ll be well on your way to creating a delicious and authentic Aloo Dum recipe
Mastering the Aloo Dum Texture
One of the key aspects of aloo dum that sets it apart is its texture. Achieving the perfect balance of creaminess and tenderness in this popular Indian dish can take it to a whole new level. If you want to elevate your aloo dum game and impress your family and friends with a dish that has the ideal texture, follow these tips and techniques:
Choose the right potatoes: To achieve the desired texture, it is essential to select the right type of potatoes. Look for potatoes that are starchy and have a creamy texture when cooked.
Cooking method: The cooking method used can significantly impact the texture of your aloo dum. While some recipes call for deep-frying the potatoes before adding them to the gravy, others suggest sautéing them. Experiment with both techniques to find the one that gives you the desired texture.
Creamy consistency: To achieve a creamy consistency in your aloo dum, consider blending a portion of the cooked potatoes with the gravy. This will help thicken the sauce and give it a rich, velvety texture.
Simmering technique: Allow your aloo dum to simmer gently on low heat to allow the flavors to meld together and the potatoes to absorb the spices and gravy. This slow cooking process will help achieve a tender texture.
By following these tips and techniques, you can master the texture of your aloo dum and create a dish that is incredibly flavorful and satisfying. Experiment with different variations and cooking methods to find the perfect balance that suits your taste.
The Secret to Rich and Creamy Gravy Aloo Dum recipe
Another essential element of restaurant-style aloo dum is the creamy gravy that envelops the potatoes. Achieving this luxurious consistency requires careful attention to the cooking process.
To start, ensure that the tomato and onion purée is cooked until it reaches a smooth and silky texture. This step allows the flavors to develop and intensify, resulting in a luscious base for the gravy.
Next, add a generous amount of cashews to the purée. These nuts contribute to the richness of the gravy and lend a velvety smoothness. Their natural oils create a creamy texture that complements the soft potatoes perfectly.
To further enhance the creamy richness, consider adding a dollop of thick yogurt or heavy cream towards the end of the cooking process. This will add a luxurious touch and bring all the flavors together.
(Aloo Dum recipe)
For many other toothsome recipes please visit the below links:
When it comes to enjoying the rich flavors of aloo dum, choosing the right accompaniments can elevate your dining experience. Pairing this popular Indian dish with complementary side dishes can enhance the overall taste and provide a well-rounded meal. Here are some of the best accompaniments to serve with aloo dum:
Jeera Rice: The fragrant aroma of jeera rice, also known as cumin rice, pairs beautifully with the spicy and flavorful aloo dum.
Naan: Soft and pillowy naan bread is perfect for scooping up the delicious aloo dum gravy and savoring every bite.
Poori: These deep-fried, fluffy breads make a delightful combination with aloo dum, offering a satisfying crunch.
Paratha: Whether it’s plain paratha or stuffed paratha, the flaky texture of this Indian bread complements the velvety aloo dum gravy.
Raita: A refreshing and cooling side dish like cucumber raita or boondi raita can balance the heat of the aloo dum and add a creamy element to the meal.
Pickle: A tangy and spicy pickle, such as mango pickle or mixed vegetable pickle, can provide a zesty contrast to the richness of the aloo dum.
Papad: Crispy papad or poppadum adds a delightful crunch to the meal and offers a contrasting texture to the creamy aloo dum.
By serving these popular Indian side dishes alongside your aloo dum, you can create a truly memorable and satisfying dining experience. Experiment with different combinations to find your favorite pairing and enjoy the explosion of flavors on your plate.
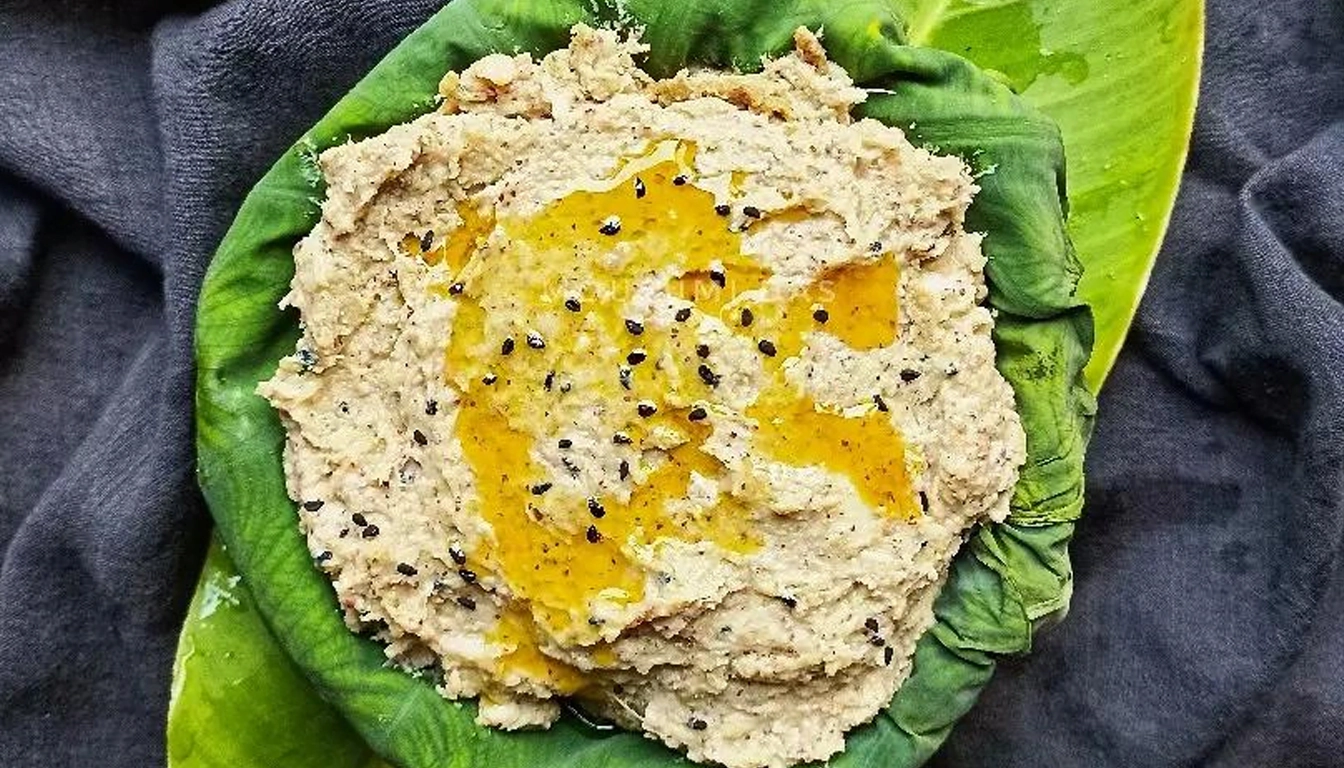
Welcome to our article on the delicious Kochu Bata recipe, a Bengali delicacy that will surely add a burst of flavor to your meals. As we explore this easy-to-follow recipe, get ready to embark on a culinary journey that showcases the unique tastes of Bengal. Whether you’re a seasoned cook or a beginner, this side dish recipe is perfect for home cooking.
Kochu Bata is a traditional Bengali dish that holds a special place in Bengali cuisine. It is a monsoon favorite, known for its unique flavors and versatility. Kochu Bata adds a touch of authenticity and spice to any meal, making it a must-try recipe for food enthusiasts.
Special recommendation for Kochu Bata Recipe
Use Maan Kochu, also known as Malanga Coco or Taro Root, as the main ingredient for Kochu Bata Recipe. Maan Kochu is a seasonal vegetable that adds a distinct flavor and texture to the dish. The process of preparing Kochu Bata involves grating the Maan Kochu and combining it with other spices and ingredients to create a flavorful paste.
Use raw mustard oil for garnishing at the end
Kochu bata with rice
Variety
Seasonality
Taste
Sreedevi
Monsoon
Delicate, slightly sweet
Prajanma
Monsoon
Robust, earthy
Radhika
Monsoon
Distinctive, nutty
The Traditional Cooking Method for Kochu Bata Recipe
In the preparation of Kochu Bata, tradition plays a significant role. The process of making this Bengali delicacy has evolved over the years, with the introduction of modern kitchenware and cooking techniques. Let us explore the traditional cooking method for Kochu Bata and the transition from using traditional tools like Shil-Nora to contemporary kitchenware.
From Shil-Nora to Modern Kitchenware (Kochu Bata Recipe)
In the past, the primary tool used to make Kochu Bata was the Shil-Nora, a traditional grinding stone made of granite or other sturdy materials. This tool consisted of a flat surface and a cylindrical rolling pin-like object. The Maan Kochu (Taro Root) was manually ground on the stone to create a fine paste.
Today, with the advent of modern kitchenware, home cooks have various appliances at their disposal to simplify the process. Electric blenders and food processors have replaced the labor-intensive grinding process, making it quicker and more convenient to prepare Kochu Bata.
Boiling vs. Pan-Roasting Techniques
When it comes to cooking Kochu Bata, two popular techniques stand out: boiling and pan-roasting. Each method imparts a distinct flavor and texture to the dish.
Boiling Technique:
In the boiling technique, the Maan Kochu is peeled, chopped, and boiled until tender. Once cooked, the taro roots are drained and mashed to create a smooth paste. This method is ideal for a softer and creamier texture in the final dish.
Pan-Roasting Technique:
The pan-roasting technique involves roasting the peeled and chopped Maan Kochu on a dry pan until it turns golden brown. This process intensifies the flavor of the taro root and adds a nutty aroma to the paste. The roasted roots are then ground into a paste, resulting in a slightly chunkier texture.
Both techniques have their unique charm, and the choice between them depends on personal preference and the desired texture in Kochu Bata.
Essential Ingredients for a Mouthwatering Kochu Bata Recipe
To create a mouthwatering Kochu Bata, there are a few essential ingredients that you’ll need. These ingredients are the key to achieving the mouthwatering flavor and traditional taste that make Kochu Bata a beloved Bengali delicacy.
Let’s take a look at the essential ingredients:
Maan Kochu (Malanga Coco) – also known as Taro Root, this vegetable forms the base of the Kochu Bata paste, lending its unique flavor and texture.
Traditional Spices – a blend of flavorful spices like cumin seeds, coriander seeds, red chili powder, and turmeric powder adds depth and complexity to the dish.
Mustard Oil – an indispensable ingredient in Bengali cooking, mustard oil enhances the flavor and authenticity of Kochu Bata.
By combining these essential ingredients, you’ll be able to create a Kochu Bata that is bursting with mouthwatering flavor and tantalizing aroma. The traditional spices and the distinctive taste of mustard oil will transport you to the heart of Bengal with every bite.
Preparing the Perfect Kochu Bata
Cleaning and Grating Maan Kochu
Before you can start preparing the perfect Kochu Bata, it is crucial to ensure that your Maan Kochu is clean and ready to be transformed into a delicious paste. Start by washing the Maan Kochu thoroughly under running water to remove any dirt or impurities. Use a vegetable brush to scrub the surface gently, paying special attention to the crevices and rough areas. Once clean, pat it dry with a clean kitchen towel.
Next, it’s time to grate the Maan Kochu. Select a grater with small holes to achieve the desired texture for your paste. Hold the Maan Kochu firmly in one hand and use the other to grate it against the grater’s surface. Be cautious of your fingers and maintain a steady grip to ensure a consistent and even grating. Continue until the entire Maan Kochu is grated and ready for the next step.
A Step-by-Step Guide to Making Kochu Bata Recipe
In this section, we will provide you with a step-by-step guide to making Kochu Bata, ensuring that you can recreate this flavorful Bengali dish with ease. From cooking techniques to essential tips, we have got you covered.
Cooking on Medium Heat: Techniques and Tips
When it comes to cooking Kochu Bata, using medium heat is key to achieving the perfect balance between flavor and texture. Here are some techniques and tips to keep in mind:
Start by heating a pan on medium heat and adding mustard oil. Allow the oil to heat up before proceeding.
Add the grated Maan Kochu and cook it slowly, stirring continuously to ensure even cooking. This gentle cooking process helps to unlock the flavors of the ingredients.
Be patient and avoid rushing the cooking process. Cooking on medium heat allows the flavors to meld together and prevents the spices from burning.
Keep a close eye on the Kochu Bata while it’s cooking. Stir frequently to prevent sticking and ensure that it cooks evenly.
Feel free to adjust the cooking time based on your preference for the final consistency. If you like a smoother texture, cook for a longer time. For a chunkier Kochu Bata, cook for a shorter time.
Knowing When Your Kochu Bata is Ready
Determining the doneness of your Kochu Bata is crucial to achieving the desired flavors. Here are some indicators to help you know when your Kochu Bata is ready:
Texture: The grated Maan Kochu should become soft and translucent while retaining its shape. It should no longer have a raw, crunchy texture.
Color: The color of the Kochu Bata will deepen as it cooks, turning into a rich golden hue.
Aroma: The aromatic blend of spices and mustard oil will permeate the air, indicating that the flavors have developed.
Taste: With a little taste test, you will be able to tell if the Kochu Bata has reached the desired level of spiciness and seasoning. Adjust the flavors accordingly if needed.
(Kochu Bata Recipe)
How to Present Kochu Bata on Your Dining Table
When it comes to presenting Kochu Bata, visual appeal plays a significant role. Consider the following presentation ideas:
Traditional Thali: Serve Kochu Bata in the center of a traditional Thali, surrounded by bowls of complementary dishes and a side of fragrant rice.
Garnish with Fresh Herbs: Sprinkle freshly chopped cilantro or mint leaves on top of the Kochu Bata to add a vibrant pop of color and freshness.
Artistic Plating: Use a ring mold to create a beautifully plated Kochu Bata on a rectangular dish, drizzling mustard oil in an elegant design.
By following these serving suggestions and presentation ideas, you can elevate your dining experience with Kochu Bata, impressing your guests and enjoying the authentic flavors of this Bengali delicacy.
For more such mouth-watering recipes do visit the below links:
Kochu bata is a good source of carbohydrates and dietary fiber. It also contains vitamins and minerals, including vitamin C, vitamin A, potassium, and magnesium. However, it should be noted that kochu(Taro) contains oxalates, which can cause irritation in the mouth and throat if consumed raw.
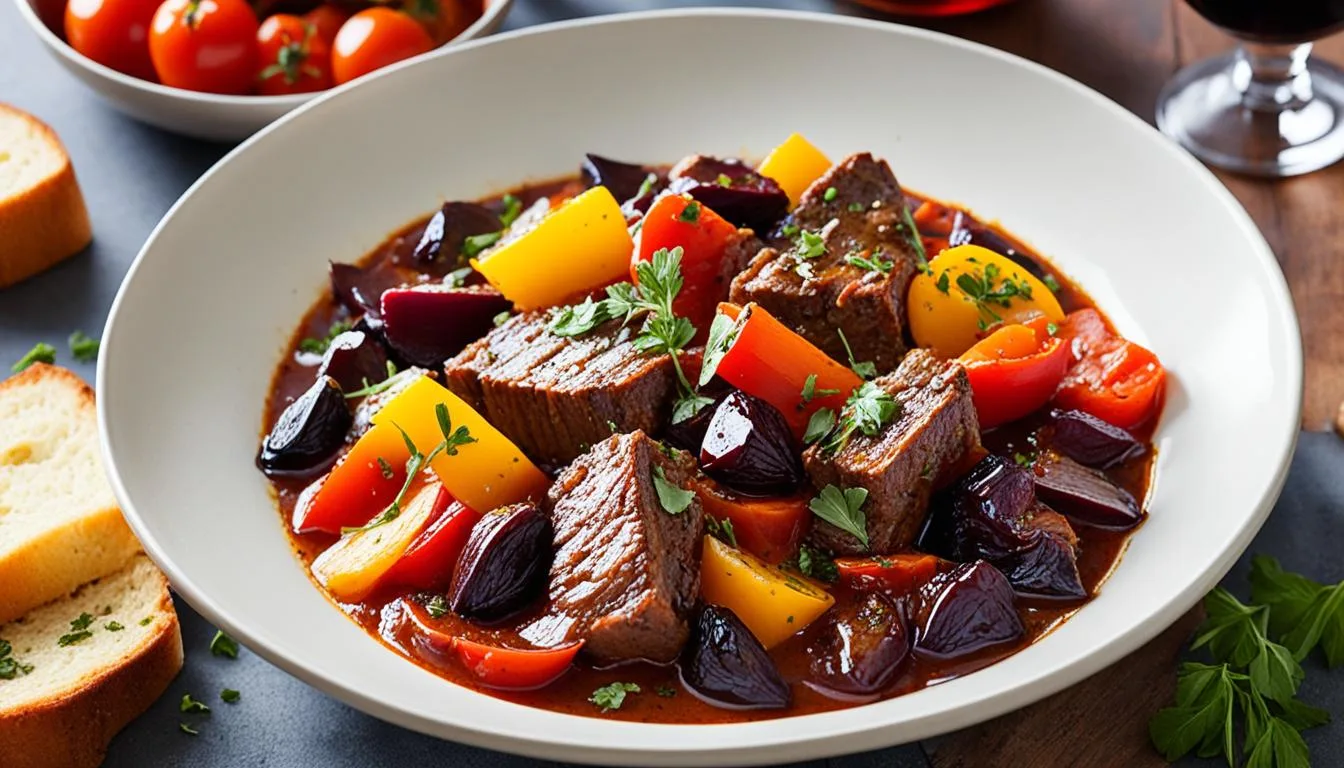
Dalmatian Pasticada Recipe is by far the best known and most traditional dish that reminds you of Dalmatia. It is interesting that not only every city has its own version or the method of preparation, but the recipes vary from household to household.
Pašticada is a Dalmatian specialty whose roots date back to the ancient Greek and Roman cuisine. This dish is listed in the List of Croatian gastronomic heritage. The preparation is very complex, you have to stuff the meat first, marinate overnight, and then cook it for hours. But it is worth it.
Whether enjoyed at a local tavern or prepared at home, Pasticada stew offers a truly authentic taste of Dalmatian cuisine. Its rich flavors and tender meat make it a cherished dish among locals and a must-try for visitors to the region.
(Pasticada Recipe)
Special recommendation for Pasticada Recipe
When marinating Pasticada, it’s important to choose the right cut of beef. Look for cuts that are well-marbled with fat, such as beef chuck or round roast for Pasticada Recipe. These cuts have enough fat content to keep the meat moist and tender during the slow cooking process. Avoid lean cuts of beef, as they can become dry and tough when marinated and cooked for an extended period.
Vinegar plays a significant role in tenderizing the beef and enhancing the flavors of Pasticada. It acts as a natural meat tenderizer by breaking down the connective tissues and proteins in the beef, resulting in a more tender and juicy texture. Additionally, vinegar helps to balance the flavors of the marinade and adds a subtle tang to the dish.
Use red wine vinegar or apple cider vinegar for a rich and robust flavor in your Pasticada marinade. Recommended for Pasticada Recipe
Allow the cooked beef to rest for a few minutes before slicing. This helps retain the juices and ensures a succulent texture.
Use a sharp knife to make clean, thin slices. Aim for uniform thickness to ensure consistent cooking throughout.
Slice against the grain to maximize tenderness. The grain refers to the lines visible on the surface of the meat.
The image above visualizes the rich history of Pasticada, showcasing its significance in Croatian gastronomic heritage.
Choosing the Perfect Cut of Beef
When marinating Pasticada, it’s important to choose the right cut of beef. Look for cuts that are well-marbled with fat, such as beef chuck or round roast. These cuts have enough fat content to keep the meat moist and tender during the slow cooking process. Avoid lean cuts of beef, as they can become dry and tough when marinated and cooked for an extended period.
Ingredients for Your Pasticada Recipe
Ingredients
Quantity
Beef
2 pounds (900 grams)
Red wine vinegar
1 cup
Carrots
2
Onions
2
Celery stalks
2
Garlic cloves
4
Bacon slices
4
Prunes
10
Bay leaves
3
Dried rosemary
1 tablespoon
Dried thyme
1 tablespoon
Olive oil
3 tablespoons
Salt
To taste
Black pepper
To taste
Cooking Your Dalmatian Pasticada
(Pasticada Recipe)
First, begin by browning the meat in a hot skillet. This step is essential for enhancing the depth of flavors and creating a rich, caramelized exterior on the beef.
Once the meat is browned, it’s time to add the marinade and flavors that will infuse the Pasticada with its distinctive taste. Slowly simmer the meat with red wine, vinegar, garlic, cloves, and various spices. Allow the flavors to meld together as the stew simmers over low heat, gradually transforming the simple ingredients into a culinary masterpiece.
The slow cooking process is crucial in achieving tender and succulent meat. The meat should be cooked until it becomes fork-tender, allowing it to melt in your mouth with each bite.
As the Pasticada cooks, your kitchen will be filled with the delightful aroma of the marinade and spices, building anticipation for the upcoming feast.
To further enhance the flavors, consider adding a touch of sweetness and acidity to the stew. Some variations of Pasticada include the addition of prunes or dried figs, which contribute to the sweet and sour balance of the dish.
Once the cooking process is complete, remove the tender meat from the flavorful sauce and let it rest for a few minutes. This will allow the juices to redistribute and ensure that every bite is moist and juicy.
Serving and Presentation: Plating Your Pasticada
The presentation of Pasticada plays a crucial role in enhancing the overall dining experience. To create an appetizing and visually appealing dish, careful attention must be paid to plating. There are two key aspects to consider: slicing the meat and arranging it on the plate, and dressing up your Pasticada with homemade gnocchi and sauce.
For more such delicious recipe please do visit the below links:
The history of Pasticada can be traced back to ancient times when Greek and Roman civilizations flourished. The dish was born out of the rich flavors, ingredients, and cooking techniques that characterized these ancient cultures. Over time, Pasticada developed its unique identity and became synonymous with Dalmatian cuisine.
To fully understand the ancient roots of Pasticada, we need to explore the traditions, ingredients, and cooking methods of this bygone era. By doing so, we gain insight into the authentic flavors and culinary heritage that have been preserved throughout history.
Nutrition value
Magnesium mg 96.5 Phosphor mg 556.02 Potassium mg 1360.21 Niacin mg 21.51 154 Vitamin C mg 23.7 Vitamin D μg 26.84 Vitamin A μg 4858.94 Salt g 2.61 Total proteins g 63.57 Diet fibres g 4.31 Total carbohydrates g Total fat g 37.1
Danish open faced sandwiches, known as smorrebrod, are an integral part of Danish food culture. These delectable sandwiches are not only a feast for the taste buds but also a reflection of the rich food traditions and artistic presentation that the Danish people are proud of.
In this article, we will guide you through the world of smorrebrod, from the essential ingredients to crafting the perfect spreads, selecting diverse toppings, and mastering the art of layering. We’ll also provide a step-by-step guide to preparing your very own smorrebrod at home.
So, get ready to tantalize your senses and experience the true essence of Danish cuisine as we explore the delightful world of authentic smorrebrod!
Special recommendation for Danish Open Faced Sandwiches
Topping
Description
Explore a wide range of toppings including roast beef, smoked salmon, pickled herring, fresh vegetables, and creamy cheeses. Let your creativity soar and mix and match to create the perfect open-faced sandwich.
Essential Ingredients for a True Smorrebrod Experience
A true Smorrebrod experience is marked by the use of fresh, high-quality ingredients. Traditional Danish dishes, such as pickled herring, smoked salmon, liver pate, and roast beef, are often featured as toppings. Accompanied by an array of flavorful spreads, herbs, vegetables, and garnishes, these ingredients come together to create a symphony of tastes and textures on a foundation of hearty Danish rye bread.
Exploring the world of Smorrebrod is a journey through the diverse flavors and culinary traditions of Denmark. Each bite offers a delightful combination of sweet, savory, tangy, and spicy flavors, harmoniously arranged to tantalize the taste buds and celebrate the art of Danish cuisine.
Crafting the Perfect Spreads: From Butter to Creative Toppings
In addition to the delicious base of rye bread, a key element in creating the perfect smorrebrod is the spread. The spread not only enhances the flavors of the toppings but also adds a creamy and smooth texture to each bite. Whether you prefer a classic butter spread or want to explore more creative options, there are plenty of choices to elevate your open-faced sandwiches.
Classic Butter Spread and its Significance in Smorrebrod
The classic butter spread is a staple in Danish open-faced sandwiches, and its significance cannot be overstated. The smooth and creamy butter is the foundation upon which the other toppings are built. It provides a rich and velvety texture while enhancing the flavors of the meat, fish, or vegetables that accompany it. Danish butter, known for its high fat content, ensures a luscious and indulgent experience on every smorrebrod.
Pate and Spreads that Elevate Your Sandwich
While the classic butter spread is beloved, there are endless possibilities to take your smorrebrod to a new level of deliciousness.
Spread
Classic Butter Spread
Pate
Herb-Infused Creams
Tangy Mustard Sauces
Creamy Avocado Spreads
Ingredients of Danish Open Faced Sandwiches
For more such finger licking recipes please click below:
Topping Varieties: Meat, Fish, and Vegetarian Options
For meat lovers, smorrebrod offers an array of delicious options. Thinly sliced roast beef, pork loin, or Danish liver pate are popular choices that add a rich and savory element to the sandwich. Smoked meats such as ham or mackerel provide a smoky and distinctive flavor profile. And for those looking for a taste of traditional Danish cuisine, try topping your smorrebrod with hot dog slices, meatballs, or even cured herring.
For seafood enthusiasts, fish options for smorrebrod are abundant. Smoked salmon, known as “røget laks” in Danish, is a classic and elegant topping choice that pairs perfectly with cream cheese, dill, and lemon. Other popular fish toppings include pickled herring, shrimp, and marinated mackerel. These fish options not only add a burst of flavor but also provide a refreshing and light element to the smorrebrod.
Vegetarians need not worry, as there are plenty of delicious options for them as well. From fresh vegetables such as tomatoes, cucumbers, and radishes to creamy cheeses like brie and Danish blue, the possibilities for vegetarian smorrebrod are endless. Consider topping your open-faced sandwich with avocado, hummus, or even pickled beets for a burst of tangy sweetness.
The Art of Layering: Constructing Your Danish Open Faced Sandwiches
When it comes to crafting the perfect Danish open faced sandwich, layering is key. Each layer contributes to the overall flavor and texture of the smorrebrod, creating a harmonious and satisfying eating experience. In this section, we will explore the art of layering and the importance of balancing flavors and textures to create visually appealing smorrebrod.
Balancing Flavors and Textures
Layering smorrebrod involves carefully selecting ingredients that complement each other, creating a symphony of flavors. It’s important to balance different tastes, such as sweet, savory, tangy, and salty, to create a well-rounded and delicious sandwich. Consider combining contrasting flavors, like the richness of smoked salmon with the freshness of dill and lemon, or the creaminess of avocado with the crunch of radishes.
Texture also plays a crucial role in layering smorrebrod. Aim for a balance of soft and crisp elements by incorporating ingredients like creamy spreads, crunchy vegetables, and crispy toppings. The contrast in textures adds depth and interest to each bite, elevating the overall enjoyment of the sandwich.
Danish Open Faced Sandwiches
Preparation Tips for Danish Open Faced Sandwiches
To ensure a successful smorrebrod preparation, keep the following tips in mind:
Start with fresh, high-quality ingredients to maximize flavors.
Have all the necessary ingredients and spreads ready before assembling.
Prepare the toppings in advance to save time during assembly.
Slice the bread evenly to create a sturdy base for the toppings.
Keep the spreads and toppings refrigerated until ready to assemble.
Designate a clean and spacious work area for assembling the smorrebrod.
By following these preparation tips, you’ll ensure a seamless experience and reduce stress during the assembly process.
Assembling the Smorrebrod – Danish Open Faced Sandwiches
When it comes to assembling smorrebrod, precision and care are crucial. Here’s a step-by-step guide:
Place a slice of bread on a clean plate or board.
Spread a thin layer of butter or other spread on the bread to enhance the flavors.
Add your desired toppings, arranging them in an appealing and balanced manner.
Garnish the smorrebrod with fresh herbs or other decorative elements for an aesthetic touch.
Repeat the process with additional slices of bread and different toppings to create a variety of smorrebrod.
Beverages and Side Dishes
When enjoying the delightful flavors of smorrebrod, it’s essential to consider the perfect beverage pairing and side dishes to elevate your dining experience. Whether you prefer a refreshing Danish beer or a glass of aquavit, we have you covered. Additionally, complementing your open-faced sandwiches with side dishes will create a complete and satisfying meal.
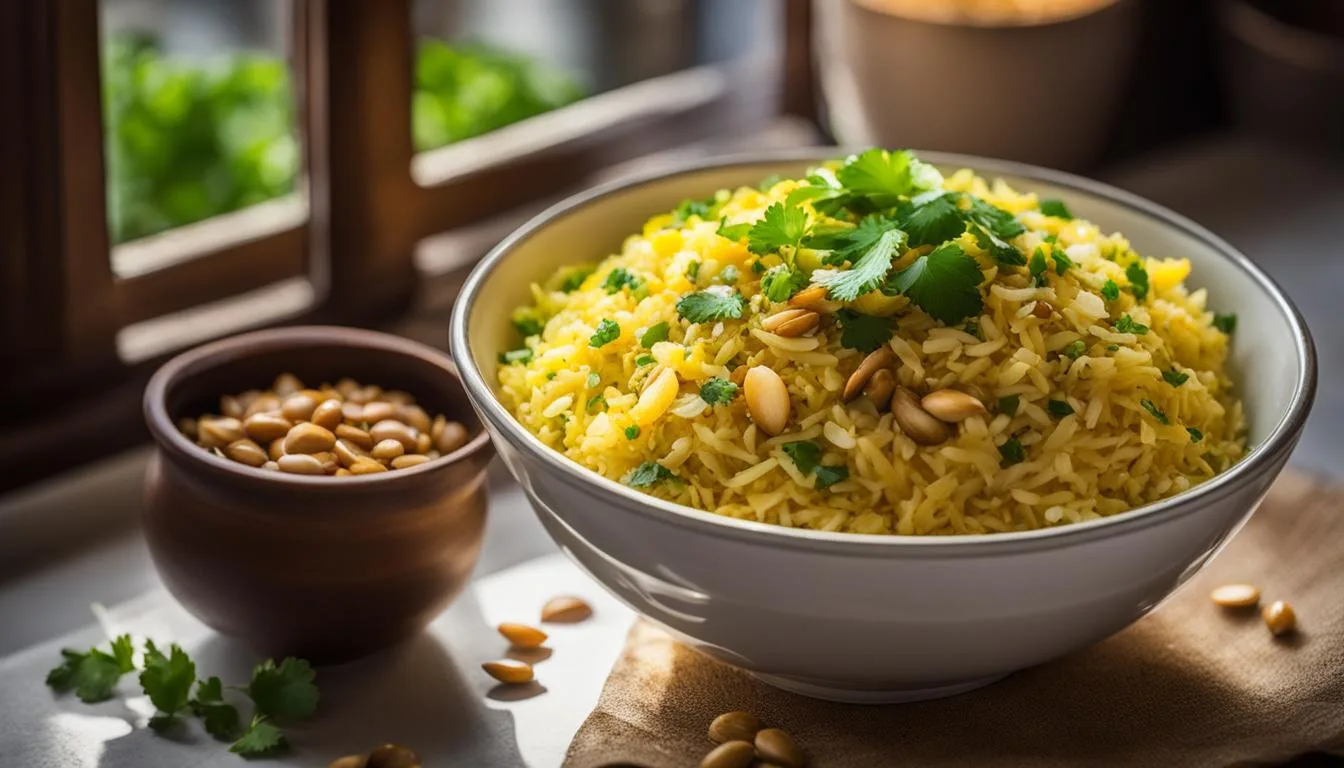
In this article, we will explore an easy poha recipe that is a traditional Indian breakfast. Poha, also known as flattened rice, is a popular breakfast option in India, loved for its simplicity and delicious flavors. Whether you’re looking for a quick and healthy breakfast, a vegetarian option, or a simple and satisfying meal, poha ticks all the boxes.
Made with ingredients like onions, potatoes, spices, and flattened rice flakes, poha can be easily customized to suit your taste preferences and dietary needs. It’s a versatile dish that can be enjoyed by people of all ages, and it’s perfect for busy mornings when you need something quick and nutritious to start your day.
Special recommendation
You can pair you plate full of poha with the below accompaniments:
Yogurt: The creamy and cooling effect of yogurt complements the spiciness of poha, creating a harmonious balance of flavors.
Chutney: Whether it’s a tangy coconut chutney or a spicy green chutney, adding a dollop of chutney enhances the taste of poha.
Pickle: The tangy and sour taste of pickles adds a punch of flavor to every bite of poha, making it a perfect combination.
Papad: Crispy and crunchy papads offer a delightful texture contrast to the softness of poha, making it a satisfying meal.
Sev: Sprinkling some sev on top of poha not only adds a delightful crunch but also enhances the visual appeal of the dish.
Delving into the Flavors of Easy Poha Recipe
What is Poha?
In order to understand the versatility of poha, let’s first explore what this traditional Indian recipe entails. Poha, also known as flattened rice, is a popular dish that is commonly enjoyed for breakfast in India. It is made by processing rice into flattened flakes, resulting in a light and easily digestible ingredient.
The Use of Flattened Rice in Poha
Flattened rice, or poha, is made by parboiling rice grains and then drying them before flattening them into thin flakes. These flakes can be easily rehydrated and cooked to create a soft and fluffy texture. Poha is an essential ingredient in poha recipes, providing a delicious and satisfying base for the dish.
Ingredients for Poha recipe
Ingredients
Quantity
Flattened rice
1 cup
Finely chopped onion
1 medium
Boiled and diced potato
1 small
Finely chopped green chili
1
Mustard seed
1 teaspoon
Turmeric powder
1/2 teaspoon
Curry leaves
Handful
Peanuts
1/4 cup
Oil
2 tablespoons
Salt
To taste
Coriander leaves
few chopped for garnishing
Preparation of Poha
Rinse the flattened rice: Place the flattened rice in a colander and rinse it under cold water for a few seconds. Gently fluff the rice with your fingers to separate any clumps. Set it aside to drain.
Prepare the tempering: Heat oil in a pan over medium heat. Add mustard seeds and let them splutter. Then, add the curry leaves, green chili, and peanuts. Sauté them for a minute until the peanuts turn golden brown.
Add the onions: Add the finely chopped onions to the pan and sauté until they turn translucent.
Season with spices: Sprinkle turmeric powder and salt over the sautéed onions. Mix well to evenly coat the onions with the spices.
Add the potatoes: Now, add the boiled and diced potatoes to the pan. Gently mix everything together.
Combine with flattened rice: Add the rinsed flattened rice to the pan. Using a light hand, mix all the ingredients together until the flattened rice is well-coated with the spices.
Cook until heated through: Cover the pan and let the poha cook for 2-3 minutes on low heat, allowing all the flavors to meld together.
Garnish and serve: Remove the lid and give the poha a final mix. Garnish with freshly chopped coriander leaves. Your homemade poha is now ready to be served!
Enjoy your delicious homemade poha for a satisfying breakfast or snack. It’s a versatile dish that can be enjoyed on its own or paired with a hot cup of masala chai. Bon appétit!
For more such delicious recipes please click below:
Welcome to our blog post on a homemade potato dumplings recipe, the epitome of cozy comfort food. There’s nothing quite like indulging in a warm bowl of potato dumplings during the colder months or enjoying them as a comforting family dinner. Whether you’re looking for a delicious and satisfying meal or seeking a taste of nostalgia, potato dumplings are sure to hit the spot.
Homemade potato dumplings are a cozy comfort food, perfect for colder months.
Enjoy the satisfying and comforting nature of potato dumplings.
Potato dumplings have a rich heritage in German cuisine.
Choose the right ingredients to make flavorful potato dumplings.
Follow our step-by-step guide for foolproof potato dumplings.
(Potato Dumplings Recipe)
Special recommendation
Choose the right potatoes: Opt for starchy potatoes like Russets or Yukon Golds. They have a higher starch content, which helps create light and fluffy dumplings.
Avoid overworking the dough: When mixing the potato and flour mixture, be gentle. Overworking the dough can make the dumplings tough and dense.
Adjust the dough consistency: Make sure to add enough flour to the dough to prevent it from being too sticky. The right consistency is crucial for shaping and cooking the dumplings.
Test the dumpling consistency: Before cooking all the dumplings, test one in simmering water to ensure it holds its shape. If it falls apart, add more flour to the dough.
Use a light touch when shaping: When rolling the dumplings, use a light touch. Pressing too hard can lead to dense dumplings instead of light and airy ones.
Cook in simmering liquid: Rather than boiling the dumplings vigorously, cook them in gently simmering water or broth. This helps maintain their shape and texture.
Give them time to cook: Dumplings need adequate cooking time to become fully cooked and tender. Resist the temptation to rush the process.
Enjoy leftovers in a new way: If you have leftover potato dumplings, pan-fry them with butter for a crispy and delicious alternative.
Gathering Your Ingredients for Potato Dumplings
In order to make delicious potato dumplings, it’s important to gather the right ingredients. From selecting the best potatoes to choosing the right binders and spices, each component plays a crucial role in creating dumplings that are full of flavor and have the perfect texture.
When selecting potatoes, look for ones that are firm and smooth without any sprouting or green patches. These imperfections can affect the taste and texture of the dumplings. Additionally, choose potatoes that are medium to large in size, as they are easier to work with when mashing and forming dumplings.
For more such lip smacking recipes please do click below
Peel and dice the potatoes. Place them in a large pot of boiling water and cook until fork-tender, approximately 15-20 minutes.
Drain the potatoes and allow them to cool slightly before transferring them to a large mixing bowl. Use a potato masher or fork to mash the potatoes until smooth.
In a separate bowl, combine the flour, eggs, salt, and nutmeg. Mix well until a sticky dough forms.
Add the dough to the mashed potatoes and gently knead until well combined.
Dust your hands with flour to prevent sticking. Take a small portion of the dough and roll it into a ball, approximately 1-2 inches in diameter.
Repeat the rolling process with the remaining dough, placing the formed dumplings onto a lightly floured surface.
In a large pot, bring water to a gentle simmer. Carefully drop the dumplings into the simmering water and cook for 10-15 minutes or until they float to the surface.
Remove the dumplings from the water using a slotted spoon and serve immediately with your favorite sauce, gravy, or soup.
Enjoy these homemade potato dumplings as a hearty side dish or as the main attraction in a comforting meal. The creamy texture and rich flavor will surely satisfy your taste buds.
Potato Dumplings recipe
Potato Dumplings Recipe tips and tricks
Tips for Achieving the Perfect Texture
Choose starchy potatoes (such as Russet or Yukon Gold)
Mash potatoes thoroughly to a smooth consistency
Balance the moisture: avoid adding too much liquid
Form the dumplings gently and avoid applying excessive pressure
Cook dumplings until they float and avoid overcooking
There you have it! With these tips and tricks, you’ll be able to achieve the perfect texture for your potato dumplings every time. Enjoy the light, fluffy goodness that will elevate your dining experience and leave your taste buds craving more.
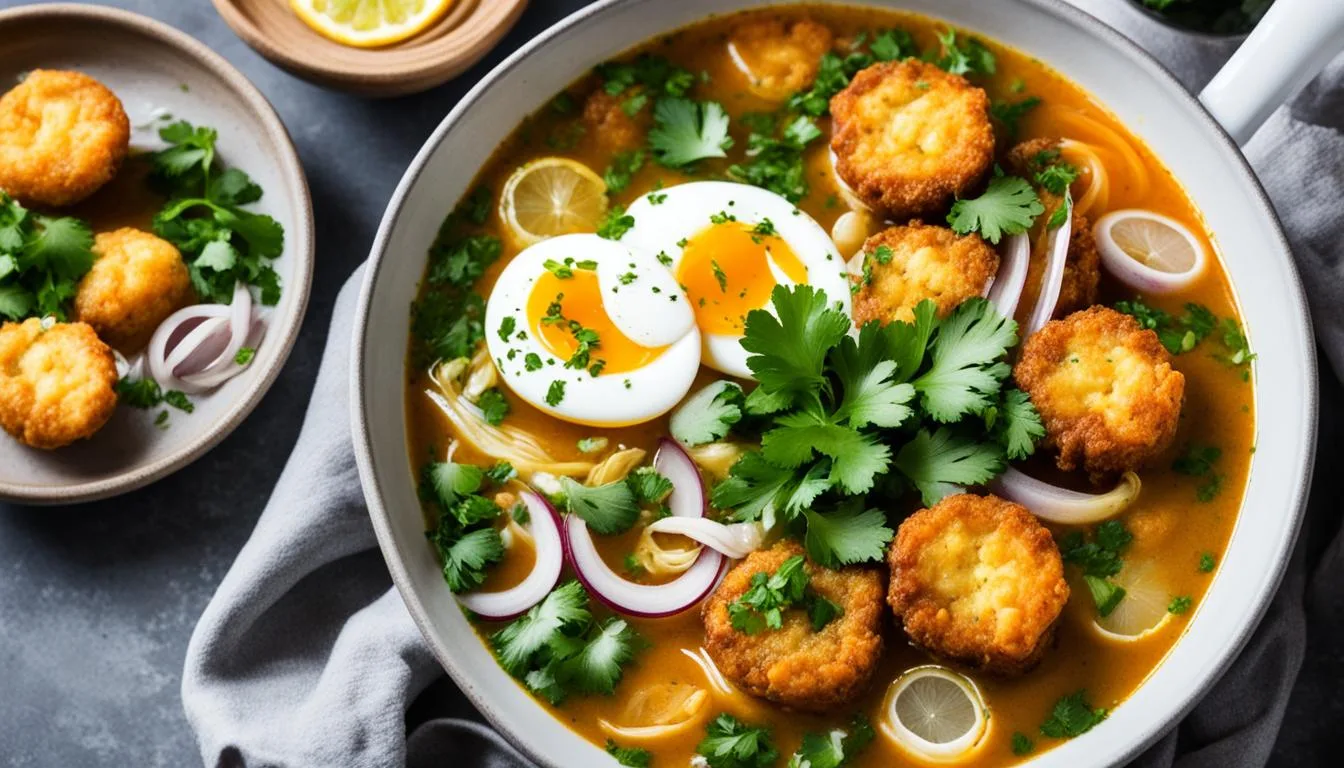
Welcome to our culinary adventure as we dive into the rich and vibrant flavors of Burmese cuisine. Today, we bring you an authentic Mohinga recipe, a traditional Burmese noodle soup that is as comforting as it is delicious. Mohinga holds a special place in the hearts of the Burmese people, often enjoyed as a hearty breakfast to start the day off right.
Mohinga is more than just a dish; it represents the cultural heritage and flavors of Myanmar. Made with a flavorful fish broth, rice noodles, and an array of aromatic herbs and spices, Mohinga embodies the unique culinary traditions of Burma. Join us as we explore the history, ingredients, variations, and garnishing techniques that make this dish truly special.
Table of Contents
Key Takeaways:
Mohinga is a traditional Burmese noodle soup enjoyed for breakfast.
It is made with a flavorful fish broth, rice noodles, and various aromatic herbs and spices.
Mohinga represents the cultural heritage and flavors of Myanmar.
There are regional variations of Mohinga, each with its own unique twist.
Garnishing Mohinga with traditional toppings enhances its flavors and textures.
Now, let’s dive into the history and cultural significance of Mohinga in our next section!
Discovering Mohinga: The Quintessential Burmese Breakfast
When it comes to Burmese breakfast, one dish stands out as a cultural favorite – Mohinga. This traditional breakfast recipe embodies the rich flavors of Myanmar and holds a special place in the hearts of the Burmese people.
Mohinga is more than just a meal; it is a cultural breakfast dish that represents the essence of Burmese cuisine. It is often enjoyed as a flavorful and comforting start to the day, providing a satisfying and nutritious foundation. The unique combination of flavors in Mohinga reflects Myanmar’s diverse culinary heritage and reflects the country’s vibrant food culture.
Mohinga is made with a fragrant fish broth that forms the base of the soup. This flavorful broth is then combined with rice noodles, tender pieces of fish, and an array of aromatic herbs and spices. The dish is typically garnished with crunchy fried fritters, fresh cilantro, and a squeeze of lime, enhancing the overall taste and texture.
What sets Mohinga apart from other breakfast dishes is its bold and distinct flavors. The combination of fish, herbs, spices, and condiments creates a harmonious balance of savory, tangy, and aromatic notes that tantalize the taste buds. It is a dish that embodies the essence of Burmese cuisine, showcasing the unique flavors and ingredients that make Myanmar’s culinary heritage so vibrant.
Whether you’re a lover of cultural breakfast dishes or simply seeking to expand your culinary horizons, exploring the world of Mohinga is an adventure worth undertaking. In the following sections, we will delve deeper into the history, ingredients, variations, and garnishing of this iconic Burmese breakfast dish, providing you with all the knowledge and inspiration to embark on your own Mohinga culinary journey.
Exploring the Storied Past of Burma’s National Dish
In this section, we will delve into the fascinating history and cultural significance of Mohinga, Burma’s national dish. Mohinga is more than just a delicious noodle soup; it holds deep spiritual and historical connections within the country.
The Spiritual Connection to Mohinga
Mohinga’s significance extends beyond its culinary delights. It is intricately linked to Buddhism, the predominant religion in Myanmar (formerly known as Burma). The preparation and consumption of Mohinga are often associated with merit-making, a spiritual practice that aims to accumulate good karma. It is believed that offering the dish to monks and partaking in it oneself can bring blessings and spiritual well-being.
Tracing the Origins: Mohinga’s Cultural Significance
Mohinga has a rich cultural heritage and is deeply woven into the fabric of Burmese society. It is considered one of the most iconic and beloved dishes in Myanmar, with a history dating back centuries. Mohinga’s cultural significance lies in its representation of national identity and the pride Burmese people take in their culinary traditions. This beloved dish reflects the shared heritage and values of the Burmese people, serving as a symbol of unity and cultural pride.
Mohinga Through the Ages: A Historical Overview
The origins of Mohinga can be traced back to the Mon people, an ethnic group inhabiting various regions of Myanmar. Historically, it was a humble dish enjoyed by fishermen along the riverbanks, providing sustenance during their long days of work. Over time, Mohinga gained popularity and made its way into the hearts and homes of the Burmese people, ultimately becoming a staple breakfast dish at tea shops across the country.
The evolution of Mohinga has seen variations in ingredients and cooking methods across different regions of Myanmar. While the essence of the dish remains the same, each region adds its unique touch to Mohinga, showcasing the diverse culinary landscape of the country.
A Journey into Burmese Cuisine: Ingredients and Flavors
As we dive deeper into the vibrant world of Burmese cuisine, we are greeted with a delightful array of flavors and ingredients. Traditional Burmese dishes are known for their bold and aromatic profiles, combining a harmonious blend of spices, herbs, and other key components. Let’s take a closer look at the fascinating ingredients and flavors that make Burmese cuisine truly unique.
Burmese Cuisine:
Burmese cuisine is a reflection of Myanmar’s diverse ethnic groups and their culinary traditions. From the tangy and spicy flavors of the north to the milder yet complex tastes of the south, Burmese cuisine offers a wide range of dishes that cater to different palates. The use of fresh ingredients and the careful balance of flavors are central to Burmese cooking.
Traditional Burmese Ingredients:
When it comes to traditional Burmese ingredients, several staples take the spotlight. Rice, being a dietary staple, forms the foundation of many Burmese meals. Fish, particularly freshwater species, is widely used in various dishes, including the beloved Mohinga. Other common ingredients include shrimp paste, lemongrass, garlic, ginger, shallots, and an array of fragrant herbs and spices.
Flavors of Burmese Dishes:
Burmese dishes boast an enchanting mix of flavors that stimulate the taste buds. The cuisine is characterized by its subtle sweetness, tanginess, and a touch of spiciness. The use of lime, tamarind, and fermented ingredients like fish sauce and shrimp paste adds depth and complexity to the dishes. The liberal use of fresh herbs such as coriander, mint, and basil imparts a refreshing aroma to the cuisine.
Key Ingredients
Flavors
Shrimp Paste
Savory, umami
Fresh Herbs (Coriander, Mint, Basil)
Refreshing, aromatic
Tamarind
Tangy, slightly sweet
Lime
Bright, citrusy
Chili Peppers
Spicy, fiery
Table: Key Ingredients and Their Flavors in Burmese Cuisine
The flavors of Burmese dishes are a testament to the culinary heritage of Myanmar. From the pungent aromas of fish sauce to the zesty tang of lime, each ingredient plays a crucial role in creating the palate-pleasing experience that defines Burmese cuisine.
In the next section, we will embark on a culinary adventure as we explore an authentic Mohinga recipe, unraveling the secrets behind this beloved Burmese noodle soup.
Mohinga Recipe: A Step-by-Step Culinary Adventure
Now that we’ve explored the history, cultural significance, and ingredients of Mohinga, it’s time to embark on a step-by-step journey to prepare this authentic Burmese noodle soup from scratch. In this section, we will guide you through each stage of the process, from making the flavorful fish stock to assembling the perfect bowl of Mohinga.
Preparing the Flavorful Fish Stock
The key to a delicious bowl of Mohinga lies in the rich and flavorful fish stock that forms the foundation of the soup. Follow these steps to prepare the fish stock:
Start by selecting fresh fish, such as catfish or white fish, and clean it thoroughly.
In a large pot, combine the fish with water, lemongrass, ginger, garlic, and onions.
Bring the mixture to a boil, then reduce the heat and let it simmer for about 30 minutes or until the fish is cooked and tender.
Once the fish is fully cooked, remove it from the broth and set it aside to cool.
Strain the fish stock to remove any solids and transfer it to a clean container.
The homemade fish stock will infuse the Mohinga with its unique and delectable flavors.
The Essential Soup Base: Aroma and Spice
To create the aromatic and flavorful base for your Mohinga, follow these essential steps:
In a large pot, heat oil and add diced onions and minced garlic. Sauté until they become fragrant and translucent.
Add turmeric powder, paprika, and ground coriander. Stir well to combine the spices with the onions and garlic.
Pour in the fish stock that you prepared in the previous step. Bring the mixture to a simmer and let it cook for about 15 minutes to allow the flavors to meld together.
Season the soup base with salt and fish sauce to taste. Remember to start with small amounts and adjust according to your preference.
The soup base will serve as the flavorful canvas for your Mohinga.
Assembling the Perfect Bowl of Mohinga
Now that you have the fish stock and soup base ready, it’s time to assemble the perfect bowl of Mohinga. Here’s how:
Cook rice vermicelli noodles according to package instructions. Drain and set aside.
Add the cooked noodles to individual serving bowls.
Ladle the hot soup base over the noodles, ensuring they are fully immersed.
Place a piece of cooked fish, flaked into bite-sized chunks, on top of the noodles.
Add additional toppings like boiled eggs, crispy fried onions, chopped cilantro, and sliced lime based on your preference.
Lastly, garnish your bowl of Mohinga with a sprinkle of sliced green onions and serve it hot.
With this step-by-step guide, you can now create a bowl of authentic Mohinga that embodies the flavors of Myanmar. Enjoy the comforting and soul-satisfying experience of this quintessential Burmese breakfast dish.
Mohinga Variations: Regional Twists on a Classic
One of the fascinating aspects of Mohinga is the regional variations and adaptations found across Burma. While the core essence of this beloved dish remains the same, different regions infuse their own unique flavors and techniques, resulting in diverse interpretations of Mohinga.
North and South: Diverse Burmese Interpretations
The northern and southern regions of Burma have distinct interpretations of Mohinga, reflecting their local tastes and culinary traditions. In the north, Mohinga is often prepared with thicker noodles and a rich and spicy broth. The addition of extra spices and chili lends a fiery kick to the dish, making it ideal for those who prefer their Mohinga with a bold and robust flavor.
In the south, Mohinga takes on a milder and sweeter taste profile. The broth is typically thinner, allowing the delicate flavors of the fish stock and traditional seasonings to shine through. Southern-style Mohinga often features additional ingredients like banana tree stems, roasted chickpea powder, and tamarind paste, adding complexity to the dish.
Adapting to Local Tastes: Ingredients and Toppings
In addition to regional variations, Mohinga is also adapted to suit the local tastes of different communities within Burma. Depending on the area, you may find variations that incorporate specific ingredients or toppings that are popular in those localities.
In coastal regions, fresh seafood such as prawns, squid, and crab may be added to the dish, giving it a delightful oceanic flavor. Inland regions, on the other hand, may showcase ingredients like pork or chicken to cater to different dietary preferences.
Yangon vs. Mandalay: A Comparison of Styles
Two major cities in Burma, Yangon and Mandalay, have their own distinct styles of Mohinga.
Yangon Mohinga is known for its rich and flavorful broth, achieved by simmering fish bones and aromatic spices for hours. The use of banana tree stems adds a unique texture to the dish, while the various toppings, such as fried onions and crushed chili, provide a delightful crunch and additional layers of taste.
Mandalay Mohinga, on the other hand, is characterized by its thicker and chewier noodles, similar to Chinese wheat noodles. The broth is lighter and milder in flavor, allowing the simplicity of the dish to shine through. Mandalay-style Mohinga often incorporates fish cake slices and crispy fritters as toppings, enhancing the overall texture and taste.
As you can see, the regional variations of Mohinga offer a tapestry of flavors and textures that celebrate the diversity of Burmese regional cuisine. Whether you prefer the fiery spices of the north or the delicate sweetness of the south, each variation showcases the culinary artistry and cultural richness of this beloved dish.
The Art of Garnishing Mohinga: Toppings and Accompaniments
In the vibrant world of Burmese cuisine, Mohinga stands out as a beloved and iconic dish. This hearty noodle soup is not only renowned for its flavorful broth and tender noodles but also for its artful presentation. To truly elevate the experience of enjoying Mohinga, the right selection of toppings and accompaniments is crucial. Let’s explore the traditional Mohinga garnishes and Burmese soup accompaniments that add the perfect finishing touches to this delightful dish.
Traditional Mohinga garnishes include:
Lime: The tangy zest of lime provides a refreshing burst of citrus flavor that cuts through the richness of the soup.
Cilantro: Fresh cilantro leaves add a vibrant touch and a hint of herbaceousness to the dish.
Fried Onions: Crispy fried onions not only lend a delightful crunch but also contribute a subtle sweetness to the overall flavor profile.
Fish Cake: Thin slices of savory fish cake lend an additional dimension of taste and texture to the soup.
These traditional Mohinga toppings work in harmony to enhance the flavors and textures of the dish, creating a delightful balance that satisfies the palate.
Accompaniments play an equally important role in complementing the richness of Mohinga. Here are a few noteworthy Burmese soup accompaniments:
Crackers: Light and crispy crackers provide a delightful contrast to the heartiness of Mohinga, offering a satisfying crunch to each bite.
Chili Sauce: For those who enjoy a spicy kick, a dollop of fiery chili sauce adds a tantalizing heat that elevates the overall flavor profile.
Boiled Egg: Sliced boiled eggs are a common accompaniment, providing a protein-rich element that adds substance to the meal.
Fried Noodles: Garnishing Mohinga with a handful of fried noodles gives an extra dimension of texture and a delightful crunch.
By adding these accompaniments to your bowl of Mohinga, you can personalize the dish to suit your own preferences and create a truly enjoyable and memorable culinary experience.
The art of garnishing Mohinga extends beyond mere decoration. The carefully selected traditional Mohinga garnishes and Burmese soup accompaniments contribute to the overall flavor profile, adding layers of complexity and texture to this classic Burmese dish. Whether you prefer the zing of lime, the freshness of cilantro, or the tantalizing heat of chili sauce, these thoughtful embellishments help transform Mohinga into an unforgettable culinary delight.
Customizing Your Mohinga Experience: Tips for Personalization
Creating a personalized Mohinga experience allows you to adapt this traditional Burmese dish to suit your unique taste preferences. By incorporating different ingredients and variations, you can customize Mohinga to reflect your culinary style. Here are some tips and suggestions for personalizing and adapting the Mohinga recipe:
Explore Ingredient Alternatives: Experiment with alternative proteins such as chicken, shrimp, or tofu instead of fish. This allows you to personalize the flavor profile of your Mohinga.
Add Vegetables: Enhance the nutritional value of your Mohinga by incorporating your favorite vegetables. Consider adding sliced mushrooms, spinach, or bell peppers for a nutritional boost.
Spice it Up: Play with different spice combinations to bring your preferred level of heat and flavor to the dish. Adjust the amount of chili powder or pepper flakes according to your taste.
Try Different Noodle Options: While rice noodles are traditional for Mohinga, you can experiment with other types of noodles like egg noodles or soba noodles for a unique twist.
Customize Toppings: Explore a variety of toppings and garnishes to enhance the flavor and visual appeal of your Mohinga. Consider adding chopped green onions, crispy fried shallots, or a squeeze of lime juice.
Experiment with Broth Variations: Modify the base broth by adding a touch of coconut milk for a creamier texture or using different types of stock to infuse additional flavors.
Remember, the key to personalizing Mohinga is to be creative and have fun with your culinary adventure. Feel free to adapt the recipe and techniques to suit your preferences. So go ahead, unleash your inner chef, and create a customized Mohinga experience that satisfies your taste buds!
The Importance of Freshness in Preparing Mohinga
When it comes to creating an authentic and flavorful bowl of Mohinga, freshness is key. Using fresh ingredients elevates the taste and brings out the true essence of this beloved Burmese noodle soup.
Selecting the Right Type of Fish
The choice of fish plays a crucial role in the rich and delicate flavors of Mohinga. Opt for fresh fish that is readily available in your local market. Popular options include catfish, snakehead, and hilsa fish, which impart a distinct taste and texture to the soup. Selecting the right fish ensures that your Mohinga is bursting with flavor and maintains its authenticity.
Benefits of Using Garden-Fresh Herbs and Spices
Garden-fresh herbs and spices are essential for adding depth and complexity to the flavors of Mohinga. Coriander, lemongrass, ginger, and garlic are some of the fragrant ingredients that contribute to the aromatic broth. By using these herbs and spices at their freshest, you can enhance the overall taste of your Mohinga and bring out the authentic Burmese flavors.
Source Locally: Emphasizing Seasonal Produce
To truly capture the essence of Mohinga, it is important to source locally and emphasize the use of seasonal produce. Fresh vegetables, such as banana stems, onions, and garlic, add additional layers of flavor and texture to the soup. By using ingredients that are in season, you ensure that your Mohinga is not only bursting with freshness but also supports sustainable and eco-friendly practices.
Benefits of Fresh Ingredients in Mohinga
Fresher fish provides a more delicate and flavorful broth.
Garden-fresh herbs and spices enhance the overall taste and aroma.
Locally sourced and seasonal produce adds layers of freshness and supports sustainable practices.
Mohinga Recipe: Traditional Burmese Comfort in a Bowl
Get ready to experience the ultimate comfort food with this traditional Mohinga recipe. Bursting with flavors and textures, this Burmese noodle soup is a beloved dish that brings warmth and satisfaction to countless breakfast tables in Myanmar. Let us guide you through the step-by-step process of creating this authentic fish soup recipe, ensuring that you achieve the perfect bowl of Mohinga every time.
Ingredients:
1 lb of fresh catfish fillets (boneless and skinless)
4 cups of fish stock
2 tablespoons of fish sauce
1 tablespoon of shrimp paste
1 teaspoon of ground turmeric
1 teaspoon of paprika
1 teaspoon of chili powder
1 tablespoon of peanut oil
4 cloves of garlic (minced)
1 onion (diced)
1 stalk of lemongrass (bruised)
2 tablespoons of rice flour, dissolved in water
Salt to taste
Instructions:
In a large pot, bring the fish stock to a boil. Add the catfish fillets and cook until tender and flaky. Remove the fish from the stock and set aside.
In a small bowl, mix the fish sauce, shrimp paste, ground turmeric, paprika, and chili powder. Set aside.
Heat the peanut oil in a separate pan and sauté the minced garlic and diced onion until fragrant and golden brown.
Add the spice mixture to the pan and cook for another minute, allowing the flavors to meld.
Pour the mixture into the pot with the fish stock. Add the bruised lemongrass stalk and simmer for 10-15 minutes to allow the flavors to infuse.
Return the catfish fillets to the pot and let them simmer for an additional 5 minutes.
Gradually stir in the rice flour mixture to thicken the soup. Continue stirring until the desired consistency is reached.
Season with salt to taste.
Serve the Mohinga hot, ladled over rice noodles and garnished with your choice of traditional toppings, such as sliced hard-boiled eggs, fried onions, fresh cilantro, chopped green onions, and a squeeze of lime.
Get ready to indulge in the comforting flavors of this Burmese comfort food. The rich fish stock, aromatic spices, and fresh ingredients come together harmoniously to create a bowl of Mohinga that will transport you to the heart of Myanmar. Enjoy this traditional Burmese noodle soup recipe for breakfast or any time of the day, and savor the authentic taste of this beloved dish.
Conclusion
We have taken you on a culinary journey through the flavors and traditions of Mohinga, the quintessential Burmese noodle soup. This iconic dish holds a significant place in Burmese culture as a hearty and comforting breakfast option. Its rich history and spiritual connection to Buddhism make it a true symbol of Myanmar’s culinary heritage.
Throughout this article, we have explored Mohinga’s origins, discussing its cultural significance and evolution over time. We have dived into the ingredients and flavors that define Burmese cuisine, showcasing the unique spices and herbs that contribute to the distinct taste of Mohinga.
We have also delved into the various regional variations of Mohinga, highlighting the diverse interpretations found in different parts of Burma. From the northern and southern regions to the distinct styles of Yangon and Mandalay, each variation offers a unique twist on this beloved dish.
To personalize your Mohinga experience, we have provided tips on customization, emphasizing the importance of using fresh ingredients and seasonal produce. Additionally, we have shared a step-by-step recipe, ensuring you have all the knowledge and guidance needed to create an authentic bowl of Mohinga in your own kitchen.
In conclusion, we invite you to embark on a culinary adventure and try your hand at making Mohinga. Explore the rich flavors and cultural traditions of Myanmar through this delicious and comforting Burmese noodle soup. Whether it’s enjoying the traditional recipe or adding your own personal touch, Mohinga is sure to transport you to the vibrant streets of Burma, tantalizing your taste buds and giving you a true taste of this remarkable country.
FAQ
Do you have an authentic Mohinga recipe?
Yes, we have a traditional Burmese Mohinga recipe that captures the authentic flavors of this beloved dish. Keep reading to find out how to make it!
What is Mohinga?
Mohinga is a traditional Burmese noodle soup and is considered the quintessential Burmese breakfast dish. It is a flavorful and comforting soup made with fish stock, rice noodles, and a variety of aromatic spices and herbs.
How is Mohinga significant in Burmese cuisine?
Mohinga holds great cultural significance in Burmese cuisine and is considered the national dish of Burma. It is a breakfast staple that reflects the rich culinary heritage of Myanmar and showcases the unique flavors and ingredients of the region.
Can you tell me more about the history of Mohinga?
Mohinga has deep cultural roots and has been enjoyed in Myanmar for centuries. It is believed to have originated in the Mon kingdoms of southern Myanmar and has evolved over time, incorporating different influences and regional variations.
What are the key ingredients used in Mohinga?
The key ingredients in Mohinga include fish (usually catfish), rice noodles, lemongrass, ginger, garlic, onion, chickpea flour, fish sauce, turmeric, and various spices and herbs. These ingredients come together to create the distinctive flavors of this traditional Burmese dish.
What are the regional variations of Mohinga?
Mohinga varies across different regions of Myanmar. In the north, Mohinga is typically thinner and less spicy compared to the thicker and spicier Mohinga found in the south. There are also variations in the choice of fish and garnishes used in different parts of the country.
What are the traditional toppings and accompaniments for Mohinga?
Traditional toppings and accompaniments for Mohinga include lime wedges, cilantro, fried onions, fish cake, hard-boiled eggs, and crispy fritters. These garnishes add texture and enhance the flavors of the dish.
Can I customize the Mohinga recipe to suit my tastes?
Absolutely! Mohinga can be easily personalized by incorporating your favorite ingredients and flavors. Experiment with different toppings, spices, or even adding vegetables to create your unique twist on this classic Burmese dish.
What should I consider when selecting fish for Mohinga?
It is essential to use fresh fish for the best flavor and texture in Mohinga. Catfish is the most commonly used fish in Burmese cuisine, but other white fish varieties can also be used. Select fish that is firm, odorless, and sourced from reputable suppliers.
Where can I find the complete traditional Mohinga recipe?
The full traditional Mohinga recipe can be found in our article. It includes step-by-step instructions, detailed ingredient measurements, and cooking times to help you prepare this delicious Burmese noodle soup at home.
In this comprehensive Ugali recipe guide, we will take you through the steps to make a simple and delicious Ugali. Whether you’re a beginner or a seasoned cook, this recipe is perfect for you. We’ll provide all the details and tips you need to create a perfect Ugali every time.
Ugali, a staple of East African cuisine, is not only flavorful but also incredibly versatile. Whether you’re enjoying it with sukuma wiki, grilled meat, or vegetable stews, Ugali is the perfect accompaniment to a wide range of dishes. Now, let’s dive into the wonderful world of Ugali!
Table of Contents
Key Takeaways:
Learn how to make a simple and delicious Ugali with our step-by-step guide.
Discover the origins and cultural significance of Ugali in East African cuisine.
Understand the essential ingredients and cooking techniques for perfect Ugali every time.
Explore the variations of Ugali made with different types of flours.
Find out the best pairings and serving suggestions for Ugali.
Discovering Ugali: A Staple of East African Cuisine
In this section, we will explore the origins and cultural significance of Ugali in East African cuisine. Ugali is a traditional staple food that holds a special place in the hearts and stomachs of the people in this region. Let’s dive into the journey of this beloved dish and discover its historical background and cultural importance across different regions.
What is Ugali?
Ugali is a simple and versatile cornmeal-based dish that is a staple in the diet of many East African countries. Also known as sima, nsima, or sadza in different regions, Ugali is made by cooking finely ground maize flour or cornmeal in water to create a thick, porridge-like consistency. This basic mixture is often served alongside a variety of dishes, providing sustenance and satisfaction to those who enjoy it.
The Historical Backdrop of Ugali
The history of Ugali dates back centuries, with corn being introduced to East Africa in the 16th century by Portuguese traders. As maize cultivation spread across the region, Ugali became an integral part of the local cuisine, evolving to reflect the unique cultural and culinary practices of each country.
Initially, maize was considered a food of the wealthy, but as it became more accessible and affordable, Ugali gained popularity as a practical and filling meal for all. The dish’s simplicity and ability to sustain and nourish the community played a vital role in its widespread adoption and enduring significance.
Ugali’s Cultural Significance Across Different Regions
Ugali holds immense cultural significance in East Africa, representing more than just a meal. It embodies the traditions, values, and history of the communities that have embraced it for generations.
In Kenya, Ugali is often served with sukuma wiki, a dish made from collard greens, creating a classic combination that represents the country’s agricultural heritage. Meanwhile, in Tanzania, it is commonly paired with nyama choma, a grilled meat delicacy that showcases the region’s vibrant culinary scene.
Across Uganda, Rwanda, and other East African nations, Ugali is a staple food that brings people together. It is shared during communal meals, celebrations, and gatherings, symbolizing unity and hospitality.
The cultural significance of Ugali goes beyond its role as a cherished food. It connects individuals to their roots, preserving ancestral knowledge and enabling the passing down of traditions from one generation to the next.
Country
Ugali Name
Classic Pairing
Kenya
Ugali
Sukuma Wiki (Collard Greens)
Tanzania
Ugali
Nyama Choma (Grilled Meat)
Uganda
Posho
Luweero Beans
Rwanda
Sima
Umutsima (Cassava and Corn)
This table highlights the regional variations of Ugali and its common pairings, showcasing the diverse culinary landscape of East Africa.
The Perfect Ugali Recipe
In this section, we will provide you with a detailed and foolproof Ugali recipe. We’ll guide you through the step-by-step process, ensuring that you achieve the perfect texture and flavor every time you make Ugali. With our recipe, you’ll be able to recreate the authentic taste of this East African staple in your own kitchen.
Ugali is a simple yet delicious dish that is a staple in East African cuisine. It is made from white maize meal or cornmeal and is often served with various accompaniments such as sukuma wiki, nyama choma, and vegetable stews.
“Ugali is not just a dish; it’s a symbol of our culture and heritage. It brings people together and represents the heart and soul of East African cuisine.”
Now, let’s dive into the recipe and learn how to make the perfect Ugali.
Ingredients:
2 cups white maize meal or cornmeal
4 cups water
Salt to taste
Instructions:
In a large saucepan, bring the water to a boil.
Gradually add the maize meal or cornmeal while stirring continuously to prevent lumps from forming.
Reduce the heat to low and cover the saucepan with a lid.
Let the mixture simmer for about 10-15 minutes, stirring occasionally to ensure it doesn’t stick to the bottom of the pan.
Add salt to taste and continue cooking for another 5 minutes, or until the Ugali reaches a thick and smooth consistency.
Remove from heat and let it cool for a few minutes.
Using a wet spoon or spatula, shape the Ugali into individual portions or place it in a serving dish.
Serve hot with your favorite accompaniments and enjoy!
Now that you have the perfect Ugali recipe, it’s time to gather your ingredients and start cooking. Remember to follow the instructions carefully to achieve the best results. Serve this authentic Ugali to your family and friends, and let them experience the rich flavors of East African cuisine.
Advantages
Disadvantages
Simple and easy to make
Requires constant stirring
Can be paired with various accompaniments
May take some practice to achieve the perfect consistency
Affordable and accessible ingredients
Can be time-consuming
Essential Ingredients for Authentic Ugali
To make authentic Ugali, you need to have the right ingredients. Two key components that contribute to the taste and texture of Ugali are the choice of maize meal and the amount of water used.
Making the Choice: White Maize Meal vs. Cornmeal
When it comes to choosing the type of maize meal for Ugali, you have two options: white maize meal and cornmeal. Both options can be used to make delicious Ugali, but they have slight differences in taste and texture.
White maize meal: This is the most commonly used type of maize meal for Ugali. It is made from whole dried white maize kernels, which are ground into a fine flour. White maize meal gives Ugali a smoother texture and a slightly sweeter taste.
Cornmeal: Cornmeal, on the other hand, is made from yellow corn and provides a slightly coarser texture to Ugali. It has a slightly nuttier flavor compared to white maize meal. If you prefer a heartier texture in your Ugali, you can opt for cornmeal.
The choice between white maize meal and cornmeal ultimately depends on your personal preference. Feel free to experiment with both and see which one you like best.
The Role of Water in Achieving the Ideal Ugali Consistency
In addition to the type of maize meal, the amount of water used plays a crucial role in achieving the ideal consistency of Ugali. The right amount of water will result in a perfectly cooked Ugali with a smooth and firm texture.
The general rule of thumb is to use a ratio of 1 part maize meal to 2 parts water. This means if you are using 1 cup of maize meal, you should use 2 cups of water. However, it’s important to note that the ideal consistency may vary depending on personal preference.
If you prefer a softer and more porridge-like texture, you can add a bit more water to the mixture. Conversely, if you prefer a firmer and more solid texture, you can reduce the amount of water slightly. It may take a few attempts to find your ideal consistency, but with practice, you’ll be able to achieve the perfect Ugali every time.
By understanding the importance of choosing the right maize meal and using the appropriate amount of water, you will be well on your way to creating the most authentic and delicious Ugali.
Step-by-Step Cooking Techniques
In this section, we will walk you through the step-by-step cooking techniques for Ugali. Mastering these techniques is key to creating the best Ugali every time. Let’s dive in!
Boiling: Setting the Stage for Ugali
To begin, bring a pot of water to a boil. The amount of water needed will depend on the quantity of Ugali you are preparing. Generally, for every cup of maize meal, you’ll need about 3 cups of water.
Once the water is boiling, gradually add the maize meal to the pot while stirring continuously to prevent lumps from forming.
Pro Tip: To achieve a smooth and lump-free Ugali, it’s important to add the maize meal slowly while stirring vigorously. This ensures that the meal incorporates well into the water.
Continue stirring and boiling the mixture for about 5 minutes or until it thickens. At this point, reduce the heat and cover the pot, allowing the Ugali to simmer for an additional 10-15 minutes. This slow simmering process helps to cook the maize meal thoroughly and achieve the desired consistency.
Mixing: The Art of Creating a Lump-Free Ugali
After the initial boiling and simmering, it’s time to give your Ugali a good mix. Using a wooden spoon or spatula, vigorously stir the mixture to break down any remaining lumps and ensure the meal is well combined.
Pro Tip: For an extra smooth Ugali, you can use a whisk instead of a spoon to achieve a lump-free texture.
Continue mixing for a few minutes until the Ugali becomes smooth and homogeneous. The goal here is to create a consistent texture without any lumps. You can adjust the consistency by adding small amounts of water if necessary.
Cooking to Perfection: Knowing When Your Ugali Is Ready
The final step is determining when your Ugali is perfectly cooked. The cooking time may vary depending on the quantity of Ugali and the heat level.
One way to check if the Ugali is ready is to take a small portion and shape it into a ball using wet hands. If the ball holds its shape without crumbling, it indicates that the Ugali is cooked and ready to be served.
Pro Tip: It’s important to note that Ugali continues to cook and firm up as it cools, so it’s better to slightly undercook it than overcook it.
Once your Ugali has reached the desired consistency and is cooked to perfection, remove it from the heat and let it rest for a few minutes before serving. This allows the flavors to blend and the Ugali to firm up slightly.
Ugali Cooking Techniques
Boiling
Mixing
Cooking Time
Description
Boil the water and gradually add the maize meal while stirring continuously to prevent lumps.
Vigorously mix the mixture to break down lumps and ensure a smooth texture.
Cook the mixture for 5 minutes, then simmer for an additional 10-15 minutes until desired consistency is achieved.
Tips
Add maize meal slowly while stirring vigorously for a lump-free Ugali.
Use a whisk for an extra smooth texture.
Check the Ugali’s readiness by shaping a small portion into a ball; it should hold its shape without crumbling.
Variations of Ugali: Exploring Different Flours
While the traditional Ugali recipe calls for white maize meal, there are various variations of Ugali made with different flours. These alternative flours not only offer unique flavors but also allow you to experiment and create different variations of this beloved East African staple.
One popular alternative to white maize meal is maize flour, which is made from finely ground maize. Maize flour Ugali has a slightly different taste compared to traditional Ugali and a smoother texture. It is a great option for those who prefer a lighter and less coarse Ugali.
Another interesting flour option for Ugali is millet flour. Millet is a nutritious grain, and millet flour Ugali has a slightly nutty flavor and a dense, crumbly texture. It adds a distinct taste to the dish and is a favorite among those looking for a more wholesome and gluten-free variation of Ugali.
“Experimenting with different flours allows you to discover new flavors and textures in your Ugali. It’s a delightful way to add variety to your meals and explore the rich culinary traditions of East Africa.”
By incorporating these different types of flours into your Ugali recipes, you can create a diverse array of flavors and textures. Whether you prefer the traditional white maize meal or want to try something new, these flour variations offer a delightful twist to the classic Ugali recipe.
Pairing Your Ugali: Complementary Dishes
Ugali is a versatile dish that can be paired with a variety of complementary dishes to create a wholesome and satisfying meal. Whether you’re looking for a classic combination or wanting to explore different flavors, there are plenty of options to enhance your Ugali experience.
Ugali with Sukuma Wiki: A Classic Combo
One of the most popular pairings for Ugali is with Sukuma Wiki, a traditional Kenyan collard greens dish. The combination of the soft and creamy Ugali with the flavorful and nutritious Sukuma Wiki creates a perfect balance of textures and tastes. The simplicity of this classic combo makes it a staple in many households across East Africa.
If you’re not familiar with Sukuma Wiki, it is a dish made by sautéing collard greens with onions, tomatoes, and spices. It can be served as a side dish or mixed into the Ugali for a delicious and hearty meal. The flavors of the Sukuma Wiki complement the plainness of the Ugali, resulting in a satisfying and wholesome dining experience.
From Nyama Choma to Vegetable Stews: Expanding Your Meal Options
While Ugali with Sukuma Wiki is a classic combination, there are numerous other dishes that pair well with Ugali. One popular option is Nyama Choma, which translates to “grilled meat” in Swahili. Nyama Choma is a beloved dish in East African cuisine, consisting of marinated and grilled meat, typically goat or beef. The smoky and flavorful meat paired with the plainness of Ugali creates a delicious and satisfying meal.
If you prefer a vegetarian option, Ugali can be paired with vegetable stews such as Githeri (a mixed bean stew) or Mchicha (a spinach stew). These hearty and nutritious vegetable stews add a burst of flavors and colors to the plate, making your Ugali meal even more enticing.
Dish
Description
Sukuma Wiki
A traditional Kenyan collard greens dish.
Nyama Choma
Grilled meat, typically goat or beef.
Githeri
A mixed bean stew.
Mchicha
A spinach stew.
These are just a few examples of the many possibilities when it comes to pairing Ugali with other dishes. The versatility of Ugali allows you to experiment with different flavors and ingredients, creating a customized meal that suits your preferences.
So, go ahead and explore the world of Ugali pairings. Whether you’re opting for the classic Sukuma Wiki combo or trying out new flavors, the delightful combination of Ugali with other dishes will surely leave you satisfied and craving for more.
Ugali Etiquette and Serving Suggestions
When it comes to serving Ugali, there is a certain etiquette and set of cultural norms that one should keep in mind. Understanding the traditional way of serving Ugali not only ensures that you present the dish in an authentic manner but also adds to the overall dining experience. Whether you’re hosting a family gathering or a formal event, here are some tips on how to serve Ugali with grace and respect.
1. Use a wooden plate or platter
In many East African cultures, Ugali is traditionally served on a wooden plate or platter known as a “sufuria” or “sikuri.” This adds an authentic touch to the meal and enhances the cultural experience. If you don’t have a wooden plate, you can also use a regular plate or a shallow bowl.
2. Form the Ugali into a mound
When serving Ugali, it’s common to shape it into a mound or a dome-like structure. This traditional presentation adds visual appeal to the dish and makes it easier for guests to scoop a portion of Ugali. Use a wet spoon or spatula to mold the Ugali and create the desired shape.
3. Serve Ugali with your right hand
In many African cultures, it is customary to eat with your right hand. When serving Ugali, use your right hand to scoop a portion of Ugali from the platter and place it on each guest’s plate. This gesture is seen as a sign of respect and hospitality.
4. Provide accompaniments and condiments
Ugali is often served with various accompaniments and condiments to enhance its flavor. Common options include sukuma wiki (collard greens), nyama choma (grilled meat), fish stew, or vegetable stews. These additions provide a balance of flavors and textures to the meal.
5. Encourage communal sharing
Ugali is traditionally served as a communal dish, where everyone shares from the same platter. This promotes a sense of togetherness and creates a warm and inviting atmosphere. Encourage your guests to share and enjoy the Ugali together, fostering a spirit of community and connection.
By following these basic serving suggestions and respecting Ugali etiquette, you can ensure that your Ugali experience is not only delicious but also culturally enriching. Embrace the traditions and customs associated with Ugali, and enjoy the warmth and joy of sharing this beloved East African staple with your loved ones.
Preserving the Tradition: Making Ugali in Modern Times
As times change, culinary traditions evolve. In the modern world, Ugali has adapted while still preserving its traditional essence. Contemporary cuisine has embraced Ugali, incorporating modern cooking techniques and ingredients, while honoring its rich heritage.
Today, chefs and home cooks alike are exploring new ways to prepare Ugali, adding a modern twist without compromising its authenticity. From innovative flavor combinations to creative presentations, Ugali has found its place in the vibrant world of contemporary cuisine.
Modern Ugali preparation involves experimenting with different grains, such as sorghum or millet, to add unique flavors and nutritional benefits to the dish. This adaptation not only introduces exciting variations but also contributes to a more diverse and inclusive culinary landscape.
“Ugali has become a canvas for creativity in modern cooking. It allows us to pay homage to our tradition while embracing innovation and experimentation.” – Chef Esther Mugo
One of the most prominent changes in Ugali preparation is the incorporation of alternative cooking methods. While the traditional stovetop boiling method is still widely used, modern techniques like steaming or baking Ugali have gained popularity. These methods offer convenience and versatility, catering to different cooking preferences and dietary needs.
In addition, the availability of pre-packaged Ugali mixes has made it easier for individuals to prepare this iconic dish in their own kitchens. These mixes combine convenience with the opportunity to experience the flavors of Ugali without the need for extensive preparation.
The modernization of Ugali has also expanded its presence beyond East Africa. As African cuisine gains recognition and popularity worldwide, Ugali has found its way onto international menus. From upscale restaurants to fusion food trucks, chefs are incorporating Ugali into innovative and exciting dishes, introducing it to a global audience.
Preserving the tradition of Ugali while embracing modern techniques and flavors ensures that this beloved staple remains relevant and cherished in the culinary world. By honoring the past while embracing the present, we can celebrate the timeless beauty and versatility of Ugali in the modern culinary landscape.
Conclusion
In conclusion, our comprehensive Ugali recipe guide has provided you with all the information you need to make a simple and delicious Ugali at home. Throughout the article, we have covered the origins and cultural significance of Ugali in East African cuisine, shared a foolproof Ugali recipe, and discussed the essential ingredients and cooking techniques for achieving the perfect consistency and flavor.
By exploring variations of Ugali made with different flours and suggesting complementary dishes to pair with Ugali, we have shown you the versatility and culinary possibilities of this East African staple. Additionally, we have touched upon Ugali etiquette and serving suggestions, ensuring that you can present the dish in a respectful manner.
We hope that this guide has inspired you to embrace the tradition of Ugali and explore the rich flavors and cultural heritage of East Africa. Making Ugali at home is not only a delightful culinary experience but also an opportunity to connect with the vibrant culinary traditions of the region. So go ahead, give our Ugali recipe a try, and embark on a flavorful journey that will transport you to East Africa.
FAQ
What is Ugali?
Ugali is a staple dish in East African cuisine. It is a thick, porridge-like food made from white maize meal or cornmeal and water. Ugali has a dough-like consistency and is typically served with various dishes.
What is the historical background of Ugali?
Ugali has been a part of East African cuisine for centuries. It originated from the indigenous communities who relied on maize as a primary source of sustenance. Over time, Ugali became a cultural symbol and a staple food in the region.
What is the cultural significance of Ugali in different regions?
Ugali holds cultural significance in various regions of East Africa. It is often associated with communal meals, celebrations, and family gatherings. In some communities, Ugali is seen as a symbol of unity and sharing.
What is the perfect Ugali recipe?
The perfect Ugali recipe involves using white maize meal or cornmeal and water in the right proportions. It is important to achieve a lump-free consistency and cook the Ugali to perfection. Our recipe guide provides detailed instructions on how to create the perfect Ugali every time.
What are the essential ingredients for authentic Ugali?
The essential ingredients for authentic Ugali are white maize meal or cornmeal and water. The choice of white maize meal or cornmeal is crucial in achieving the traditional flavor and texture of Ugali. Water is added gradually to create the desired consistency.
What are the step-by-step cooking techniques for Ugali?
The cooking techniques for Ugali involve boiling the ingredients, mixing them to create a lump-free mixture, and cooking the Ugali until it reaches the desired texture. Our recipe guide provides detailed instructions on each step to help you master the cooking techniques.
Can I use different types of flour to make Ugali?
Yes, there are variations of Ugali made with different types of flours. Common alternatives include maize flour and millet flour. These flours bring unique flavors and textures to the dish, allowing you to experiment and create different variations of Ugali.
What are the best pairings for Ugali?
Ugali is often paired with other dishes to create a complete meal. One popular pairing is Ugali with Sukuma Wiki, a delicious Kenyan collard greens dish. Other options include Nyama Choma (grilled meat) and vegetable stews, which complement the flavors and textures of Ugali.
How should Ugali be served?
Traditional Ugali is usually served in a large communal bowl. It is shaped into a mound or flattened into a disc-like shape. Ugali is often eaten by rolling it into small balls or using it as a utensil to scoop up other dishes. It is best enjoyed hot and fresh.
How has Ugali adapted to the modern world?
While preserving its traditional essence, Ugali has embraced modern cooking techniques and ingredients. Contemporary variations of Ugali may incorporate different flours, spices, and cooking methods. This allows for innovation and experimentation, while still honoring the rich culinary traditions of East Africa.
Welcome to our article on an easy cachupa recipe, a traditional Cape Verdean stew that will delight your taste buds and transport you to the vibrant culture of Cape Verde. Cachupa is the national dish of Cape Verde, a beautiful island country off the coast of West Africa. This hearty stew is made with a combination of hominy, beans, starches, vegetables, and a variety of meats, resulting in a flavorful and satisfying meal.
Our easy cachupa recipe will guide you through the step-by-step process of creating this delicious dish in your own kitchen. Whether you’re looking for a quick and simple cachupa recipe or a traditional and authentic version, we have you covered. Get ready to experience the flavors of Cape Verdean cuisine and enjoy a taste of the rich cultural heritage of this beautiful country.
Table of Contents
Key Takeaways:
Create a delicious and hearty cachupa stew with our easy-to-follow recipe.
Experience the flavors of Cape Verdean cuisine and explore the traditional Cape Verdean dish.
Learn how to make a quick and simple version or go for an authentic cachupa recipe.
Discover the cultural significance of cachupa and its role in Cape Verdean traditions.
Enjoy a wholesome and flavorful meal with our healthy cachupa recipe.
The Rich Cultural Heritage of Cape Verdean Cachupa
Cape Verdean cachupa is not just a delicious stew, but also a reflection of the rich cultural heritage of the Cape Verdean people. The islands of Cape Verde were originally uninhabited until they were discovered and colonized by the Portuguese in the 15th century. The Portuguese brought with them their food, language, and traditions, which heavily influenced the cuisine of Cape Verde.
Over time, cachupa became a staple dish that is deeply ingrained in the Cape Verdean culture. It is often served during special occasions, festivals, and family gatherings, showcasing the importance of food and communal meals in Cape Verdean traditions. Cachupa is not just a culinary delight, but also a symbol of Cape Verdean identity and a way to connect with the country’s history and heritage.
Through the flavors and aromas of cachupa, one can delve into the vibrant roots of Cape Verdean culture. The slow-cooking process allows the ingredients to meld together, creating a dish that is not only delicious but also represents the cultural and historical fusion that defines Cape Verdean cuisine. Every spoonful of cachupa tells a story, carrying with it the traditions, customs, and unique identity of the Cape Verdean people.
Cachupa: A Culinary Emblem of Cape Verde
Cachupa has become an emblem of Cape Verdean cuisine, representing the country’s unique blend of flavors and culinary traditions. The dish has evolved over the years, blending Portuguese influences with local ingredients and cooking techniques. From its humble origins as a peasant dish, cachupa has risen to become a beloved national dish that is enjoyed by people of all backgrounds in Cape Verde.
From Portuguese Influence to National Identity
The roots of cachupa can be traced back to the Portuguese colonization of Cape Verde in the 15th century. The Portuguese brought with them their food, language, and traditions, which had a significant impact on the local cuisine. Over time, as the Cape Verdean people embraced their own cultural identity, cachupa became a symbol of national pride and heritage. It represents the fusion of Portuguese and African influences, showcasing the rich cultural history of Cape Verde.
Cachupa Rica vs. Cachupa Pobre: A Dish for All
Cachupa comes in two main variations: Cachupa Rica and Cachupa Pobre. Both versions are delicious and reflect the diversity of Cape Verdean tastes.
Cachupa Rica:
Cachupa Rica is the more elaborate and rich version of the dish. It includes a variety of meats such as chicken, beef, pork, and Portuguese sausage. These meats add depth and flavor to the stew, creating a hearty and satisfying meal. Cachupa Rica is often served on special occasions and celebrations.
Cachupa Pobre:
Cachupa Pobre, on the other hand, is the simpler and more economical version of cachupa. It is made with basic ingredients like beans, hominy, and vegetables, without the addition of meats. Despite its simplicity, Cachupa Pobre is still full of flavor and is enjoyed as a comforting and nutritious everyday meal.
Cachupa Rica and Cachupa Pobre demonstrate the versatility of the dish, catering to different preferences and budgets. Both versions showcase the essence of Cape Verdean cuisine and the cultural fusion that makes it so unique.
Celebrating the Key Ingredients of Traditional Cachupa
Traditional cachupa is made with a combination of key ingredients that give it its distinctive flavor and texture. The main components include hominy, beans, starches, vegetables, and meats. Hominy, which is alkali processed corn, forms the base of the stew and provides a hearty and filling element. Beans, such as red kidney beans and white kidney beans, add protein and texture to the dish. Starches like cassava, sweet potato, and plantain contribute to the overall creaminess and thickness of the stew. Vegetables like squash, kale, and cabbage add freshness and a burst of color. Meats, such as chicken, beef, and Portuguese sausage, bring richness and flavor to the dish. When combined together, these ingredients create a harmonious and satisfying meal that is a true representation of traditional Cape Verdean cuisine.
With these key ingredients, cachupa becomes a flavorful and nutritious dish that captures the essence of Cape Verdean cuisine. Each ingredient plays a vital role in creating a well-balanced and satisfying stew. The combination of hominy, beans, starches, vegetables, and meats brings together a variety of textures, flavors, and colors, resulting in a culinary experience that is both comforting and delicious.
Hominy, with its hearty and chewy texture, adds a substantial element to the stew, while beans provide a rich source of protein, making cachupa a filling and satisfying meal. The addition of starches, such as cassava, sweet potato, and plantain, not only adds depth and creaminess to the stew but also contributes to its overall thickness. The vegetables, including squash, kale, and cabbage, add freshness, vibrant colors, and a range of nutrients to the dish. Lastly, the meats, including chicken, beef, and Portuguese sausage, bring a depth of flavor and richness that enhances the overall taste of the stew.
By celebrating these key ingredients, we honor the traditional flavors of Cape Verdean cuisine and pay homage to the diverse culinary heritage of the islands. Whether enjoyed on a special occasion or as a comforting weeknight meal, cachupa showcases the unique fusion of Portuguese and African influences that have shaped Cape Verdean cuisine over the years.
Easy Cachupa Recipe: Step-by-Step Preparation
Making cachupa may seem like a daunting task, but with this easy step-by-step recipe, you’ll be able to recreate this traditional Cape Verdean stew in your own kitchen. The recipe starts with soaking the beans overnight, which helps to soften them and enhance their flavor. Soaking the beans is an essential step in the preparation of cachupa as it ensures that they cook evenly and contribute to the rich flavors of the stew.
Soaking the Beans: The Foundation of Flavors
To start, you’ll need the following ingredients:
1 cup of dried beans (red kidney beans or white kidney beans)
Water
Follow these steps to soak the beans:
Rinse the dried beans under cold water to remove any dirt or debris.
Place the beans in a large bowl and cover them with water.
Allow the beans to soak overnight, preferably for 8-12 hours.
The overnight soaking process helps to rehydrate the beans and reduce their cooking time. It also aids in breaking down the complex sugars in the beans, making them easier to digest. Soaking the beans ensures that they become tender and release their flavor into the stew, resulting in a more flavorful and delicious cachupa.
Layering the Meats and Vegetables
Once the beans are soaked and ready, it’s time to layer the meats and vegetables in the pot. Here’s what you’ll need:
Soaked beans
Meat of your choice (chicken, beef, pork, or Portuguese sausage)
Additional ingredients and seasonings as desired (garlic, onion, bay leaves, paprika, etc.)
Follow these steps to layer the ingredients:
1. In a large pot, start by layering the soaked beans at the bottom.
2. Add the meat of your choice on top of the beans.
3. Layer the assorted vegetables on top of the meat.
4. Add any additional ingredients and seasonings as desired.
5. Cover the pot and bring it to a simmer over medium heat.
6. Allow the stew to cook for a few hours, until the meat is tender and the flavors have melded together.
By layering the ingredients in this manner, you ensure that each component of the cachupa cooks evenly and imparts its unique flavors to the dish. The layering technique also allows the flavors to develop and intensify as the stew simmers gently on the stove.
Cooking Tips for the Perfect Stew Consistency
Preparing cachupa requires some cooking finesse to achieve the perfect stew consistency. Here are some cooking tips to keep in mind:
Stir the stew occasionally to prevent the ingredients from sticking to the bottom of the pot.
Adjust the heat as needed to maintain a gentle simmer throughout the cooking process.
If the stew becomes too thick, add a little water or broth to thin it out.
If the stew is too thin, let it simmer uncovered for a bit longer to allow some of the liquid to evaporate and thicken.
For a richer and creamier stew, you can add coconut milk or cream towards the end of the cooking process.
By following these cooking tips, you’ll be able to achieve the right stew consistency and ensure that your cachupa turns out perfectly flavorful and delicious.
Now that you know the step-by-step process of preparing cachupa, you’re ready to embark on a culinary journey to Cape Verde right in your own kitchen. The next section will explore the health benefits of cachupa, making it an even more enticing dish to add to your recipe repertoire.
Savoring the Health Benefits of Cachupa
In addition to its delicious flavors, cachupa offers a range of health benefits. The stew is packed with nutritious ingredients like beans, vegetables, and lean meats, making it a wholesome and filling meal.
Beans are an excellent source of plant-based protein, fiber, and minerals, while vegetables add vitamins, antioxidants, and dietary fiber to the dish. Lean meats provide essential amino acids and iron. Cachupa is also a low-fat and cholesterol-free dish, making it a healthy option for those looking to maintain a balanced diet. By enjoying cachupa, you can savor the flavors of Cape Verdean cuisine while nourishing your body with wholesome ingredients.
Health Benefits of Cachupa
1. Nutritious ingredients like beans, vegetables, and lean meats
2. Source of plant-based protein, fiber, and minerals
3. Vitamins, antioxidants, and dietary fiber from vegetables
4. Essential amino acids and iron from lean meats
5. Low-fat and cholesterol-free
Digging into a bowl of cachupa not only satisfies your taste buds but also contributes to your overall health and well-being. The combination of nutritious ingredients in this traditional Cape Verdean stew offers a wide range of benefits that make it a smart choice for a balanced and wholesome meal.
Delicious Serving Suggestions for Cachupa
Cachupa is a versatile dish that can be enjoyed on its own or paired with complementary side dishes. Its rich and hearty flavors make it the perfect base for a variety of delicious accompaniments. Here are some serving suggestions to enhance your cachupa experience:
Cachupa Guisod: The Next-Day Delight
One popular way to enjoy cachupa is by transforming the leftovers into a dish called Cachupa Guisod. This next-day delight involves frying the leftover cachupa until it becomes crispy and golden. The result is a delightful breakfast option that brings out new textures and flavors in the dish. It’s like enjoying cachupa in a whole new way!
Pairing Cachupa with Traditional Sides
When serving cachupa, consider adding traditional Cape Verdean side dishes to complete the meal. These sides not only complement the flavors of cachupa but also provide a balanced and well-rounded dining experience. Here are some classic options:
Cornbread: Serve warm cornbread alongside cachupa for a satisfying combination of flavors and textures. The slightly sweet and crumbly cornbread complements the heartiness of the stew.
Batata Frita: These crispy and savory Cape Verdean-style French fries make a delicious side dish for cachupa. They add a satisfying crunch and can be enjoyed on their own or dipped in the stew.
Salted Fish: For a traditional Cape Verdean twist, serve cachupa with salted fish. The saltiness of the fish balances well with the flavors of the stew and adds an extra layer of taste to the meal.
Whether you choose to enjoy cachupa guisod or pair it with traditional sides, these serving suggestions will take your cachupa experience to the next level. Get creative and explore the different flavors and textures that complement this beloved Cape Verdean dish!
Customizing Your Cachupa: Variations to Try
While traditional cachupa is delicious on its own, you can also get creative and customize the dish to suit your tastes and preferences. There are various ways to add your own twist to cachupa, such as incorporating different spices, herbs, or vegetables. You can also experiment with different types of meats or proteins, or even make a vegetarian or vegan version by omitting the meat altogether and focusing on plant-based ingredients. By customizing your cachupa, you can truly make it your own and create a unique and flavorful dish that reflects your culinary creativity.
Customizing your cachupa allows you to explore endless possibilities and bring your own flair to this traditional Cape Verdean stew. Here are some creative ideas to inspire you:
Add a spicy kick: Incorporate hot peppers or chili flakes to give your cachupa a fiery flavor.
Herb-infused cachupa: Experiment with fresh herbs like cilantro, parsley, or thyme to add a burst of freshness to your dish.
Vegetarian delight: Create a vegetable-focused version of cachupa by using a variety of seasonal vegetables and legumes.
Seafood twist: Introduce seafood elements such as shrimp or fish to complement the traditional cachupa ingredients.
Exotic spices: Explore the world of spices and infuse your cachupa with flavors like cumin, turmeric, or paprika.
Fusion fusion: Combine elements from different cuisines to create a fusion cachupa, such as adding coconut milk, curry paste, or coconut flakes.
Remember, there’s no right or wrong way to customize your cachupa. Feel free to experiment and make it a reflection of your own culinary preferences and imagination. Whether you’re looking to add a new twist or create a completely unique recipe, the only limit is your creativity. So go ahead, get creative, and enjoy the delicious journey of customizing your very own cachupa!
Exploring More of Cape Verdean Cuisine Beyond Cachupa
While cachupa is certainly the star of Cape Verdean cuisine, there are many other delicious dishes that are worth exploring. Cape Verdean cuisine is rich in flavors and diverse in its offerings. From hearty stews and soups to flavorful grilled meats and seafood dishes, there is something for everyone to enjoy.
Dive into the Diversity: 25 Cape Verdean Foods
Table:
Cape Verdean Foods
Description
Cachupa
A traditional Cape Verdean stew made with hominy, beans, starches, vegetables, and meats.
Caldo de Peixe
A flavorful fish soup made with local seafood, vegetables, and spices.
Bacalhau com Natas
A creamy codfish dish prepared with potatoes, onions, cream, and cheese.
Feijoada
A hearty black bean stew with pork, sausage, and various meats.
Lagosta Grelhada
Grilled lobster seasoned with local herbs and spices.
Sopa de Couve
A classic Cape Verdean kale soup with beans, potatoes, and sausage.
Polvo Guisado
Braised octopus cooked with tomatoes, onions, and flavorful spices.
Canjica
A sweet corn pudding made with coconut milk and spices.
Frango Grelhado
Grilled chicken marinated in a blend of Cape Verdean herbs and spices.
Moqueca
A rich seafood stew cooked in coconut milk and flavored with peppers and cilantro.
Cuscuz de Milho
A cornmeal couscous dish served with fish or meat.
Tchetché
A popular street food made with grilled fish served in a traditional cornmeal wrap.
Bolo de Mandioca
A cassava cake made with grated cassava, coconut, and sweetened condensed milk.
Camoca
A traditional Cape Verdean cornbread made with cornmeal, milk, and eggs.
Buzio
Conch cooked in a flavorful sauce made with tomatoes, garlic, and herbs.
Tremoco
Salted lupini beans served as a popular snack or appetizer.
Morcella
A Cape Verdean blood sausage made with pork, rice, and spices.
Torresmo
Deep-fried pork belly, served crispy and flavorful.
Espetada
Skewered meat, usually beef or chicken, marinated and grilled to perfection.
Batata Frita
Crispy fried Cape Verdean-style fries, often served as a side dish.
The Influence of Seafood in Cape Verdean Diet
Seafood plays a significant role in Cape Verdean cuisine due to the country’s abundant coastal waters. The Cape Verdean diet features a variety of fresh fish, including tuna, wahoo, grouper, and snapper. Fish is often prepared simply, seasoned with local herbs and spices, and grilled or pan-fried to highlight its natural flavors. Traditional Cape Verdean seafood recipes showcase the versatility of fish, combining it with flavorful ingredients such as coconut milk, tomatoes, peppers, and aromatic herbs. Some popular Cape Verdean seafood dishes include Moqueca de Peixe (fish stewed in coconut milk) and Peixada (a spicy fish dish). The presence of seafood in Cape Verdean cuisine adds a unique and delicious dimension to the country’s culinary offerings.
Conclusion
In conclusion, exploring the flavors of Cape Verdean cuisine, specifically through the traditional dish of cachupa, allows us to not only savor delicious meals but also connect with the vibrant culture and heritage of Cape Verde. Embracing Cape Verdean food is a way to honor and preserve the cultural richness of the country, as food has always been an essential part of Cape Verdean traditions.
Cachupa, the national dish of Cape Verde, holds immense importance in the country’s culinary landscape. Its cultural significance goes beyond being a simple stew—it represents the fusion of Portuguese influences and local ingredients, reflecting the country’s history and identity. By incorporating traditional recipes like cachupa into our cooking repertoire, we can expand our culinary horizons and appreciate the diversity of global cuisines.
So, let’s celebrate Cape Verdean culture by embracing Cape Verdean food and including cachupa in our recipe book. By doing so, we not only indulge in a delicious and hearty dish but also connect with the rich traditions and flavors of Cape Verde, allowing us to explore new culinary experiences and broaden our understanding of global cuisines.
FAQ
What is cachupa?
Cachupa is the national dish of Cape Verde, a traditional stew made with hominy, beans, starches, and vegetables.
What is the difference between Cachupa Rica and Cachupa Pobre?
Cachupa Rica is the meat version of cachupa, while Cachupa Pobre is the vegetarian version.
What are the key ingredients in traditional cachupa?
The main components of cachupa include hominy, beans, starches, vegetables, and meats.
How can I make cachupa?
Soak the beans overnight, layer the meats and vegetables, and slow-cook the stew until it reaches the desired consistency.
What are the health benefits of cachupa?
Cachupa is packed with nutritious ingredients such as beans, vegetables, and lean meats, making it a wholesome and filling meal.
How can I customize my cachupa?
You can add different spices, herbs, vegetables, or even experiment with different types of meats or proteins to create a unique flavor profile.
What are some serving suggestions for cachupa?
You can enjoy cachupa on its own or pair it with traditional sides. Another popular option is to transform the leftovers into a crispy and golden dish called Cachupa Guisod.
Are there other traditional Cape Verdean dishes to explore?
Yes, Cape Verdean cuisine is rich and diverse, with a wide range of delicious dishes including stews, grilled meats, and seafood specialties.
Why is cachupa important in Cape Verdean culture?
Cachupa is not only a culinary delight but also a symbol of Cape Verdean identity and an important part of the country’s cultural heritage.
What is the cultural significance of cachupa?
Cachupa represents the blending of Portuguese influences with local ingredients and cooking techniques, reflecting the cultural fusion in Cape Verdean cuisine.
Why should I try cachupa?
Trying cachupa allows you to savor the flavors of Cape Verdean cuisine and connect with the vibrant culture and heritage of Cape Verde.
Welcome to our blog, where we are delighted to share with you an authentic idli recipe that you can easily make at home. Idli is a traditional South Indian delicacy loved for its soft and fluffy texture. With our easy idli recipe, you can recreate this classic dish in your own kitchen, without any special ingredients or equipment.
Idlis are not only a delicious breakfast option but also a versatile dish that can be enjoyed for lunch, dinner, or as a snack. Whether you are a fan of traditional recipes or love exploring new flavors, our homemade idli recipe is perfect for you. Get ready to savor the authentic taste of these delectable treats.
Table of Contents
Key Takeaways
Make perfect idlis at home with our easy and authentic idli recipe.
Enjoy soft and fluffy idlis without any special ingredients or equipment.
Idlis make a versatile dish that can be enjoyed for any meal or as a snack.
Try our homemade idli recipe to experience the traditional flavors of South India.
Savor the deliciousness of idlis with your favorite chutneys and sambar.
The Art of Creating Perfect Idli Batter
In order to achieve the perfect texture and taste of idlis, it is crucial to create the right idli batter. The batter serves as the foundation for creating soft, fluffy, and delicious idlis. Understanding the key factors in making a good idli batter will help you master the art of idli making at home.
The first step in creating idli batter is to carefully select the ingredients. The main components of idli batter are rice and lentils. It is important to choose the right type of rice and lentils to ensure the desired texture and flavor of the final product. Long-grain parboiled rice and skinned black gram lentils (urad dal) are commonly used in traditional idli batter recipes.
After selecting the ingredients, the next step is to soak them. Soaking the rice and lentils overnight or for a few hours helps soften them and make them easier to grind. The soaking time may vary depending on the climate and the rice and lentil varieties used.
Once the rice and lentils are soaked, it’s time to grind them. Grinding the soaked ingredients to a smooth paste is crucial for achieving the desired texture of the idli batter. Traditionally, stone grinders were used to grind the ingredients, but nowadays, blenders and food processors are commonly used for convenience.
After grinding, the batter needs to undergo fermentation. Fermentation is a key step in idli making as it imparts the characteristic tanginess and lightness to the idlis. The batter should be left to ferment in a warm place for several hours or overnight, depending on the temperature and climate. The ideal fermentation temperature is around 80°F (27°C).
During the fermentation process, the naturally occurring bacteria in the batter break down the carbohydrates and proteins, making it more digestible and light. Fermented idli batter will have a slightly sour aroma and frothy texture, which is a sign of a well-fermented batter.
Once the batter is fermented, it is ready to be used for making idlis. The fluffy and airy texture of the fermented batter will result in soft and spongy idlis. Remember to gently mix the batter before using it to ensure a consistent texture throughout.
Now that you know the art of creating perfect idli batter, you can confidently make homemade idlis that are as good as those served in restaurants. The next section will explore the basics of idli and its cultural significance.
Understanding the Basics: What is an Idli?
An idli is a popular South Indian dish that is known for its soft and fluffy texture. It is a type of savory rice cake that is made from a fermented batter consisting of rice and lentils. Idlis are typically served as a breakfast dish or a light meal.
The Origin and Cultural Significance of Idli
Idli has a rich history and is believed to have originated in the southern parts of India, specifically in the states of Karnataka and Tamil Nadu. It has been a staple in South Indian cuisine for centuries and is deeply ingrained in the culture and traditions of the region.
Traditionally, idlis were made by grinding soaked rice and lentils together using a grinding stone called a “ultra” or “attukal.” This labor-intensive process resulted in a fine batter, which was then fermented overnight. The fermentation process not only adds flavor but also makes the idlis light, soft, and easily digestible.
“Idlis are an integral part of our South Indian culture. They are often served during religious ceremonies, festivals, and special occasions. Idli-making is a skill that has been passed down through generations, and each family has their own unique recipe and techniques.”
Nutritional Benefits: Is Idli a Healthy Choice?
Idlis are not only delicious but also offer several nutritional benefits. They are low in fat, cholesterol-free, and rich in essential nutrients, making them a healthy choice for breakfast or a snack.
Some key nutritional benefits of idlis include:
High in protein: The combination of rice and lentils in idli batter provides a good amount of protein, which is essential for muscle growth and repair.
Good source of fiber: Idlis are made from whole grains, which contain dietary fiber that aids in digestion, promotes satiety, and helps maintain healthy blood sugar levels.
Low in calories: Idlis are relatively low in calories, especially when compared to other breakfast options. They are a satisfying meal that keeps you energized without adding extra weight.
Rich in vitamins and minerals: Idlis contain various vitamins and minerals, such as vitamin B, iron, and calcium, which are essential for overall health and well-being.
Overall, idlis not only satisfy your taste buds but also provide a nutritious start to your day.
The Two Approaches to a Fluffy Idli Recipe
When it comes to making fluffy idlis, there are two main approaches: the traditional method and modern techniques. Each method has its own unique characteristics and benefits, allowing you to create the perfect idli to suit your preferences.
1. Traditional Idli Recipe:
The traditional idli recipe involves stone grinding the batter and a longer fermentation process. Stone grinding helps achieve a fine texture and consistency, resulting in soft and fluffy idlis. The longer fermentation period allows the batter to develop a tangy flavor and enhances the overall taste.
Although the traditional method requires some additional time and effort, many people prefer it for its authentic taste and texture. It retains the essence of the age-old idli-making process, thereby preserving the cultural heritage and traditional flavors.
2. Modern Idli Recipe:
In contrast, modern techniques for making idlis utilize kitchen appliances like blenders and instant pots. These methods offer convenience and save time without compromising on taste and texture.
With modern techniques, you can achieve similar results to the traditional method in less time. Blenders provide a quick and efficient way to grind the batter, while instant pots allow for faster fermentation. This makes the modern idli recipe a popular choice among busy individuals who want to enjoy homemade idlis without spending too much time in the kitchen.
By comparing the two approaches, you can decide which method suits your preferences and lifestyle. If you prefer a traditional and authentic idli experience, the traditional method would be your best choice. On the other hand, if convenience and time-saving are your priorities, modern techniques are a great option.
It’s worth noting that both approaches yield delicious and fluffy idlis. The choice ultimately depends on your personal taste and the resources available to you.
To visualize the differences between the traditional and modern approaches, refer to the table below:
Note: The table represents a visual comparison of the traditional and modern approaches to a fluffy idli recipe.
Key Ingredients for the Authentic Idli Recipe
In order to make delicious and authentic idlis, it is essential to use the right ingredients. The key components of idli batter include idli rice and urad dal, along with the crucial element of fermentation.
Choosing the Right Type of Rice and Lentils
When it comes to idli rice, it is recommended to use a specific variety known as idli rice. This rice is specially processed to have a smooth and fine texture, which contributes to the softness of the idlis. You can find idli rice easily at most Indian grocery stores.
The second vital ingredient is urad dal, also known as black gram lentils. Urad dal is responsible for adding a creamy texture and richness to the idli batter. It is crucial to use whole urad dal, preferably with the skin intact, as it aids in the fermentation process. Split urad dal may not yield the same results.
The Role of Fermentation in Idli Making
Fermentation plays a crucial role in achieving the characteristic texture and taste of idlis. The natural fermentation process not only enhances the flavor but also makes the idlis soft and fluffy. During fermentation, the natural bacteria present in the environment break down the carbohydrates in the batter, resulting in the production of carbon dioxide gas. This gas gets trapped in the batter, causing it to rise and ferment.
The fermentation process usually takes around 8 to 12 hours, depending on the temperature and climate. It is recommended to place the batter in a warm and draft-free spot, as the bacteria thrive in such conditions. The result is a well-fermented batter that yields light, airy, and flavorful idlis.
Now that we understand the importance of the key ingredients and the role of fermentation, let’s move on to exploring the different cooking techniques for making idlis.
Traditional vs. Modern Cooking Techniques for Idli
In this section, we will explore the contrasting approaches to cooking idlis: the traditional method and the modern technique. Both methods have their own unique advantages and disadvantages, and understanding them can help you choose the best technique for your idli-making process. Let’s dive in!
The Stone Grinding Technique
The traditional method of making idli batter involves using a stone grinder to grind the rice and lentils. This age-old technique has been passed down through generations and is believed to yield superior results. The stone grinder, also known as a wet grinder, slowly grinds the ingredients to create a smooth and creamy batter. This slow grinding process allows the rice and lentils to retain their nutrients and flavors, resulting in deliciously authentic idlis.
Using the stone grinding technique requires time and patience as the batter needs to be soaked, ground, and fermented over a period of hours or even overnight. The fermentation process enhances the taste and texture of the idlis, making them light, fluffy, and full of flavor.
Utilizing Modern Kitchen Appliances
In recent years, modern kitchen appliances have gained popularity for making idli batter quickly and conveniently. Appliances like blenders and food processors offer a convenient alternative to stone grinding. With these appliances, you can easily grind the rice and lentils into a smooth batter in a matter of minutes.
The use of modern kitchen appliances reduces the time required for preparation. However, it is important to note that the texture and taste may differ slightly compared to idlis made using the traditional stone grinding technique. Some enthusiasts claim that the traditional method yields idlis with a better texture and flavor.
Ultimately, the choice between traditional and modern cooking techniques comes down to personal preference and the time you have available. If you appreciate the authenticity and traditional flavors of idlis, then the stone grinding method is worth exploring. On the other hand, if convenience and time-saving are your priorities, modern kitchen appliances can be a great option.
idli recipe: Step by Step Guide to the Perfect Mix
In this section, we will provide a detailed step-by-step guide to making the perfect idli batter. Creating the ideal batter is crucial for achieving fluffy and delicious idlis, so we will break down each step of the process to ensure success.
1. Soaking the rice and lentils:
Start by measuring out the rice and lentils according to the recipe. Rinse them thoroughly under cold water to remove any impurities. Place them in separate bowls and cover with enough water. Let them soak separately for at least 4 hours or overnight. This soaking process helps soften the grains and aids in the fermentation process.
2. Grinding the batter:
After soaking, drain the water from both the rice and lentils. Transfer them to a blender or wet grinder. Begin by adding a small amount of water and grind them into a smooth paste. Gradually add water as needed to achieve a thick, creamy consistency. A well-ground batter is key to achieving the perfect texture of idlis.
3. Fermenting the batter:
Transfer the batter to a large container, making sure there is enough room for it to expand during fermentation. Cover the container with a clean cloth or lid and let it ferment for 8 to 12 hours, or until the batter has doubled in volume. Fermentation is a crucial step as it helps develop the characteristic tangy flavor and airy texture of idlis.
Tip: To aid fermentation, place the container in a warm place or use a fermentation function if available on your appliance.
4. Preparing the idlis:
Before steaming the idlis, give the fermented batter a gentle stir to incorporate any settled solids. Grease the idli molds with a little oil or ghee. Fill each mold about three-fourths full with the batter. Steam the idlis in a steamer or idli cooker for about 10 to 12 minutes, or until they are cooked through and springy to the touch.
5. Serve and enjoy:
Once the idlis are cooked, remove them from the steamer and let them cool for a few minutes. Use a spoon or knife to gently loosen the idlis from the molds. Serve hot with your favorite chutney, sambar, or any other accompaniments of your choice.
Navigating the Fermentation Process: Tips and Tricks
In order to achieve soft and fluffy idlis, proper fermentation of the idli batter is crucial. In this section, we will provide you with some helpful tips and tricks to navigate the fermentation process successfully.
Best Temperature for Fermentation
The ideal temperature for fermenting idli batter is around 80°F to 90°F (27°C to 32°C). This temperature range promotes the growth of beneficial microorganisms, which helps in the fermentation process. It is important to maintain a consistent temperature throughout the fermentation period to ensure optimal results.
There are a few ways to maintain the proper temperature for fermentation:
Use a warm place in your kitchen: Find a warm spot in your kitchen, such as near the oven or on top of the refrigerator, where the temperature is relatively stable and warm.
Utilize a hot water bath: Place the container with the idli batter in a larger container filled with warm water. This helps to regulate the temperature and provides a consistent environment for fermentation.
Use a fermentation appliance: If you have a fermentation appliance, such as a yogurt maker or a proofing box, you can use it to create the ideal temperature for fermenting the idli batter.
By maintaining the proper temperature, you can ensure that the fermentation process occurs at an optimal rate, resulting in light and airy idlis.
Dealing with Fermentation in Different Climates
The fermentation process can be influenced by the climate in which you live. If you live in a hot and humid climate, the batter may ferment faster. On the other hand, if you live in a colder climate, the fermentation process may take longer.
Here are some tips for dealing with fermentation in different climates:
Hot and humid climate: In hotter climates, fermentation can happen quickly. Keep a close eye on the batter and check for the sour aroma and small air bubbles on the surface, indicating that the fermentation is complete.
Cold climate: In colder climates, fermentation may take longer. Place the batter in a warm place, such as near a warm appliance or use a warm water bath to speed up the process. Be patient and allow the batter to ferment until it develops the desired tangy aroma.
Remember, the fermentation time may vary depending on the climate, so it is essential to observe the visual and olfactory cues to determine when the batter is ready for making idlis.
Proper fermentation is key to achieving soft and fluffy idlis. By following these tips and tricks, you can navigate the fermentation process with confidence and enjoy delicious homemade idlis every time.
The Secret to Soft and Fluffy Idli
To achieve soft and fluffy idlis, there are a few secrets and tips that can make all the difference in the final result. Here are some additional techniques you can incorporate into your idli-making process:
Adjusting the consistency of the batter: The consistency of the idli batter plays a crucial role in determining the texture of the idlis. If the batter is too thick, the idlis might turn out dense and heavy. On the other hand, if the batter is too watery, the idlis might not hold their shape. Aim for a batter that is smooth and slightly thick, but still easily pourable.
Steaming techniques: The way you steam the idlis can also impact their softness and fluffiness. Ensure that the steamer is properly preheated before placing the idli molds inside. Steam the idlis on medium heat for the optimum time, typically around 10-12 minutes, or until a toothpick inserted into the center comes out clean.
Storing leftover batter: If you have leftover idli batter, do not let it go to waste. It can be refrigerated and used within a couple of days. When using leftover batter, make sure to bring it to room temperature before steaming to ensure the idlis turn out soft and fluffy.
By keeping these secrets and tips in mind, you can elevate your idli-making skills and enjoy delicious, soft, and fluffy idlis every time.
Essential Complements: Chutney and Sambar Recipes
As idlis are a staple in South Indian cuisine, they are typically served with flavorful accompaniments that enhance their taste. Chutney and sambar are the quintessential side dishes that perfectly complement the soft and fluffy idlis.
Chutneys are versatile condiments made with a variety of ingredients, such as coconut, tomatoes, and mint. They provide a burst of flavor and add a delicious contrast to the mildness of idlis. Here are three easy and delicious chutney recipes that you can try:
Coconut Chutney Recipe
This coconut chutney is a classic accompaniment to idlis. It has a creamy texture and a subtle nutty flavor that pairs beautifully with the softness of the idlis.
Tomato Chutney Recipe
This tangy tomato chutney adds a vibrant burst of flavor to your idlis. It is made with ripe tomatoes, onions, and a blend of spices, creating a perfect balance of sweet, tangy, and spicy flavors.
Mint Chutney Recipe
Mint chutney is a refreshing and aromatic condiment that complements the mildness of idlis. Made with fresh mint leaves, coriander, and green chilies, this chutney adds a burst of freshness to every bite.
In addition to chutneys, sambar is another popular side dish that pairs exceptionally well with idlis. Sambar is a flavorful lentil-based stew cooked with vegetables and spices. It adds a savory and tangy element to the idlis. Here is a simple and aromatic sambar recipe to try:
Sambar Recipe
This sambar recipe is packed with the goodness of lentils and a medley of vegetables. It has a rich and tangy flavor profile that perfectly complements the soft idlis. The aromatic blend of spices adds depth to the dish, making it a delightful accompaniment.
By serving your idlis with these flavorful chutneys and sambar, you can elevate your breakfast or meal to a whole new level of taste and satisfaction. The combination of soft idlis with these delicious accompaniments is a match made in culinary heaven. Give these recipes a try to experience the true flavors of South Indian cuisine.
Conclusion
After exploring the art of creating a perfect idli batter, understanding the basics of idli, and comparing traditional and modern techniques, we hope you now feel confident to embark on your homemade idli-making journey. With our easy-to-follow recipe and handy tips, making fluffy idlis at home is within your reach.
Idlis have a rich cultural significance in South Indian cuisine and are enjoyed for breakfast or as a light meal. Not only are they delicious, but they also pack a nutritional punch, being a great source of protein and fiber.
Remember, the key to achieving soft and fluffy idlis lies in properly fermenting the batter and selecting the right ingredients. Whether you choose the traditional stone grinding technique or opt for modern kitchen appliances, the end result will be equally satisfying.
We encourage you to unleash your culinary creativity by pairing your homemade idlis with a variety of flavorful chutneys and a delicious sambar. By making idlis at home, you can customize the flavors to suit your preferences and enjoy a wholesome and satisfying meal.
FAQ
What is the key to making perfect and fluffy idlis?
The key to making perfect and fluffy idlis lies in the idli batter. The right ratio of rice and lentils, the soaking and grinding process, and proper fermentation are all crucial factors in achieving the desired texture and taste.
How important is fermentation in making idlis?
Fermentation plays a vital role in idli making. It not only adds a tangy flavor to the batter but also helps in making the idlis soft and fluffy. Proper fermentation allows the batter to rise and become light, resulting in airy and delicious idlis.
What are the traditional and modern approaches to making idlis?
The traditional method of making idlis involves stone grinding the batter and longer fermentation. Modern techniques, on the other hand, utilize kitchen appliances like blenders and instant pots, which offer more convenience and time-saving options.
What are the key ingredients for authentic idlis?
The key ingredients for authentic idlis include rice and lentils. It’s important to choose the right type of rice and lentils, such as idli rice and urad dal, to ensure the best results. The fermentation process also plays a crucial role in achieving the desired texture and taste.
What are the traditional and modern cooking techniques for making idlis?
The traditional cooking technique involves stone grinding the batter, which helps in achieving a smooth and fine texture. Modern techniques utilize kitchen appliances like wet grinders and blenders, which offer convenience and speed up the process.
Can you provide a step-by-step guide to making idli batter?
Of course! To make idli batter, you need to soak the rice and lentils, grind them into a smooth paste, and then ferment the batter overnight. It’s essential to follow the proper measurements and process to achieve the best results. Check out our detailed instructions in the article for a step-by-step guide.
How do I know if the idli batter is properly fermented?
The idli batter should rise and become light and frothy during fermentation. It should have a slight tangy aroma and a bubbly texture. You can perform a simple spoon test by dropping a spoonful of batter into a bowl of water. If it floats, it means the batter is well-fermented and ready to use.
What are some additional tips for achieving soft and fluffy idlis?
Apart from proper fermentation, achieving soft and fluffy idlis also depends on the consistency of the batter. It should be thick yet pourable. Steaming the idlis in a well-greased steamer and using fresh ingredients can also contribute to better results. You can find more helpful tips and techniques in our article.
What are the essential complements to idlis?
Chutney and sambar are the essential complements to idlis. They add flavor and enhance the overall dining experience. Popular chutney options include coconut chutney, tomato chutney, and mint chutney. A delicious and aromatic sambar also pairs well with idlis.
Welcome to our easy dosa recipe guide! If you’ve always wanted to try making dosa at home but felt intimidated by the process, this recipe is perfect for you. We’ve simplified the steps so that even beginners can create a delicious and crispy dosa from scratch. Say goodbye to store-bought mixes and impress your family and friends with your homemade dosa making skills!
Dosa is a beloved South Indian dish that has gained popularity worldwide. It is a thin and crispy crepe made from fermented rice and lentil batter. With our easy dosa recipe, you’ll be able to recreate this authentic South Indian favorite in your own kitchen.
From understanding the essential ingredients to mastering the art of spreading dosas and cooking them to perfection, we will guide you through every step of the process. You’ll learn how to create the perfect dosa batter, achieve the ideal consistency, and cook dosas that are golden brown and crispy.
Not only will you learn the traditional plain dosa recipe, but we’ll also show you how to make a delicious masala dosa filled with spiced potatoes. Along the way, we’ll explore different variations and serving suggestions to add variety to your dosa repertoire.
So why wait? Let’s get started on your dosa-making journey and enjoy the authentic taste of this popular South Indian dish right at home. The aroma of the dosas cooking on the griddle and the satisfaction of creating these delicious pancakes from scratch will make every bite worth it!
Table of Contents
Key Takeaways:
Our easy dosa recipe is perfect for beginners looking to make dosa at home.
Dosa is a popular South Indian dish made from fermented rice and lentil batter.
We will guide you through the process of creating the perfect dosa batter and cooking dosas to perfection.
Learn how to make traditional plain dosa as well as delicious masala dosa with spiced potatoes.
Explore different variations and serving suggestions to add variety to your dosa experience.
Introducing the South Indian Favorite: Dosa
Dosa is a beloved South Indian dish that has gained popularity worldwide. It is a thin and crispy crepe made from fermented rice and lentil batter. Dosa is typically served with chutney and sambar, and it can be enjoyed for breakfast, lunch, or dinner.
Discover the rich history and cultural significance of dosa as you embark on your journey to make this delicious dish at home. With our authentic dosa recipe, you’ll be able to recreate the flavors of South India and enjoy a crispy dosa that will tantalize your taste buds.
Understanding the Essential Ingredients for Your Dosa Homemade
The key to making the perfect dosa lies in using the right ingredients. In this section, we will explore the essential components that go into creating a delicious and authentic homemade dosa.
Choosing the Right Rice
When it comes to dosa, the type of rice you use plays a crucial role in determining the texture and taste of the final dish. Traditionally, a variety of rice called “dosa rice” or “idli rice” is used, as it has a higher starch content and lends a distinct flavor to the dosa. However, if you cannot find dosa rice, you can also use regular raw rice or parboiled rice. Just ensure that the rice you choose is of good quality and suitable for dosa-making.
The Role of Urad Dal in Your Dosa
Urad dal, also known as black gram lentils, is another essential ingredient in dosa batter. It not only adds a rich, creamy texture to the batter but also aids in the fermentation process. Urad dal provides the necessary proteins and enzymes that help the batter ferment and develop the characteristic tangy flavor of dosa. It is important to use whole urad dal and not split urad dal for best results.
To better understand the importance of these dosa ingredients, take a look at the visual guide below:
Comparison of Dosa Rice Types
Dosa Rice Type
Characteristics
Availability
Dosa Rice/Idli Rice
Higher starch content, distinct flavor
Available in Indian grocery stores
Raw Rice
Widely available, milder taste
Available in most grocery stores
Parboiled Rice
Partially boiled, grains are firmer
Available in most grocery stores
With a good understanding of the dosa ingredients, you are well-equipped to create a delicious homemade dosa. In the next section, we will delve into the process of creating the perfect dosa batter recipe.
The Perfect Blend: Creating Your Dosa Batter Recipe
Mastering the art of creating the perfect dosa starts with the batter. Follow our step-by-step recipe to ensure your dosa batter is well-prepared and ready to cook.
Soaking the Ingredients
Begin by soaking the rice and urad dal in water for at least 4-6 hours, or overnight. This process is crucial as it helps soften the grains and make them easier to grind. Rinse the soaked ingredients thoroughly before grinding to remove any impurities.
Grinding the Batter
Grind the soaked rice and urad dal separately using a wet grinder or blender. Add water intermittently to achieve a smooth and thick consistency. The grinding process may take some time, but it’s essential for achieving the desired texture of the dosa batter. Aim for a batter that is neither too thick nor too runny.
Fermentation Tips for the Best Results
Once the batter is well-ground, transfer it to a large bowl or container. Cover the container with a clean cloth or plastic wrap and let it ferment for 8-12 hours, or overnight, in a warm place. Fermentation is a crucial step as it helps develop the unique flavor and texture of dosa.
During fermentation, the batter will rise and double in volume. It should have a slightly sour aroma and a bubbly texture. If your kitchen is colder, you can place the batter in an oven with the pilot light on or use a fermentation box to maintain the ideal temperature.
After fermentation, give the batter a gentle mix to combine any separated liquids. Your dosa batter is now ready to be transformed into crispy and flavorful dosas.
Mastering the Art of Spreading Dosas
When it comes to creating the perfect dosa, spreading the batter evenly on the griddle is crucial. This technique ensures that your dosa becomes thin, crispy, and delicious. But how do you achieve that even, smooth spread?
Here are some tips to master the art of spreading dosas:
Preheat the griddle: Begin by preheating your griddle on medium heat. This will help the batter spread evenly.
Use the right amount of batter: Take a ladleful of dosa batter and pour it in the center of the griddle.
Spread in circular motions: Using the back of the ladle or a flat-bottomed cup, gently spread the batter in circular motions from the center towards the edges of the griddle. Keep rotating your wrist to create a thin and even layer.
Avoid gaps: Ensure that there are no gaps or holes in the dosa by filling them with a little extra batter.
Achieve the perfect thickness: To achieve the desired thickness, spread the batter thinly for a crispy dosa or leave it slightly thicker for a softer dosa.
Practice makes perfect: Spreading dosas takes practice, so don’t be discouraged if your first attempts are not perfect. With time, you’ll develop the right technique and be able to spread dosas like a pro.
With these tips and a little practice, you’ll be able to create beautiful dosas that are both visually appealing and delicious. So, roll up your sleeves, grab your ladle, and start spreading dosas with confidence!
Cooking Techniques for Crispy Dosa Recipe
When it comes to cooking dosa, attention to detail and proper techniques are key to achieving a crispy and perfectly cooked outcome. In this section, we will explore two important aspects of cooking dosa: temperature and timing, and the right cookware to use.
Temperature and Timing
The right temperature is crucial for cooking dosas to perfection. Too low, and your dosa will turn out soggy; too high, and it will burn. The ideal temperature for cooking dosas is medium-high heat. This allows the batter to cook gradually, ensuring a crispy texture and even browning.
Timing also plays a vital role in cooking dosas. It takes practice to determine the right amount of time needed to cook each side of the dosa. Generally, it should take around 2-3 minutes for the first side and 1-2 minutes for the second side. Keep an eye on the color and texture of the dosa to gauge when it’s ready to be flipped.
Using the Right Cookware
The type of cookware you use can greatly affect the outcome of your dosa. For crispy and evenly cooked dosas, it is recommended to use a non-stick flat skillet or a cast-iron griddle. These types of cookware distribute heat evenly, ensuring that the dosa cooks uniformly and doesn’t stick to the pan.
When cooking dosas, it is essential to use a flat ladle or spatula to spread the batter evenly on the pan. A curved spatula may result in uneven thickness and shape. Additionally, make sure to use a wide and shallow pan to allow for easy flipping of the dosa without breaking it.
Now that we’ve covered the importance of temperature and timing, as well as the right cookware to use, you’re ready to create delicious and crispy dosas. Follow these cooking techniques to ensure that your dosas turn out golden brown and irresistible.
Exploring Different Variations with Your Homemade Dosa Recipe
Get creative with your dosa-making by exploring different variations of this classic dish. Adding a twist to your homemade dosa recipe allows you to customize the flavors and create unique dosa experiences. Two popular variations of dosa that you can try are the Classic Plain Dosa and the Masala Dosa with Spiced Potatoes.
Classic Plain Dosa
The Classic Plain Dosa is a simple yet delicious variation that highlights the flavor of the fermented rice and lentil batter. It is a crispy and golden dosa that can be enjoyed on its own or paired with coconut chutney and sambar. The secret to making a perfect plain dosa lies in achieving a thin and evenly spread batter on the griddle.
Masala Dosa with Spiced Potatoes
For a more indulgent dosa experience, try the Masala Dosa with Spiced Potatoes. This variation features a filling of spiced mashed potatoes wrapped in a crispy dosa. The aromatic blend of spices and the creamy texture of the potatoes complement the crispy exterior of the dosa beautifully. Serve it with coconut chutney, sambar, and a side of tomato or onion chutney for a complete meal.
Variation
Description
Serving Suggestion
Classic Plain Dosa
A crispy dosa made with fermented rice and lentil batter
Pair with coconut chutney and sambar
Masala Dosa with Spiced Potatoes
A dosa filled with spiced mashed potatoes
Serve with coconut chutney, sambar, and chutneys of your choice
Dosa from Scratch vs. Store-bought Ready Mixes
When it comes to making dosa, you have two options: creating it from scratch or using store-bought ready mixes. Each method has its own advantages and considerations to keep in mind. Let’s take a closer look at both options to help you make an informed decision.
Homemade Dosa:
Control over ingredients: Making dosa from scratch allows you to have full control over the ingredients used. You can choose high-quality rice and lentils, ensuring that your dosa is prepared with the freshest and most nutritious ingredients.
Customizable flavor: Homemade dosa provides the opportunity to customize the flavor according to your taste preferences. You can experiment with different ratios of rice and lentils, as well as add spices and herbs to enhance the taste.
Dosa Mixes:
Convenience: Dosa mixes offer a convenient alternative, especially for those with busy schedules. They come pre-packaged with the necessary ingredients, saving you time and effort in measuring and grinding.
Potential trade-offs: While dosa mixes are convenient, they may not deliver the same authentic taste and texture as homemade dosas. The flavor and quality of the mixes can vary, and some may contain preservatives or additives.
Ultimately, the choice between homemade dosa and store-bought ready mixes depends on your priorities and preferences. If you value full control over ingredients and the ability to customize flavors, making dosa from scratch is the way to go. On the other hand, if convenience is a top priority, dosa mixes can be a time-saving option. Consider your needs and decide which method aligns best with your dosa-making goals.
Serving Suggestions: Complementing Your Dosa Pancake Recipe
Enhance the flavors of your homemade dosa with a variety of delicious accompaniments. To truly elevate your dosa experience, we recommend serving it with traditional coconut chutney and sambar. These classic pairings perfectly complement the taste and texture of dosa, adding a burst of flavor to every bite.
To make the coconut chutney, blend fresh grated coconut, roasted chana dal, green chilies, ginger, and a dash of lemon juice in a mixer. Season with salt and temper with mustard seeds, urad dal, curry leaves, and dried red chilies in hot oil. This creamy and tangy coconut chutney is the perfect accompaniment for your dosas.
Sambar, a flavorful and tangy lentil stew, is another must-have accompaniment for dosa. To make sambar, cook pigeon peas (toor dal), tamarind pulp, and a medley of vegetables such as onions, tomatoes, drumsticks, carrots, and eggplant in a fragrant blend of spices. Finish off the dish with a tempering of mustard seeds, asafoetida, curry leaves, and dried red chilies. The rich and aromatic sambar complements the dosas perfectly, adding a flavorful contrast to every bite.
If you’re feeling adventurous, you can also explore non-traditional accompaniments for your dosas. Experiment with different types of chutneys, such as mint chutney, tomato chutney, or peanut chutney. You can even try pairing your dosas with tangy tomato salsa or spicy cilantro sauce for a fusion twist.
The possibilities are endless when it comes to serving dosas. Let your creativity run wild and discover unique combinations that suit your palate. The key is to find accompaniments that balance the flavors of dosa and enhance your dining experience.
Storing and Reheating Tips for Your Indian Crepe Recipe
When it comes to enjoying dosas, it’s not always possible to devour them all at once. That’s why we’re here to share some valuable tips on how to store and reheat your leftover dosas. With these practices, you can ensure that your dosas maintain their texture and flavor, so you can savor them later without compromising on taste and quality.
Storing Dosas:
Allow the dosas to cool completely before storing them. This helps prevent them from becoming soggy.
Place the dosas in an airtight container or wrap them in aluminum foil, ensuring they are tightly sealed to maintain freshness.
Store the dosas in the refrigerator to extend their shelf life. They can typically be stored for up to 2-3 days.
Reheating Dosas:
Heat a non-stick pan or tawa over medium heat.
Place the dosas on the heated pan and cook for a few minutes on each side until they become warm and crispy.
You can also reheat dosas in a microwave by placing them on a microwave-safe plate and heating them for 30 seconds to 1 minute, or until they are warm.
Now that you know how to store and reheat your dosas, you can enjoy them whenever you crave that fresh-out-of-the-pan taste. Don’t let your delicious dosas go to waste – follow these tips to make the most of your homemade Indian crepes!
Conclusion
As we come to the end of our dosa-making journey, let’s recap the key points and takeaways from this article. We’ve emphasized the importance of using authentic ingredients to ensure the true flavors of dosa. By choosing the right rice and understanding the role of urad dal, you can create a batter that produces delicious and crispy dosas every time.
We’ve also delved into the techniques of batter preparation and cooking. From soaking the ingredients to grinding the batter to perfection, every step plays a crucial role in achieving the desired texture and taste of dosa. And let’s not forget the art of spreading dosas and mastering the cooking techniques, which ensure that our dosas turn out golden brown and irresistibly crispy.
Throughout this article, we’ve encouraged you to explore different variations of dosa and suggested serving ideas to enhance your dosa experience. From classic plain dosas to flavorful masala dosas, the possibilities are endless. And with traditional coconut chutney and sambar as well as non-traditional accompaniments, you can create a truly satisfying meal.
Now, it’s time for you to roll up your sleeves and try making your own dosas at home. Enjoy the process of preparing the batter, spreading it on the griddle, and savoring the aroma as the dosas cook to perfection. Embrace the joy of creating this beloved South Indian dish and delight your family and friends with your dosa-making skills. We hope you have a wonderful culinary journey as you embark on the dosa adventure!
FAQ
What is dosa?
Dosa is a thin and crispy crepe made from fermented rice and lentil batter. It is a popular South Indian dish that can be enjoyed for breakfast, lunch, or dinner.
What are the key ingredients for making dosa at home?
The key ingredients for making dosa at home are rice and urad dal. Different types of rice can be used, and urad dal plays a crucial role in creating the texture and flavor of dosa.
How do I make dosa batter from scratch?
To make dosa batter from scratch, you need to soak the rice and urad dal, grind them to a smooth paste, and allow the batter to ferment. The fermentation process is important for developing the unique flavor and texture of dosa.
What are some tips for spreading dosa batter on the griddle?
To spread the dosa batter evenly on the griddle, use a circular motion and start from the center, moving outward. Tilt the griddle to spread the batter into a thin and even circle. Practice and patience will help you perfect your spreading technique.
How do I cook dosa to achieve a crispy texture?
To achieve a crispy dosa, make sure the griddle is hot before pouring the batter. Cook the dosa on medium heat and flip it when the edges turn golden brown. Cook the other side until it becomes crispy. Using a non-stick griddle or a cast-iron skillet can also help achieve a crispy texture.
Can I make different variations of dosa?
Absolutely! You can make different variations of dosa. Some popular variations include plain dosa and masala dosa, which is filled with spiced potatoes. You can get creative and customize your dosas according to your preferences by adding various fillings or toppings.
Should I make dosa from scratch or use a ready mix?
Making dosa batter from scratch allows you to control the ingredients and customize the flavor. However, using a ready mix is more convenient. It’s a personal choice, depending on your preference for taste, quality, and convenience.
What are some traditional accompaniments for dosa?
The traditional accompaniments for dosa are coconut chutney and sambar. Coconut chutney is made with grated coconut, lentils, and spices, while sambar is a lentil-based vegetable stew. These complement dosa perfectly, but you can also try different chutneys, sauces, or fillings.
How do I store and reheat leftover dosas?
To store leftover dosas, place them in an airtight container or wrap them in foil. Store them in the refrigerator and consume within a day or two. To reheat dosas, warm them on a griddle or in a microwave until heated through. This will help maintain their texture and flavor.
What are the key takeaways from this article?
The key takeaways from this article are the importance of using authentic ingredients, mastering the techniques of batter preparation and cooking, and exploring different variations and serving suggestions. We encourage you to try making dosas at home and experience the joy of creating this beloved South Indian dish.
Welcome to our kitchen, where we’ll be sharing a comforting homemade kadhi chawal recipe with you. There’s something truly special about this dish – it has the power to bring warmth and comfort to any meal. Picture a bowl of tangy yogurt curry, paired with fluffy rice, creating the ultimate combination of flavors that soothes the soul. It’s the perfect dish for a cozy meal at home, and we can’t wait to show you how to make it.
Table of Contents
Key Takeaways:
Homemade kadhi chawal is a comforting and flavorful dish that combines tangy yogurt curry with fluffy rice.
It is the perfect recipe for a cozy meal at home.
Stay tuned as we delve into the history, step-by-step preparation, regional variations, health benefits, and serving suggestions of kadhi chawal.
Preserve the authenticity of the recipe by using traditional cooking techniques and ingredients.
We invite you to try the recipe and share your feedback and experiences with us.
The Heartwarming Roots of Kadhi Chawal
Let’s take a journey into the heartwarming history and cultural significance of the beloved dish, kadhi chawal. Kadhi chawal is a traditional Indian delicacy that holds a special place in the hearts and palates of millions of people. Its origins can be traced back to ancient times, where curd or yogurt, one of the main ingredients of kadhi, has been a staple in Indian diets for centuries.
The use of curd in Indian cuisine can be attributed to its numerous health benefits and its ability to add a creamy tanginess to dishes. Kadhi chawal has been prepared and enjoyed in households across India for generations, with each region adding its own unique touch to the recipe.
“The combination of tangy yogurt curry and fluffy rice creates a symphony of flavors that evoke feelings of comfort and love. Memories of enjoying kadhi chawal with family and loved ones during festive occasions or lazy Sunday afternoons bring a sense of warmth and nostalgia.”
From the spiced kadhi with pakoras in North India to the delicate mor kuzhambu made with coconut in South India, kadhi chawal has countless variations. This dish has gracefully withstood the test of time, capturing the essence of Indian culinary traditions.
Each region’s twist on kadhi chawal reflects the local flavors, ingredients, and cultural influences, making it a truly diverse and versatile dish. Whether it’s the jaggery-laced kadhi from Gujarat or the fragrant kokum kadhi from Maharashtra, every version of kadhi chawal tells a story and paints a picture of the rich Indian culinary heritage.
The history and evolution of kadhi chawal highlight the significance of food in Indian culture. As we explore the roots of this cherished dish, we celebrate the traditions and flavors that have been passed down through generations, creating a sense of belonging and connection.
The Beauty of Tradition and Comfort
The appeal of kadhi chawal lies not just in its delicious taste but also in the emotions it evokes. It brings back memories of gathering around the dining table with loved ones, sharing stories, and savoring the flavors of home.
In the next section, we will uncover the secrets to creating the perfect homemade kadhi chawal. We will explore the ingredients, techniques, and steps that will help you recreate this comforting dish in your own kitchen.
Anatomy of the Perfect Homemade Kadhi Chawal Recipe
When it comes to creating the perfect homemade kadhi chawal, every ingredient and step plays a crucial role. From selecting the right ingredients to preparing the flavorful kadhi and guilt-free pakoras, attention to detail is key. Let’s dive into the anatomy of this classic dish and discover the secrets behind its comforting flavors.
Selecting the Right Ingredients
To create an authentic and delicious kadhi chawal, it’s essential to choose the right ingredients. Here are the key components that will elevate your dish:
Curd (yogurt): Fresh and tangy curd forms the base of the kadhi, adding a creamy and luscious texture.
Gram flour (besan): This nutty and aromatic flour acts as a thickening agent, giving the kadhi its signature consistency.
Spices: A blend of flavorful spices such as turmeric, cumin, mustard seeds, and fenugreek seeds infuse the kadhi with their distinct flavors.
Vegetables: Diced onions, ginger, and green chilies add a delightful crunch and enhance the overall taste.
To make your kadhi chawal truly exceptional, opt for high-quality ingredients that bring out the best flavors.
Preparing the Kadhi: Combining Culture and Curd
Making the kadhi involves a seamless combination of cultural traditions and the star ingredient, curd. Here’s a step-by-step guide to preparing this comforting curry:
In a bowl, whisk together the curd and gram flour until smooth, ensuring there are no lumps.
Add water gradually, whisking continuously to achieve the desired consistency.
Heat oil in a pan and add mustard seeds, cumin seeds, and fenugreek seeds. Allow them to splutter and release their aroma.
Add onions, ginger, and green chilies, sautéing until golden brown.
Pour in the curd and gram flour mixture, stirring gently to blend everything together.
Season with turmeric, red chili powder, and salt, adjusting the flavors to suit your taste.
Simmer the kadhi on low heat, allowing it to thicken and develop its flavors for about 15-20 minutes.
Your kadhi is now ready to be served with fluffy rice, bringing comfort and satisfaction to every bite.
The process of making kadhi is not only a culinary adventure but also a tribute to the rich cultural heritage of Indian cuisine.
Frying Up Flavorful Pakoras Without the Guilt
No kadhi chawal is complete without the addition of crispy pakoras. While deep-frying pakoras is the traditional method, you can make them guilt-free with a few modifications. Here’s how:
In a bowl, combine gram flour, chopped onions, coriander leaves, green chilies, and spices like turmeric, cumin, and red chili powder.
Add water gradually to form a thick batter, ensuring it coats the onion mixture evenly.
Instead of deep-frying, opt for baking or air frying the pakoras for a healthier alternative.
Place spoonfuls of the batter on a lined baking sheet or in an air fryer basket.
Bake or air fry the pakoras until golden brown and crispy, flipping them halfway through cooking.
Once cooked, gently place the pakoras in the simmering kadhi, allowing them to absorb the flavors.
With these modifications, you can enjoy the delightful crunch of pakoras without compromising on your health.
Ingredients
Quantity
Curd (yogurt)
1 cup
Gram flour (besan)
1/4 cup
Turmeric
1/2 teaspoon
Cumin seeds
1 teaspoon
Mustard seeds
1/2 teaspoon
Fenugreek seeds
1/4 teaspoon
Onions
1 medium, diced
Ginger
1-inch piece, grated
Green chilies
2, chopped
Red chili powder
1/2 teaspoon
Salt
To taste
With these key ingredients and step-by-step instructions, you’re well-equipped to create the perfect homemade kadhi chawal. Let’s move on to exploring the regional variations of this beloved dish.
The Regional Twists of Kadhi Across India
India is a land of diverse cultures and cuisines, and kadhi is no exception. This tangy yogurt-based curry has many regional variations that showcase the unique flavors and traditions of different states. Let’s explore the fascinating world of regional kadhi variations!
Kadhi from South India: Coconut-based Mor Kuzhambu
In South India, kadhi takes the form of a creamy coconut-based curry known as Mor Kuzhambu. This variation includes a medley of spices, curry leaves, and coconut milk, resulting in a rich and flavorful dish. Mor Kuzhambu is often served with steamed rice, and the combination of tangy yogurt and coconut brings a delightful balance to the meal.
Kadhi from Gujarat: Jaggery-laced Kadhi
Gujarat, known for its vibrant and sweet flavors, has its own unique twist on kadhi. Here, the tanginess is complemented by the sweetness of jaggery, a traditional unrefined sugar. The addition of jaggery gives the kadhi a distinct taste and a hint of caramelized flavor. This lip-smacking kadhi pairs perfectly with hot rotis or steamed rice.
Kadhi from Punjab: Pakora Kadhi
Punjab, the land of hearty and indulgent flavors, offers its signature variation of kadhi with pakoras. The kadhi is enriched with pakoras, which are deep-fried dumplings made of chickpea flour and spices. These crispy pakoras add a delightful texture to the kadhi, making it a comforting and satisfying meal. It is often enjoyed with freshly cooked basmati rice and a side of pickles.
State
Regional Variation
South India
Coconut-based Mor Kuzhambu
Gujarat
Jaggery-laced Kadhi
Punjab
Pakora Kadhi
These are just a few examples of the regional twists on kadhi across India. Each state brings its own distinct flavors, ingredients, and cooking techniques to this beloved dish, making it an integral part of their culinary heritage. Exploring these regional variations allows us to appreciate the gastronomic diversity that India has to offer.
Health Benefits of Incorporating Curd in Your Diet
Incorporating curd, also known as yogurt, into your diet can provide numerous health benefits. Curd is a rich source of probiotics, calcium, and protein, making it a valuable addition to a balanced eating plan.
One of the key advantages of consuming curd is its probiotic content. Probiotics are live bacteria and yeasts that promote a healthy gut microbiome. They play a crucial role in improving digestion by maintaining a balanced intestinal flora and aiding in the absorption of nutrients.
Furthermore, curd is an excellent source of calcium, which is essential for maintaining strong bones and teeth. Including curd in your diet can help prevent osteoporosis and reduce the risk of fractures, especially in older individuals.
Another benefit of curd is its high protein content. Protein is crucial for building and repairing tissues, supporting muscle growth, and promoting satiety. Consuming curd as a part of your diet can help you meet your daily protein needs and keep you feeling full and satisfied.
Additionally, curd is known to boost immunity due to its rich nutrient profile. It contains vitamins such as vitamin B12, which plays a vital role in immune system function, as well as vitamin D, which is crucial for supporting immune health.
Incorporating curd into your meals, such as in the comforting homemade kadhi chawal recipe, not only enhances the taste but also adds nutritional value. By including curd in your diet, you can enjoy its health benefits and support your overall well-being.
Step-by-Step Guide to Making Comforting Homemade Kadhi Chawal
Are you ready to recreate the warmth and comfort of homemade kadhi chawal in your own kitchen? Follow our step-by-step guide to create this flavorful and satisfying dish that will transport you to the streets of India. With a tangy yogurt curry and fluffy rice, kadhi chawal is the ultimate comfort food for any occasion.
Cooking the Rice to Perfection
To start your kadhi chawal journey, it’s crucial to cook the rice just right. Here’s how:
Wash the rice thoroughly under running water until the water runs clear.
In a pot, combine the rinsed rice with the appropriate amount of water. For every cup of rice, use two cups of water.
Bring the water to a boil over medium heat, then reduce the heat to low and cover the pot with a tight-fitting lid.
Cook the rice for 15-20 minutes, or until all the water is absorbed and the rice is fluffy. Remove from heat and let it sit, covered, for 5 minutes before fluffing it with a fork.
Creating the Aromatic Kadhi Base
Now, let’s dive into the creation of the aromatic kadhi base:
In a bowl, whisk together yogurt and gram flour until no lumps remain. Gradually add water and continue whisking until you achieve a smooth, pourable consistency.
In a separate pan, heat oil or ghee over medium heat. Add cumin seeds and let them sizzle for a few seconds.
Add chopped onions and sauté until they turn translucent.
Next, add minced garlic, ginger, and green chili. Sauté for another minute, until fragrant.
Pour in the yogurt and gram flour mixture, stirring continuously to avoid lumps.
Season with turmeric, red chili powder, coriander powder, and salt. Stir well to incorporate the spices.
Allow the kadhi to simmer over low heat for 15-20 minutes, stirring occasionally, until it thickens slightly and the flavors meld together.
Achieving the Ideal Consistency for Your Kadhi
The perfect kadhi should have a creamy and smooth consistency. Follow these tips to ensure you achieve the ideal texture:
If your kadhi gets too thick, simply add a little water and stir to loosen it up.
If it’s too thin, continue simmering over low heat until it thickens to your desired consistency.
Adjust the seasoning, adding more salt or spices if needed.
For an extra touch of richness, you can temper the kadhi with a tadka of ghee, cumin seeds, and dried red chilies.
Now that you have mastered the art of making comforting homemade kadhi chawal, it’s time to sit back, relax, and savor the flavors of this beloved traditional Indian dish. Enjoy!
Sharing the Love: How to Serve Kadhi Chawal to Your Family
Serving Kadhi Chawal with Traditional Accompaniments
When it comes to serving kadhi chawal to your family, incorporating traditional accompaniments can elevate the overall dining experience. These companions not only enhance the flavors but also add variety to the meal. To truly share the love through this comforting dish, consider these suggestions:
1. Papad: Crispy and flavorful, papad is a popular choice to pair with kadhi chawal. These thin, round lentil wafers provide a delightful crunch and complement the creamy texture of the kadhi.
2. Pickle: Tangy and spicy, pickles are an indispensable part of an Indian meal. Whether it’s mango pickle, lemon pickle, or mixed vegetable pickle, adding a small portion to your plate can harmonize the flavors of kadhi chawal.
Garnishing kadhi chawal also adds visual appeal to the dish. A sprinkle of freshly chopped cilantro or a drizzle of fragrant ghee can create an inviting presentation. Additionally, consider arranging crispy fried pakoras on top of the kadhi for an extra burst of flavor and texture.
By serving kadhi chawal with these traditional accompaniments and adding thoughtful garnishes, you can make your family’s dining experience truly special. It’s not just about the delicious taste but also about the memories and traditions that come with sharing this heartwarming meal.
Conclusion
Tips for Preserving the Authenticity of the Recipe
As we conclude our journey into the world of comforting homemade kadhi chawal, it’s important to remember a few tips for preserving the authenticity of this beloved recipe. Firstly, embrace the use of traditional cooking techniques and ingredients. This will help you create a kadhi chawal that truly captures the essence of this classic dish.
Secondly, take the time to understand the regional variations of kadhi chawal. Explore the diverse flavors and techniques from different states in India, and let these influences inspire your own culinary creations. By staying true to the roots of this dish, you can ensure an authentic and enriching experience.
We also invite you to try our recipe and share your feedback and experiences. Your thoughts matter to us, and we would love to hear how our kadhi chawal recipe turned out for you. Feel free to engage with us through our social media platforms, where you can connect with fellow food enthusiasts and share your own variations of kadhi chawal.
FAQ
What is kadhi chawal?
Kadhi chawal is a comforting homemade dish that consists of a tangy yogurt curry called kadhi and fluffy rice. It is a popular traditional Indian dish known for its warmth and delicious flavors.
How is kadhi chawal prepared?
To make kadhi chawal, you need to prepare the kadhi base by combining curd, gram flour, and spices. The rice is cooked separately to achieve fluffy and separate grains. The kadhi and rice are then served together, creating a satisfying and flavorful meal.
Are there any regional variations of kadhi chawal?
Yes, kadhi chawal has different variations across India. For example, in South India, there is a coconut-based variation called mor kuzhambu. In Gujarat, kadhi is often laced with jaggery. Each variation adds its own unique twist to this classic dish.
What are the health benefits of incorporating curd in kadhi chawal?
Curd is a good source of probiotics, calcium, and protein. It aids digestion, boosts immunity, and promotes bone health. By including curd in your kadhi chawal, you can add nutritional value to your meal.
How do I serve kadhi chawal to my family?
Kadhi chawal can be served with traditional accompaniments such as papad and pickle. You can garnish the dish with fresh coriander leaves and serve it on a plate to make it visually appealing. Sharing this comforting meal with your loved ones is a joyful experience.
How can I preserve the authenticity of the kadhi chawal recipe?
To preserve the authenticity of the kadhi chawal recipe, you can use traditional cooking techniques and ingredients. This ensures that the dish stays true to its roots and maintains its delicious flavors. Experimentation is always encouraged, but preserving the essence of the recipe is key.
Can I share my feedback and variations of kadhi chawal with the author?
Absolutely! The author welcomes your feedback and encourages you to share your own variations of kadhi chawal. You can engage with the author through social media platforms and share your experiences, tips, and suggestions. Your input is valuable and contributes to the kadhi chawal community.
Welcome to our guide on mouthwatering chicken brochettes recipes and tips! If you’re looking to elevate your grilling game and impress your family and friends with delicious skewers, you’ve come to the right place. Chicken brochettes are a versatile and flavorful choice for barbecues, family dinners, and summer gatherings.
Whether you’re a seasoned grill master or a novice in the kitchen, we’re here to help you create the perfect chicken brochettes that will have everyone coming back for seconds. From selecting the best chicken cuts to mastering the art of marinating and exploring extraordinary flavor combinations, we have all the tips and tricks you need to create mouthwatering brochettes.
Get ready to tantalize your taste buds and become a brochette expert. Let’s dive into the world of chicken brochettes and discover the secrets to creating these delectable grilled skewers!
Table of Contents
Key Takeaways:
Chicken brochettes are a versatile and flavorful choice for barbecues, family dinners, and summer gatherings.
We’ll provide tips and tricks to select the best chicken cuts and master the art of marinating for mouthwatering brochettes.
Explore extraordinary marinade recipes and creative serving suggestions to elevate your grilling experience.
Chicken brochettes are a healthy and nutritious option, perfect for those conscious of their diet and nutrition.
Learn how to adapt brochette recipes for indoor cooking, so you can enjoy the deliciousness anytime, regardless of the weather.
The Origins of Chicken Brochettes and Their Global Appeal
In this section, we will explore the origins of chicken brochettes and their global appeal. Chicken brochettes, also known as chicken kebabs, have a rich history that dates back to ancient times. The word “kebab” originates from the Persian language, referring to any kind of grilled meat on skewers. Over time, this delicious dish has spread across various cultures around the world, each adding its own unique flavors and seasonings.
The global appeal of chicken brochettes lies in their versatility and popularity among people of different backgrounds. Whether you’re in the bustling streets of Istanbul, the vibrant markets of Mexico City, or the tranquil beaches of Thailand, you’re likely to find chicken brochettes being grilled to perfection and savored with delight. The succulent pieces of marinated chicken, charred to perfection, offer a mouthwatering experience that transcends borders and brings people together through the love of food.
Chicken brochettes have become a staple in many cuisines due to their ability to incorporate local flavors and ingredients. From the aromatic spices of Indian cuisine to the tangy marinades of Mediterranean cuisine, chicken brochettes have adapted and evolved to suit different palates. The global appeal of chicken brochettes stems from their ability to satisfy cravings for smoky, juicy, and flavorful skewers, no matter where you are in the world.
Throughout this article, we will delve deeper into the origins, recipes, and tips for preparing mouthwatering chicken brochettes. So, join us on this culinary journey as we explore the world of chicken brochettes and uncover the secrets behind their universal allure.
A Honey Lime Twist: Your Go-To Chicken Brochettes Recipe
Selecting the Best Chicken Cuts for Brochettes
Before diving into the mouthwatering honey lime chicken brochettes recipe, it’s essential to select the best chicken cuts for perfectly cooked skewers. Opting for boneless, skinless chicken thighs or chicken breasts ensures tender and flavorful results. These cuts are ideal as they can withstand grilling without drying out, and their mild flavor pairs well with the vibrant honey lime marinade. When choosing chicken cuts, make sure they are uniform in size to ensure even cooking throughout the brochettes.
Now that we have the ideal chicken cuts, let’s move on to the star of the show – the honey lime marinade.
The honey lime marinade adds a delightful twist to classic chicken brochettes. The combination of tangy lime and sweet honey creates a harmonious balance of flavors that will captivate your taste buds. The marinade not only infuses the chicken with incredible taste but also tenderizes it, resulting in juicy and succulent brochettes.
To master the honey lime marinade, follow these simple steps:
Gather the following ingredients:
– 1/4 cup lime juice (freshly squeezed for optimal flavor)
– 2 tablespoons honey
– 2 tablespoons olive oil
– 2 cloves of garlic, minced
– 1 teaspoon ground cumin
– 1/2 teaspoon salt
– 1/4 teaspoon black pepper
In a bowl, whisk together all the marinade ingredients until well combined.
Add the chicken cuts to a resealable plastic bag or a shallow dish.
Pour the honey lime marinade over the chicken, making sure all the pieces are coated.
Seal the bag or cover the dish and marinate the chicken in the refrigerator for at least 1 hour, or ideally overnight. The longer the chicken marinates, the more flavorful it will be.
Once your chicken is marinated and ready to be grilled, it’s time to focus on the cooking technique to achieve perfectly cooked brochettes. Preheat your grill to medium-high heat, around 400°F (200°C). Thread the marinated chicken onto skewers, alternating with your favorite vegetables like bell peppers, onions, or cherry tomatoes, for a vibrant and well-rounded meal.
Grill the skewers for approximately 10-12 minutes, turning occasionally, until the chicken reaches an internal temperature of 165°F (75°C). The cooking time may vary depending on the size of the chicken pieces and the heat of your grill, so keep an eye on them to prevent overcooking.
Once the honey lime chicken brochettes are beautifully charred and perfectly cooked, remove them from the grill and let them rest for a couple of minutes before serving. This resting period allows the juices to redistribute, resulting in tender and juicy bites.
Now that you have mastered the honey lime chicken brochettes recipe and the art of selecting the best chicken cuts, it’s time to enjoy this delicious and versatile dish. Serve the brochettes with your favorite sides, such as couscous, grilled vegetables, or a fresh green salad, for a complete and satisfying meal.
The Art of Marinating: Elevating Your Grilled Chicken Skewers
Marinating is an essential technique that can take your grilled chicken skewers from ordinary to extraordinary. By infusing the chicken with delicious flavors and tenderizing it, marinating enhances the overall taste and texture of your brochettes. In this section, we will provide you with valuable tips and techniques for marinating chicken brochettes and achieving mouthwatering results.
It all starts with selecting the right marinade for your grilled chicken skewers. A marinade is a flavorful liquid mixture that typically consists of ingredients such as herbs, spices, oils, acids (like citrus juice or vinegar), and sweeteners. The key is to choose a marinade that complements the flavors you want to enhance in your chicken.
Here are some tips for marinating chicken brochettes:
Choose the right container: Opt for a container that is just the right size for your chicken pieces and allows the marinade to evenly coat the chicken. A zip-top bag or a shallow dish works well.
Marinating time: The optimal marinating time for chicken brochettes usually ranges from 1 to 24 hours. Keep in mind that the longer you marinate, the more flavorful and tender the chicken will become. Aim to marinate the chicken for at least 1-2 hours to allow the flavors to penetrate the meat.
Turn and baste: To ensure that the chicken absorbs the marinade evenly, turn the skewers occasionally and baste them with the marinade. This helps infuse the flavors throughout and prevents the chicken from drying out.
Experiment with flavors: Don’t be afraid to get creative with your marinades. Try different combinations of herbs, spices, and seasonings to find the flavors that you enjoy the most. Consider adding ingredients like garlic, ginger, soy sauce, honey, or even fruit juices to add depth and complexity to your marinade.
Remember, marinating is not only about adding flavor; it also helps to tenderize the chicken, making it juicier and more succulent. The acids in the marinade, such as citrus juice or vinegar, help break down the proteins in the chicken, resulting in a more tender and moist texture.
Now that you have learned the art of marinating, it’s time to experiment with different marinades and flavor combinations to elevate your grilled chicken skewers to a whole new level of deliciousness. Get creative, have fun, and enjoy the incredible flavors that marinating brings to your brochettes!
Creative Serving Suggestions for Chicken Kebabs
Pairing the perfect sides with your chicken brochettes can elevate your dining experience to new heights. Whether you’re hosting a backyard barbecue or enjoying a family dinner, these creative serving suggestions will complement your chicken kebabs and create a delicious and complete meal. Let’s explore some mouthwatering options!
Pairing with Sides for a Complete Meal
1. Greek Salad: The fresh and vibrant flavors of a classic Greek salad pair beautifully with grilled chicken kebabs. Toss together crisp lettuce, juicy tomatoes, cucumber, red onions, Kalamata olives, and crumbled feta cheese. Drizzle with a lemon and olive oil dressing for a refreshing accompaniment.
2. Mediterranean Rice Pilaf: Transport your taste buds to the Mediterranean with a fragrant and fluffy rice pilaf. Sauté onions, garlic, and bell peppers in olive oil, then add basmati rice, chicken broth, and Mediterranean spices like oregano, thyme, and paprika. Cook until the rice is tender and serve alongside your succulent chicken brochettes.
3. Roasted Vegetables: Enhance your chicken kebabs with a medley of roasted vegetables. Toss bell peppers, zucchini, eggplant, and cherry tomatoes in olive oil, sprinkle with salt, pepper, and herbs like rosemary or thyme, and roast until tender. The smoky and caramelized flavors will complement the grilled chicken perfectly.
4. Tzatziki Sauce: A creamy and tangy tzatziki sauce is an excellent condiment for chicken brochettes. Combine Greek yogurt, grated cucumber, minced garlic, lemon juice, and fresh dill. Season with salt and pepper to taste. The refreshing flavors of tzatziki will balance the richness of the grilled chicken.
5. Couscous Salad: Create a light and refreshing side dish by tossing cooked pearl couscous with chopped cucumbers, tomatoes, red onion, fresh herbs like parsley or mint, and a squeeze of lemon juice. The tender couscous provides a delightful contrast to the juicy chicken kebabs.
6. Grilled Corn on the Cob: Embrace the flavors of summer by grilling sweet corn on the cob alongside your chicken brochettes. Brush the corn with melted butter, sprinkle with salt, pepper, and a hint of chili powder, then cook until charred and tender. The smoky and slightly spicy corn will add a wonderful dimension to your meal.
7. Pita Bread and Hummus: Serve your chicken kebabs with warm pita bread and a creamy hummus dip. The soft and pillowy pita bread provides a delightful vessel for assembling bite-sized wraps with the grilled chicken. The creamy hummus adds a flavorful and nutritious element to the meal.
8. Tabbouleh Salad: Refresh your palate with a refreshing tabbouleh salad. Combine bulgur wheat, finely chopped tomatoes, cucumbers, parsley, mint, and green onions. Dress with lemon juice and olive oil. The vibrant colors and fresh flavors of tabbouleh make it an excellent side dish for chicken brochettes.
9. Caprese Skewers: Put a twist on the classic Caprese salad by skewering mozzarella cheese, cherry tomatoes, and fresh basil leaves. Drizzle with balsamic glaze for an elegant and delicious accompaniment to your chicken kebabs. The combination of creamy cheese, juicy tomatoes, and fragrant basil will tantalize your taste buds.
10. Sweet Potato Fries: Swap traditional french fries with crispy sweet potato fries as a side for your chicken brochettes. Cut sweet potatoes into thin wedges, toss in olive oil, sprinkle with salt, pepper, and spices like paprika or cumin, then bake until golden and crispy. The slight sweetness of the fries will complement the savory flavors of the grilled chicken.
Get creative with your sides and experiment with different flavors and textures to find the perfect pairings for your chicken kebabs. The possibilities are endless, so let your culinary imagination run wild!
Extraordinary Marinades for Flavorful Chicken Kebabs
In this section, we will introduce extraordinary marinades for flavorful chicken kebabs. Marinades are key to infusing chicken with delicious flavors and ensuring tender and juicy meat. We will focus on two exceptional marinade recipes that will take your chicken brochettes to the next level.
Sweet and Savory Combo: Honey Garlic Inspiration
Introducing our first extraordinary marinade: the Honey Garlic Marinade. This delightful combination of sweet and savory flavors will leave your taste buds craving more. The honey adds a touch of natural sweetness, while the garlic brings a savory and aromatic element to the mix.
To create this mouthwatering marinade, combine the following ingredients:
1/4 cup honey
3 cloves of garlic, minced
2 tablespoons soy sauce
1 tablespoon olive oil
1 tablespoon fresh lemon juice
1 teaspoon Dijon mustard
1/2 teaspoon salt
1/4 teaspoon black pepper
Whisk all the ingredients together in a bowl until well combined. Place your chicken brochettes in a resealable bag or container, and pour the marinade over the chicken, ensuring each piece is coated evenly. Let the chicken marinate in the refrigerator for at least 2 hours, or preferably overnight, to allow the flavors to penetrate the meat.
When you’re ready to grill, simply thread the marinated chicken onto skewers and cook them to perfection. The Honey Garlic Marinade will caramelize beautifully on the grill, creating irresistible flavor and a golden glaze on your chicken kebabs.
Introducing Heat with Sriracha
If you’re a fan of spicy flavors, our second extraordinary marinade will surely excite your taste buds. The Sriracha Marinade infuses your chicken kebabs with a fiery kick and tantalizing heat. Sriracha, a popular Thai hot sauce, adds depth and intensity to the marinade.
To make the Sriracha Marinade, gather the following ingredients:
1/4 cup soy sauce
2 tablespoons sriracha sauce
1 tablespoon honey
1 tablespoon lime juice
1 tablespoon sesame oil
1 teaspoon minced ginger
1/2 teaspoon garlic powder
1/4 teaspoon red pepper flakes
In a bowl, whisk together all the ingredients until well combined. Place your chicken brochettes in a resealable bag or container, and pour the marinade over the chicken, making sure to coat each piece thoroughly. Allow the chicken to marinate in the refrigerator for at least 1 hour, allowing the flavors to meld and the heat to intensify.
When you’re ready to grill, thread the marinated chicken onto skewers and grill them to perfection. The Sriracha Marinade will infuse your chicken brochettes with a bold and spicy flavor profile, satisfying those who crave a little heat during their grilling adventures.
With these extraordinary marinades, your chicken brochettes will be transformed into delectable masterpieces bursting with flavor. Whether you prefer the sweet and savory combination of the Honey Garlic Marinade or the heat and spice of the Sriracha Marinade, your taste buds are in for an extraordinary treat.
CHICKEN BROCHETTES: A Quick and Easy Summer Classic
Chicken brochettes are a quintessential summer classic that never fails to impress. With their quick and easy preparation, they are the perfect choice for summer gatherings, backyard barbecues, and even weeknight dinners. Whether you’re hosting a party or simply craving a delicious grilled meal, chicken brochettes are sure to satisfy your cravings.
The beauty of chicken brochettes lies in their simplicity. All you need are a few ingredients, some skewers, and a grill, and you’re good to go. To begin, marinate your choice of chicken cuts in your favorite flavors – from zesty citrus to savory herbs and spices. Then, thread the marinated chicken onto skewers, alternating with colorful veggies like bell peppers, onions, and cherry tomatoes.
Once your brochettes are ready, simply grill them to perfection, allowing the flames to infuse a smoky, charred flavor into the tender chicken and crisp vegetables. The result is a mouthwatering dish that captures the essence of summer in every bite.
One of the best things about chicken brochettes is their versatility. You can customize them to suit your taste and dietary preferences. Whether you prefer a tangy barbecue glaze, a spicy marinade, or a refreshing herb-infused dressing, there are endless options to explore.
So, why not add chicken brochettes to your menu this summer? They are quick, easy, and guaranteed to be a hit with family and friends. Whether you’re enjoying a leisurely weekend barbecue or a weeknight dinner, these summer classics are sure to satisfy your cravings and bring a taste of the season to your table.
Optimal Skewer Choices: Metal vs. Bamboo
When it comes to preparing chicken brochettes, one important consideration is selecting the right skewers. In this section, we will compare metal skewers to bamboo skewers and discuss the optimal choices for your grilling needs.
The Importance of Pre-Soaking Bamboo Skewers
One popular option for skewering chicken is bamboo skewers. These skewers are made from natural bamboo and are easily available in most supermarkets. However, bamboo skewers require some preparation before use.
To prevent the skewers from burning during grilling, it is crucial to pre-soak them. Soaking bamboo skewers in water for at least 30 minutes before grilling helps to keep them from charring or disintegrating on the grill. This step not only ensures better cooking results but also prevents the skewers from imparting a burnt taste to your delicious chicken brochettes.
Note: To further enhance the flavor of your chicken brochettes, you may also consider adding herbs or spices to the water while soaking the bamboo skewers.
On the other hand, metal skewers offer a durable and reusable alternative to bamboo skewers. These skewers are typically made from stainless steel, which provides excellent heat conductivity and helps in even cooking of the chicken. Metal skewers also have a long lifespan and can withstand high grilling temperatures, making them a convenient choice for frequent use.
When choosing between metal and bamboo skewers, consider factors like convenience, ease of use, and personal preference. Both options have their advantages and can result in delicious chicken brochettes.
Skewer Type
Advantages
Disadvantages
Bamboo Skewers
1. Widely available and affordable 2. Natural and eco-friendly 3. Easy to handle and dispose of
1. Require pre-soaking 2. Prone to burning if not soaked properly 3. Single-use, not reusable
Metal Skewers
1. Reusable and long-lasting 2. Durable and withstand high temperatures 3. Even cooking due to excellent heat conductivity
1. More expensive than bamboo skewers 2. Can get very hot during grilling (use caution)
Table: A comparison of bamboo skewers and metal skewers for chicken brochettes.
Ultimately, the choice between metal and bamboo skewers for your chicken brochettes depends on your preferences and grilling needs. Whichever option you choose, following proper care and maintenance instructions will ensure many successful grilling sessions with delicious skewers.
Healthy Chicken Skewers: A Nutritious Grilling Option
When it comes to enjoying delicious grilled food, chicken skewers are a fantastic choice. Not only are they bursting with flavors, but they also offer numerous health benefits. Grilled chicken brochettes are a nutritious option for those who are conscious of their diet and nutrition.
One of the key advantages of chicken skewers is the lean protein they provide. Skinless chicken breast meat is low in fat and high in protein, making it an excellent choice for maintaining a healthy diet. Protein is essential for building and repairing tissues, regulating cell function, and boosting immunity.
In addition to being rich in lean protein, chicken skewers offer a range of essential nutrients. They are a good source of vitamins and minerals such as vitamin B6, which plays a crucial role in metabolism and brain development, and niacin, which supports digestion and skin health.
Furthermore, grilled chicken brochettes are a versatile option that can be paired with a variety of healthy side dishes. Consider serving them with a refreshing mixed green salad, grilled vegetables, or whole-grain rice for a complete and balanced meal.
So, if you’re looking for a nutritious grilling option that doesn’t compromise on taste, try incorporating healthy chicken skewers into your next barbecue or get-together. Your taste buds and your body will thank you!
In this section, we will provide tips and techniques for indoor grilling to make chicken kebabs anytime, regardless of the weather or availability of outdoor grilling equipment. Whether you live in an apartment, have limited outdoor space, or simply prefer the convenience of indoor cooking, you can still enjoy the delicious flavors of grilled chicken brochettes.
Adapting Brochette Recipes for Indoor Cooking
When it comes to indoor grilling for chicken brochettes, there are a few adjustments you can make to ensure successful results. Here are some tips:
Use a grill pan or stovetop griddle: These cooking surfaces provide the perfect alternative to an outdoor grill. They allow for direct heat and can create those desirable grill marks on the chicken kebabs.
Preheat the grill pan or griddle: Just like preheating an outdoor grill, preheating the indoor cooking surface is crucial. It helps to sear the chicken, lock in juices, and promote even cooking.
Oil the cooking surface: To prevent sticking, lightly oil the grill pan or griddle before placing the chicken kebabs on it.
Adjust cooking time and temperature: Indoor grilling may require slightly longer cooking times compared to outdoor grilling. It’s important to monitor the doneness of the chicken using a meat thermometer to ensure it reaches a safe internal temperature of 165°F (74°C).
To further enhance the flavors of your indoor-grilled chicken brochettes, you can incorporate the same marinades and seasonings used for outdoor grilling. The key is to adapt the cooking method while keeping the same delicious flavors intact.
With these indoor grilling techniques, you can enjoy the mouthwatering taste of chicken kebabs any time of the year, even when outdoor grilling is not an option. Whether you’re hosting a gathering, preparing a weeknight dinner, or simply craving that smoky grilled flavor, indoor grilling for chicken brochettes is a versatile and convenient solution.
Conclusion
In conclusion, chicken brochettes are the ultimate grilling delight that offers a delicious and versatile dining experience. We have explored the origins and global appeal of chicken brochettes, highlighting their historical significance and popularity across cultures. From the mouthwatering honey lime twist to extraordinary marinades, we have shared a range of recipes and tips to elevate your grilled chicken skewers to new heights.
By marinating your chicken brochettes with flavorful combinations and mastering grilling techniques, you can achieve tender and succulent skewers that will impress your family and friends. We have also provided creative serving suggestions and recommended pairing them with side dishes for a complete and satisfying meal. Whether you prefer the convenience of indoor grilling or the classic barbeque experience, chicken brochettes are a quick and easy summer classic that will surely delight your taste buds.
We invite you to try out the recipes and techniques shared in this article. Explore the various marinades and flavor combinations to create your signature chicken brochettes. Whether you are hosting a backyard gathering or enjoying a weeknight dinner with your loved ones, chicken brochettes are the perfect choice for a flavorful and nutritious grilling option. So fire up your grill, gather your ingredients, and let the enticing aroma of sizzling chicken brochettes take your grilling experience to new heights!
FAQ
What are some easy chicken brochettes recipes?
We have a variety of mouthwatering chicken brochettes recipes that are quick and easy to prepare. From honey lime chicken brochettes to savory sriracha marinades, we have options to suit every palate. Check out our recipe section for more details!
How do I select the best chicken cuts for brochettes?
When choosing chicken cuts for brochettes, it’s important to opt for boneless and skinless cuts that are uniform in size. This ensures even cooking and makes it easier to thread onto skewers. Popular choices include chicken breast, thigh, and tenderloin.
What are some tips for marinating chicken brochettes?
Marinating is key to enhancing the flavor and tenderness of grilled chicken brochettes. Make sure to marinate the chicken for a minimum of 30 minutes to allow the flavors to penetrate. You can use a variety of ingredients such as herbs, spices, citrus juices, and olive oil to create delicious marinades. Don’t forget to refrigerate the chicken while marinating.
What are some creative serving suggestions for chicken kebabs?
Chicken brochettes can be served in various ways to enhance the dining experience. They pair well with side dishes like grilled vegetables, rice pilaf, or a fresh Mediterranean salad. You can also serve them as part of a wrap, sandwich, or on top of a bed of greens for a healthy and satisfying meal.
What are some extraordinary marinades for flavorful chicken kebabs?
If you want to take your chicken brochettes to the next level of deliciousness, try our sweet and savory honey garlic marinade or add some heat with a spicy sriracha marinade. These marinades will add incredible flavor and depth to your grilled chicken skewers.
How can I make chicken brochettes indoors?
If you don’t have access to an outdoor grill or prefer to cook indoors, you can still enjoy the flavors of chicken brochettes. Simply adapt the brochette recipes for indoor cooking by using a grill pan or broiling function in your oven. Follow the same cooking times and techniques mentioned in the recipes for perfectly cooked indoor chicken kebabs.
What are the health benefits of chicken skewers?
Chicken skewers are a nutritious grilling option as they provide lean protein and are low in fat. By opting for boneless, skinless chicken cuts, you can reduce the fat content even further. Grilled chicken brochettes are a healthy choice for individuals conscious of their diet and nutrition.
Which skewer choice is better, metal or bamboo?
Both metal and bamboo skewers have their advantages. Metal skewers are reusable, durable, and heat up quickly, resulting in faster cooking. On the other hand, bamboo skewers are affordable and disposable, making cleanup easy. To prevent bamboo skewers from burning on the grill, soak them in water for 30 minutes before threading the chicken onto them.
Is there a quick and easy chicken brochettes recipe?
Yes! Chicken brochettes are the perfect quick and easy summer classic. With minimal preparation and grilling time, you can have delicious skewers ready in no time. Check out our recipe section for simple and flavorful chicken brochette options.
Welcome to our culinary journey through Brazil! Today, we are excited to share an authentic Feijoada recipe with you, the beloved Brazilian black bean stew. Feijoada is not just a dish; it’s a symbol of Brazilian culture and a flavorful representation of the country’s diverse culinary heritage.
Feijoada is a hearty and satisfying stew made with black beans, a variety of pork cuts, and traditional seasonings. This dish is typically served with farofa, a toasted cassava flour, and accompanied by rice, collard greens, and orange slices. It’s a combination of flavors and textures that will transport you straight to the vibrant streets of Brazil.
Whether you are a seasoned chef or a novice in the kitchen, this Feijoada recipe is accessible and easy to follow. So put on your apron and let’s embark on a culinary adventure!
Table of Contents
Key Takeaways:
Feijoada, the Brazilian black bean stew, is a beloved dish that represents the country’s culinary heritage.
Traditionally, Feijoada is made with black beans, various cuts of pork, and traditional seasonings.
Feijoada is typically served with farofa, rice, collard greens, and orange slices.
This authentic recipe captures the rich flavors and cultural significance of Feijoada.
Get ready to savor the taste of Brazil in your own kitchen!
Unveiling Feijoada: Brazil’s Heartwarming National Dish
In this section, we will embark on a culinary journey through Brazilian history to uncover the origins and significance of Feijoada, the heartwarming national dish of Brazil. The consumption of Feijoada is deeply ingrained in the social fabric of Brazilian society, extending its popularity across different social classes. We will also explore the African and European roots of Feijoada, tracing the influences that have shaped this beloved Brazilian dish.
A Culinary Journey Through Brazilian History
Feijoada carries a rich history that reflects the cultural heritage of Brazil. From its humble origins to its status as a national dish, Feijoada has emerged as a symbol of Brazilian identity. This culinary journey will take us through the annals of Brazilian history, showcasing how Feijoada has evolved and become an integral part of the country’s gastronomic legacy.
The Social Fabric of Feijoada Consumption
Feijoada is not just a dish in Brazil; it is a social experience that brings people together. Regardless of social class, Feijoada is enjoyed by Brazilians from all walks of life. It is a dish that fosters community and connection, transcending barriers and bridging gaps. We will delve into the social fabric of Feijoada consumption, exploring its role in fostering a sense of unity and belonging among the diverse population of Brazil.
Unraveling Feijoada’s African and European Roots
Feijoada’s roots can be traced back to both African and European influences. As Brazil’s history intertwines with the slave trade and colonialism, the African and European cultures have left an indelible mark on the culinary landscape of the country. We will unravel the complex layers of Feijoada’s origins, exploring how African and European culinary traditions have blended together to create this iconic Brazilian dish.
Feijoada’s African Roots
Feijoada’s European Roots
The use of black beans as a staple ingredient reflects the influence of African cuisine.
The inclusion of various cuts of pork in Feijoada draws from European cooking traditions.
Spices and seasonings, such as bay leaves and dried herbs, add flavors reminiscent of African cooking styles.
Smoked sausages, bacon, and pork ribs contribute to the rich and savory taste of Feijoada, mirroring European culinary techniques.
The slow-cooking method used in Feijoada can be traced back to African cooking practices.
The use of garlic and onions in Feijoada reflects the European influence on Brazilian cuisine.
Savoring the Regional Twists of Brazilian Cuisine
Brazilian cuisine is a vibrant tapestry of flavors, influenced by the diverse cultural backgrounds and geographical variations across the country. Each region of Brazil has its own distinct culinary traditions, resulting in a rich and varied gastronomic landscape. In this section, we will delve into the regional twists of Brazilian cuisine, with a specific focus on the adaptation of Feijoada, Brazil’s beloved black bean stew, across different Brazilian territories.
Feijoada’s Adaptation Across Brazilian Territories
Feijoada, the national dish of Brazil, has undergone fascinating adaptations as it travels from one region to another. While the core components, such as black beans and pork, remain constant, regional variations emerge in the choice of meats and additional ingredients. For example, in the southern state of Rio Grande do Sul, Feijoada is often prepared with smoked pork ribs and sausages, reflecting the influence of the region’s rich barbecue culture. In the northeastern state of Bahia, Feijoada Baiana showcases distinctive flavors with the addition of palm oil, coconut milk, and spices like ginger and coriander.
These regional adaptations of Feijoada exemplify the creative spirit and culinary ingenuity of the Brazilian people. They highlight the unique local ingredients and cultural nuances that shape the country’s cuisine, offering a tantalizing glimpse into the gastronomic diversity of Brazil.
To visualize the regional variations of Feijoada across Brazil, take a look at the map below:
Ingredients That Tell a Story of Diversity
The diverse and bountiful ingredients used in Brazilian cuisine are a testament to the country’s rich cultural heritage. Feijoada, in particular, showcases this diversity through its array of ingredients. While black beans and meats like pork and beef form the foundation of Feijoada, the specific cuts of meat and additional ingredients vary across regions.
In the southeast, Feijoada often includes smoked sausages, bacon, and pork ribs.
In the Amazonian region, Feijoada may incorporate native ingredients such as tucupi (a yellow sauce made from fermented cassava), jambu (a leafy herb with a tingling sensation), and freshwater fish.
In the northeastern coastal areas, Feijoada may feature seafood like shrimp or salted cod.
These diverse ingredients reflect the historical influences of Indigenous, African, and European cultures in Brazil, as well as the abundance of local produce and resources. They contribute to the distinct flavors and character of Feijoada, making it a true representation of Brazilian culinary heritage.
The Essential Components of a Classic Feijoada
To create an authentic and flavorful Feijoada, it is important to understand the essential components that make up this classic dish. The combination of these key ingredients results in the rich and hearty flavors that Feijoada is known for.
Here are the essential components of a classic Feijoada:
Black Beans: The foundation of Feijoada, black beans provide a velvety texture and earthy flavor to the stew.
Cuts of Pork: Feijoada traditionally includes various cuts of pork, such as smoked sausages, ribs, and bacon. These cuts add depth of flavor and a satisfying meatiness to the dish.
Traditional Seasonings: Feijoada is seasoned with a combination of ingredients like garlic, onions, bay leaves, and a medley of spices. These seasonings enhance the overall taste profile of the stew.
By carefully selecting and combining these essential components, you can create a classic Feijoada that captures the authentic flavors of Brazil. The resulting dish will be hearty, flavorful, and a true representation of Brazilian culinary heritage.
Feijoada – Brazilian Black Bean Stew: A Gastronomic Staple
Feijoada holds a special place in Brazilian cuisine as a gastronomic staple. This iconic dish, known for its rich flavors and hearty ingredients, is a beloved favorite both in Brazilian homes and restaurants throughout the country. Whether enjoyed on special occasions or as a comforting meal on a Sunday afternoon, Feijoada is deeply ingrained in Brazilian food culture.
Feijoada’s popularity can be attributed to its delicious combination of Brazilian black beans, various cuts of pork, and traditional seasonings. The slow-cooked stew results in tender meats, creamy beans, and a robust savory flavor that is simply irresistible.
From the vibrant street markets of Rio de Janeiro to the cozy family kitchens of São Paulo, Feijoada is a dish that brings people together. It is often shared with loved ones during gatherings and celebrations, creating a sense of warmth and joy. The act of preparing and sharing Feijoada has become a cherished tradition that symbolizes unity and a love for Brazilian cuisine.
“Feijoada is not just a dish but a celebration of Brazilian culinary heritage and cultural traditions. It represents the soul of our cuisine and the diversity of our nation.” – Renowned Brazilian Chef
Whether served with farofa, rice, and orange slices or accompanied by a caipirinha, Feijoada is a meal to be savored and enjoyed with friends and family. It embodies the essence of Brazilian hospitality and showcases the country’s rich culinary history.
Feijoada is more than just a savory stew; it is a gastronomic experience that captures the flavors, traditions, and vibrant spirit of Brazil. Its status as a culinary staple solidifies its place as a cherished and beloved dish in Brazilian cuisine.
Step-by-Step Guide to Crafting the Perfect Feijoada
In this section, we will provide you with a step-by-step guide to help you craft the perfect Feijoada. From preparation to slow-cooking, we will walk you through each stage of the process, ensuring that your Feijoada turns out flavorful and delicious.
Preparation: What To Do the Night Before
Before you begin cooking your Feijoada, it is essential to prepare the ingredients properly. Here’s what you need to do the night before:
Soak the beans: Rinse the black beans thoroughly and place them in a large bowl. Cover the beans with water and let them soak overnight. Soaking the beans helps soften them and reduces cooking time.
Prepare the meats: Cut the smoked sausages, pork ribs, and bacon into bite-sized pieces. Season them with salt, pepper, and any other desired spices. Cover and refrigerate the seasoned meats overnight to enhance the flavors.
Cooking the Meats: From Smoked Sausages to Bacon
Once the preparation is complete, it’s time to cook the meats for your Feijoada.
Sear the meats: Heat a large Dutch oven or pot over medium heat. Add a drizzle of oil and sear the seasoned meats until they are browned and caramelized. This step adds depth of flavor to the dish.
Add the aromatics: Chop onions, garlic, and bell peppers and add them to the pot. Sauté until the vegetables are soft and fragrant.
Simmer with the beans: Drain the soaked black beans and add them to the pot along with enough water to cover the ingredients. Bring the mixture to a boil, then reduce the heat to low and let it simmer for about 2-3 hours, or until the beans and meats are tender.
The Slow-Cooking Process: Merging Flavors Over Hours
The slow-cooking process is crucial for infusing the Feijoada with deep, rich flavors. Here’s how you can achieve this:
Continue simmering: Let the Feijoada simmer over low heat for an additional 2-3 hours, allowing the flavors to meld together and intensify.
Adjust the seasoning: Taste the Feijoada and adjust the seasoning as needed. You can add more salt, pepper, or spices to enhance the flavors to your preference.
After the slow-cooking process, your Feijoada is ready to be served. Remember to remove any bones and excess fat before serving. Garnish with fresh parsley or cilantro and serve with traditional accompaniments such as farofa, orange slices, and white rice. Enjoy your homemade Feijoada!
In this section, we will explore the nutritional aspects of Feijoada, discussing its protein and fiber content, as well as other important nutrients. Feijoada is not only a delicious dish but also a nutritious one, making it a great addition to your diet.
Understanding Feijoada’s Nutritional Aspects
Feijoada is packed with protein, thanks to the black beans and various cuts of pork used in the recipe. Protein is an essential nutrient that helps build and repair tissues in the body. It also contributes to the feeling of fullness, making Feijoada a satisfying meal.
Additionally, Feijoada is a good source of fiber, which promotes healthy digestion and can help regulate blood sugar levels. The black beans in Feijoada are rich in dietary fiber, providing many benefits for overall digestive health.
Feijoada also contains important vitamins and minerals, such as iron, potassium, and vitamin C. Iron is necessary for the production of red blood cells, while potassium plays a role in maintaining proper heart function. Vitamin C is an antioxidant that supports immune system health.
Accompaniments: Balancing the Heaviness with Citrus and Grains
While Feijoada is a rich and hearty dish, it can be balanced with refreshing accompaniments to complement its flavors and provide additional nutritional value. Consider serving Feijoada with the following:
Orange Slices: The citrusy flavor of oranges pairs well with the richness of Feijoada. The vitamin C in oranges also enhances iron absorption from the beans.
Collard Greens: Steam or sautéed collard greens make a nutritious side dish for Feijoada. They are high in vitamins A, C, and K, as well as fiber.
Farofa: Farofa, a toasted cassava flour, is a traditional accompaniment to Feijoada. It adds texture and flavor to the dish, offering a satisfying crunch.
White Rice: Serve Feijoada with a side of fluffy white rice to balance the flavors. Rice is a staple in Brazilian cuisine and complements the richness of Feijoada.
By incorporating these accompaniments, you can create a well-rounded meal that combines the indulgence of Feijoada with the freshness of citrus and the wholesomeness of grains.
Conclusion
In conclusion, Feijoada is a true culinary gem that captures the essence of Brazilian cuisine. Throughout this article, we have explored the rich history and cultural significance of this iconic dish, uncovering its African and European roots and its popularity across different social classes. Feijoada’s adaptation across Brazilian territories showcases the regional diversity of Brazilian cuisine, while its essential components contribute to its unique and hearty flavors.
Feijoada holds a special place as a gastronomic staple in Brazilian food culture, enjoyed in both homes and restaurants across the country. By crafting the perfect Feijoada using our step-by-step guide, you can experience the authentic flavors of Brazil right in your own kitchen.
Not only is Feijoada delicious, but it also offers nutritional benefits. With its protein and fiber content, Feijoada is a satisfying and nourishing dish. To enhance your Feijoada experience, consider serving it with refreshing citrus flavors and hearty grains, creating a perfect balance of flavors and textures.
So why not embark on a culinary adventure and try our authentic Feijoada recipe? Immerse yourself in the flavors of Brazil and enjoy this hearty and flavorful black bean stew. Whether you are cooking for yourself or sharing it with family and friends, Feijoada is sure to delight your taste buds and transport you to the vibrant streets of Brazil.
FAQ
What is Feijoada?
Feijoada is a traditional black bean and pork stew that is considered the national dish of Brazil. It is a hearty and flavorful dish that is typically served with farofa, a toasted cassava flour.
What is the history of Feijoada?
Feijoada’s history is deeply intertwined with the cultural heritage of Brazil. It has African and European roots and holds a significant place in Brazilian society.
How is Feijoada adapted across different Brazilian territories?
Brazilian cuisine is known for its regional diversity, and Feijoada is no exception. It is adapted in various ways across different regions of Brazil, showcasing unique flavors and culinary traditions.
What are the essential components of a classic Feijoada?
A classic Feijoada is made with black beans, various cuts of pork, and traditional seasonings. These components contribute to its rich and hearty flavors.
Why is Feijoada considered a gastronomic staple in Brazil?
Feijoada holds a special place in Brazilian cuisine and is considered a gastronomic staple. It is popularly consumed in both home kitchens and restaurants throughout Brazil, and it is associated with various occasions and traditions.
How can I make Feijoada?
Follow our detailed step-by-step guide to craft the perfect Feijoada. It includes preparation steps, cooking the meats, and the slow-cooking process that allows the flavors to meld over hours of simmering.
What are the nutritional aspects of Feijoada?
Feijoada is rich in protein and fiber, and it also contains other important nutrients. We will provide serving suggestions that help balance the heaviness of Feijoada with refreshing citrus flavors and hearty grains.
Welcome to our culinary adventure, where we bring the vibrant flavors of authentic chicken tandoori right into your kitchen. We’re excited to guide you through a home-cooked Indian cuisine experience that promises a tasty tandoori chicken dish without spending hours in preparation. Whether you have a bustling schedule or you’re a fan of flavor-packed meals, our quick chicken tandoori recipe makes it easier than ever to enjoy this traditional favorite at your convenience.
Join us as we delve into the rich heritage of this dish and unveil the secrets to creating that perfect char and juicy interior. With our instructions, you’ll learn to master an authentic chicken tandoori that could rival the best Indian restaurants, all from the comfort of your home.
Table of Contents
Key Takeaways
Discover how to make an authentic chicken tandoori with ease at home.
Embrace quick and efficient cooking methods without sacrificing taste.
Explore the essential spices and techniques for restaurant-style tandoori chicken.
Learn the versatility of this dish across various cooking appliances.
Gain tips for pairing your tandoori chicken with the perfect condiments and sides.
The Rich History of Chicken Tandoori
Tandoori Murgh history is as rich and vibrant as the flavors this dish boasts. It traces its origins to the times of Mughal cuisine, a period known for its luxurious and aromatic dishes. The story goes that Kundan Lal Gujral, a man whose culinary expertise has become a legend, was the creator of this delectable dish at the renowned Moti Mahal in Peshawar. Before the partition of India, Gujral had the vision to experiment with the traditional Indian cooking methods and unearthed a recipe that would intrigue taste buds for generations.
Tandoori Chicken, or as it is affectionately known in India, Tandoori Murgh, was traditionally prepared in a Tandoor, a type of clay oven that generates heat with wood fire or charcoal. This unique preparation method lent the chicken a signature smoky flavor that has become synonymous with the dish. Today, although we don’t all have a Tandoor at home, we channel the spirit of historical culinary excellence to replicate this traditional meal in our modern kitchens.
Feature
Description
Originating Chef
Kundan Lal Gujral
Location of Origin
Moti Mahal, Peshawar
Era
Mughal Cuisine
Cooking Method
Traditional Clay Tandoor Oven
Signature Flavor
Smoky, Derived from Wood Fire or Charcoal
Global Recognition
Icon of Traditional Indian Cooking
But why, you might ask, does this piece of culinary history matter to us? It is because to truly appreciate Chicken Tandoori, one must understand the care, creativity, and cultural significance that has shaped this dish over the centuries. Kundan Lal Gujral’s legendary contribution to traditional Indian cooking is not just about food; it’s about preserving a piece of history, one sumptuous bite at a time.
Understanding Authentic Chicken Tandoori Recipe
The magic of an authentic Chicken Tandoori dish can be found within its marination. It’s a combination of flavors and tenderizing techniques that make it a standout in Indian cuisine. Below, we’ll delve into the traditional marination process and the essential spices that make this dish truly special.
The Traditional Tandoori Marination Process
The cornerstone of our Tandoori chicken marinade is a thick, creamy base of Greek yogurt. This isn’t just any yogurt—it’s packed with beneficial bacteria that help break down the protein fibers in the chicken, resulting in meat that’s soft and tender. We also mix in generous amounts of ginger garlic paste, creating an aromatic foundation that’s crucial for that depth of flavor. For best results, we always recommend an overnight marination, granting ample time for the flavors to seep deep into every crevice of the chicken.
Key Spices That Make Tandoori Chicken Authentic
When it comes to spices, we rely on no more than four core ingredients to lend the marinade its earthy and smoky notes. See the table below detailing these essential tenderizing spices.
Spice
Notes
Benefits
Garam Masala
A complex blend contributing warmth and sweetness
Contributes to complexity and aroma of the dish
Red Chili Powder
Offers color and varying degrees of heat
Adds vibrancy and enhances the spice profile
Kasuri Methi (Dried Fenugreek Leaves)
Delivers a subtle bitterness and characteristic flavor
Aids in creating the trademark taste and aroma
Coriander Powder
Brings a citrusy, tangy essence
Balances and rounds out the flavor palate
Each of these spices plays a role not just in flavoring, but also in tenderizing and coloring the chicken. The outcome? A dish that’s as visually appealing as it is rewarding to the palate. Remember, authentic Tandoori chicken is all about letting these spices do the work, so don’t rush the process—overight marination with these carefully curated spices will set the stage for a culinary masterpiece.
Essential Ingredients for an Authentic Taste
When it comes to preparing Tandoori Chicken, the symphony of ingredients used is as crucial as the melody in a song. We understand how important it is to strike the right notes for that authentic taste. Here, each ingredient, like a perfectly tuned instrument, brings its unique flavor, resulting in a dish that sings with traditional Indian taste. The Tandoori chicken ingredients play a pivotal role in delivering this culinary delight to your taste buds.
A proper Greek yogurt marinade is rich and thick, ensuring the chicken absorbs all the flavorful spices. The zest of lemon juice not only adds a tangy punch, but also works together with the yogurt to tenderize the meat, making every bite succulently soft. And we must not forget the bold and nutty essence imparted by mustard oil, an ingredient synonymous with authenticity in many Indian kitchens.
The secret to a beautifully marinated Tandoori Chicken lies in the time-tested combination of spices, marinade, and tender care during preparation.
But what exactly are these indispensable elements? Let’s lay them out:
Skinless chicken thighs or legs—preferably with bone in for added moisture and flavor
Greek yogurt, which blankets the chicken in its creamy, tangy marinade
Freshly squeezed lemon juice for that essential zippy undertone
Rich, aromatic mustard oil to give it that distinctive Tandoori character
Below is a table that encapsulates the core components of our Tandoori Chicken recipe:
Ingredient
Role in Dish
Authentic Touch
Chicken thighs/legs
Meatiness and juiciness
Skinless, with bone
Greek Yogurt
Base for marinade
Thick and tangy
Lemon Juice
Provides tang and aids in tenderization
Freshly squeezed
Mustard Oil
Distinctive aroma and flavor
Essential for authentic aroma
Together, these create the unmistakable profile of Tandoori Chicken that we all crave. As we venture further into this recipe, keep in mind how each of these ingredients contributes to the marinated masterpiece that is Tandoori Chicken.
Preparing Your Chicken for Tandoori
Before we dive into seasoning and cooking, the initial steps involve getting the poultry ready for its flavorful journey. Proper chicken preparation stands at the heart of creating the most authentic tandoori experience. Let’s explore how to prime your chicken for its tandoori transformation.
Cleaning and Cutting the Chicken
Our first task in chicken preparation is to ensure our clean poultry reaches its most absorbent state. Starting with pat drying, we remove excess moisture, paving the way for the spices to cling to the meat. Following this, we move onto scoring chicken, making intentional deep cuts into the flesh. These aren’t just for show; they are integral to our process, inviting the marinade deep into the chicken, thereby reducing cooking times and enhancing flavor distribution. Check out the method we swear by:
Step
Action
Reason
1
Rinse Chicken
Removal of any debris and surface impurities.
2
Pat Dry
Ensures spices and marinade stick better to the surface.
3
Score Meat
Allows deep penetration of marinade and even cooking.
Marinating Timeframes for Optimal Flavour
The secret to achieving that rich, heartwarming taste comes down to the marinating period. As a rule of thumb, we advise a minimum of 6 hours to let the flavors meld and meat tenderize. For the best results, leaving it to marinate overnight will often yield the most succulent and richly flavored chicken tandoori. The below guide outlines our recommended timeframes for marinating:
6 Hours: The bare minimum to infuse the chicken with basic flavor and increase tenderness.
12 Hours: A notable improvement in taste depth and texture.
Overnight: The ultimate flavor infusion, resulting in chicken that is thoroughly seasoned and exceptionally tender.
Remember, patience truly is a virtue when it comes to marination. Rushing this step could mean robbing your dish of its potential to sing with spices and charm the palate with its tenderness. So, give your chicken the time it deserves to absorb every ounce of the rich tandoori marinade you’ve prepared.
Cooking Chicken Tandoori: Alternatives to Tandoor
When we think of Tandoori Chicken, the image of a traditional clay tandoor might spring to mind. However, not everyone has the luxury of owning a tandoor oven. Fortunately, there are several alternative cooking methods that can deliver that distinctive tandoori zest using indoor appliances or conventional grilling techniques. Let’s explore some of these methods that can help you create oven-roasting tandoori chicken and more within the comfort of your home.
Oven-Roasted Chicken Tandoori
One of the most effective ways to replicate the tandoori cooking process is via oven-roasting. This method makes good use of the broiling technique, which is essential for achieving the iconic char and flavor. We’ll preheat the oven to a toasty 470°F (240°C) and position the marinated chicken on a wire rack over a tray to ensure heat circulates evenly. Remember, basting is key—applying a layer of chili oil or melted butter adds richness midway through roasting and just before broiling for that final touch of authenticity.
Stovetop Griddle Cooking Method
When you’re craving that sear but prefer staying indoors, the stovetop griddle comes to the rescue as a great indoor tandoori recipe. It requires a bit of attentiveness as the chicken must be cooked evenly, requiring flipping and basting with marinade and chili oil. Achieving that tantalizing char is all part of the fun, signaling a hearty meal that’s just about ready to be served.
Air Fryer Chicken Tandoori Quick Recipe
If you’re looking for a healthier alternative that doesn’t skimp on taste, the air fryer is your ally. Set at 390°F (200°C), it works wonders on the marinated chicken, resulting in a rapid preparation that keeps the juicy flavor of tandoori intact. Keeping an eye on the internal temperature, which should reach 165°F, guarantees a fully-cooked yet moist delight.
Grilling Over Direct Fire
For the traditionalists out there or those who love outdoor cooking, grilling over direct fire remains a steadfast method. Whether you’re using charcoal for infusion of smoky tones or a gas grill for convenience, this technique involves a dance of basting and turning the chicken. It requires patience, but the reward is a visually and tastefully satisfying grilled tandoori chicken that rivals any restaurant offering.
By exploring these varied cooking approaches, we ensure the joy of tandoori chicken isn’t confined to the tandoor alone. Even when cooking indoors, with these techniques, every home chef can proudly serve up tandoori chicken with its signature savory smokiness.
Step-by-Step Cooking Instructions
Embarking on your cooking journey to master the art of the classic tandoori chicken begins with a robust and easy to follow cooking guide. Our mission is to provide you with tandoori chicken steps that are fuss-free and filled with culinary joy. Below, we lay out practical recipe instructions that ensure even novice chefs can produce a dish that sings with authenticity and flavor.
Marinade Preparation: In a large mixing bowl, combine Greek yogurt, freshly squeezed lemon juice, ginger-garlic paste, and the aromatic spices – cayenne, garam masala, turmeric, and any additional seasonings you fancy.
Marinating the Chicken: After cleaning and patting the chicken dry, make deep cuts into the flesh to enhance flavor absorption. Submerge it fully in the marinade, ensuring it reaches into every slit and crevice.
Setting Time: Place the marinated chicken in the refrigerator. For the best infusion of flavors, allow it to marinate for at least 6 hours, though overnight is preferred.
Cooking the Chicken: When ready to cook, decide on your method:
Method
Preparation
Cooking
Final Touch
Oven Roasting
Preheat to 470°F (240°C).
Roast on a wire rack over a tray, basting with oil midway.
Broil for a charred finish.
Stovetop
Heat a grill pan or skillet with oil.
Cook while flipping frequently, basting with marinade.
Rest before serving.
Air Fryer
Preheat to 390°F (200°C).
Air fry until the internal temperature reads 165°F.
Brush with melted butter for sheen.
Direct Fire Grill
Preheat grill to medium-high.
Grill, turning and basting regularly.
Finish with a sprinkle of chat masala.
Once your chicken has beautifully cooked through with a glorious char on the outside, it’s all about the finishing touches. A light brush of melted butter or ghee will add a glistening sheen and an extra layer of flavor that can elevate your tandoori chicken from simply cooked to perfection.
We can’t emphasize enough the value of patience and attention to detail throughout the cooking process. Keep an eye on the chicken as it cooks; this ensures you capture that ideal balance of juicy on the inside and charred on the outside, iconic to a well-made tandoori chicken.
As we commence the cooking, let’s not forget the visual delight and anticipation that comes with watching your tandoori chicken turn into a gastronomic masterpiece.
Now, with our guide in hand and these steps fresh in your mind, we believe you’re well-equipped to grace your dinner table with an authentic and mouthwatering tandoori chicken that promises to transport you to the heart of Indian cuisine right from the comfort of your home.
How to Achieve the Signature Smoky Flavor
One of the hallmarks of authentic Indian cuisine is the rich, smoky essence we love in our tandoori dishes. For many of us who are recreating this magic at home, it might seem challenging to mimic that traditionally fire-kissed taste especially when we’re working with an indoor kitchen setup. But fear not, as there are effective methods to infuse that coveted homemade tandoori smoke.
Indoor Smoking Technique
Imagine achieving that rustic, smoked Indian chicken flavor within the confines of your kitchen. It’s possible with a clever trick that doesn’t require an outdoor grill. To create a homemade smoky environment for your indoor chicken tandoori, begin by heating up a piece of coal until it’s red-hot. Place this coal in a small, heatproof bowl containing a tablespoon of oil. As the oil heats up, it will produce smoke. Immediately place this bowl inside a covered pot or pan with your cooked tandoori chicken, and seal the lid. This will capture the smoke and let it permeate the chicken, imparting flavors that are remarkably close to those achieved with traditional methods.
Enhancing Flavor with Charcoal
For those who can step outside and harness the power of an open flame, using charcoal is the way to go. The charcoal method is all about cooking your chicken directly over the hot embers. The key here is in the juices from the chicken; as they drip onto the coals, they create smoke that engulfs your meat, infusing the tandoori with that irresistible smoky aroma we all crave. This is the ninth wonder in achieving traditional tandoori flavors—the magic of charcoal and fire.
Smoking Technique
Advantages
Tools Required
Indoor Smoking Method
Can be done inside, convenient for apartment living
Heatproof bowl, coal, oil, stove
Charcoal Smoking
Authentic taste, engaging and traditional method
Charcoal grill, charcoal
Whether you choose the indoor smoking technique or the outdoor charcoal method, both approaches promise to elevate your homemade tandoori to new heights. Don’t let the absence of a tandoor dissuade you from chasing that smoky flavor. Achieving the perfect smoked Indian chicken is more than doable—it’s a culinary adventure that brings the essence of Indian cooking right into the heart of your home.
Chicken Tandoori Recipe Cooking Tips
Our kitchen is always buzzing with the succulent aromas of spices and fresh ingredients, particularly when we’re spilling our secret insights on creating the perfect Chicken Tandoori. It’s all about mastering the art of marination and knowing your kitchen’s hot spots to ensure a dish bursting with flavor and cooked just right.
Marination Insights
Engaging in effective marinating techniques is more than a step; it’s the soul of Chicken Tandoori. For that perfect tandoori marinade, you’ll want consistency that’s reminiscent of a well-blended glaze, thick enough to stick to the chicken pieces, creating a flavorful coat that deeply penetrates each fiber. We always reach for full-fat strained yogurt to avoid a watery marinade that barely holds onto the chicken. A gentle reminder: patience is a virtue with marination. Letting it rest assures that the flavors aren’t just on the surface but are soaked into every bite, delivering those delightful flavorful chicken tips with our tried and true marination mantra.
Cooking Time and Temperature
When the marination masterpiece is complete, it’s time to talk about another critical 10 on the scale of tandoori triumph—an instant-read thermometer, your comrade in the battle against overcooking. Tandoori chicken’s doneness doesn’t just rely on color and aroma; we’re aiming for precision. That means having your oven or grill dialed to the right temperature and keeping an eagle eye on the reading: an internal sweet spot between 165 to 170 F (75 C). Trust us, and you’ll serve up tandoori chicken that’s tender, juicy, and just perfect—never dry, never tough. Every piece, a little symphony of smoky, spiced delight.
How to Serve Your Chicken Tandoori
The magic of a perfectly cooked chicken tandoori not only lies in its flavor but also in how it’s presented and paired. Serving suggestions play a crucial role in turning a simple chicken dish into a feast for the senses.
Accompaniments and Side Dishes
When we bring tandoori chicken to the table, it’s always accompanied by vibrant, traditional sides that elevate the dish. Fresh, cool, and tangy contrasts like Cilantro Chutney or Mint Chutney add layers of flavor, while sides such as Turmeric Rice, Onion Salad, and Cucumber Raita offer a refreshing break from the rich spices. Don’t forget the standard yet essential sliced onions and lemon wedges. These side dishes for tandoori chicken are not just add-ons but essential Indian condiments that complete the tandoori experience.
Creating a Themed Dinner
Imagine a spread that teases the palate with aromatic spices and tantalizes the taste buds with rich flavors. An Indian-themed dinner is an opportunity to delve deep into the culinary culture of India. Begin with a plate of succulent chicken tandoori as the center of attraction, and surround it with a cast of equally enticing dishes – perhaps a creamy Butter Chicken or a robust Chicken Tikka Masala. A simple yet refreshing Onion Salad and Turmeric Rice act as perfect counterparts to these flavorsome curries. Such a full course tandoori dinner is more than just a meal; it’s a ticket to a festive, Indian dinner party right in your home.
We understand that finding a dish that’s both flavorful and nutritious can sometimes be a challenge, which is why we love to highlight the nutritional benefits of Chicken Tandoori. This Indian classic isn’t just about tantalizing your taste buds—it’s a healthy tandoori option that aligns with a well-balanced diet. The key lies in the lean protein it provides, making it a satisfying lean protein meal without a heavy caloric toll.
The preparation of Chicken Tandoori sets it apart as a healthier choice within the realm of Indian cuisine. Traditional recipes call for minimal use of oil, relying on a medley of natural spices and yogurt to imbue the dish with its characteristic flavors. These spices don’t just add depth to the taste; they offer their own set of health benefits, from aiding digestion to anti-inflammatory properties.
Those who are conscientious about their food intake will appreciate that Chicken Tandoori is typically made without the heavy creams and batters found in other dishes. This not only keeps the calorie count in check but also maintains a simplicity that respects the quality of the ingredients.
Whether you’re looking to build muscle, maintain a balanced diet, or simply enjoy a delightful meal without the guilt, Chicken Tandoori is a trustworthy choice. It’s a dish that proves indulgence and wellbeing can go hand in hand, and we’re confident it will earn its place as a staple in your health-conscious menu.
Storing and Reheating Leftovers
Enjoyed a sumptuous Chicken Tandoori meal but find yourself with leftovers? Fret not, as we guide you through the appropriate steps to store and reheat your delightful dinner, ensuring that leftover Indian food remains as delicious as it was when freshly made. Keeping safe food storage in mind is paramount, so let’s dive into the specifics.
Best Practices for Refrigeration
Proper storage is crucial when it comes to extending the life of your storing chicken tandoori leftovers. We recommend placing the tandoori chicken in an airtight container and refrigerating it promptly. This simple practice assists in maintaining the freshness and safety of your food. Here’s a quick reference table for safe food storage:
Type of Food
Refrigeration (up to)
Notes for Optimal Storage
Chicken Tandoori
5 days
Ensure it’s cooled before storing to avoid moisture and bacteria.
Other cooked poultry
3-4 days
Separate from raw food to prevent cross-contamination.
Prepared Indian dishes
2-3 days
Store in shallow containers for quicker cooling.
Reheating for Best Taste and Quality
When it comes to reheating tandoori chicken, it’s essential to proceed with a method that preserves its flavors and moisture. We recommend using your oven or microwave to heat the chicken until it’s adequately warm. If you’re utilizing an oven, a covered dish or foil can help keep the chicken moist. For microwave reheating, short intervals on medium power are best to prevent drying out the chicken.
Remember, the key is to reheat to the point just enough for consumption, retaining the quality and taste of your leftovers.
Conclusion
As we reach the Indian cuisine finale of our culinary exploration, we reflect on the savory journey we’ve shared with you. We have delved into the legacy and craft of creating the perfect tandoori chicken, and it’s our hope that the secrets we’ve unveiled will transform your home kitchen into a haven of aromatic Indian flavors. This recipe is not merely a meal; it’s a passage through time-honored traditions, designed to bring a slice of authenticity to your dining table.
Whether you’re seeking a delicious weekday dinner alternative or a show-stopping centerpiece for your next gathering, this flavorful dish is poised to exceed expectations. By adhering to the marinating expertise, cooking precision, and pairing insights we’ve discussed, satisfaction is guaranteed. Embrace the rich palette of spices, the tender texture of well-marinated chicken, and the irresistible smoky charm that defines this beloved Indian classic.
We cherish the opportunity to have guided you through the steps to achieve a taste that resonates with the depth of Indian gastronomy. With each technique tailored for your convenience, the distinct, robust profile of this tandoori chicken will carry the legacy of a cuisine celebrated worldwide. Remember, the key to perfection lies in the love, patience, and respect for the culinary process—principles that ensure every bite is steeped in history and flavor.
FAQ
What is the origin of Chicken Tandoori?
Chicken Tandoori boasts a rich history that dates back to the Mughal era and is believed to have been invented by Kundan Lal Gujral at Moti Mahal in Peshawar. The traditional Mughal cuisine has been popularized for generations, still holding a significant place in Indian culinary culture.
Can Chicken Tandoori be made without a tandoor oven?
Yes, Chicken Tandoori can be prepared using alternative cooking methods such as an oven, stovetop griddle, air fryer, or grilling over an open fire. Each method provides a way to achieve the distinctive smoky flavor and tenderness associated with this classic dish.
What are the key spices in an authentic Chicken Tandoori marinade?
The traditional Tandoori Chicken marinade includes a blend of spices like garam masala, red chili powder, kasuri methi (dry fenugreek leaves), turmeric, coriander powder, and kashmiri chili powder. These spices create the vibrant flavor profile and traditional red hue of the dish.
What is the recommended marinating time for Chicken Tandoori?
To achieve the richest flavor and ultimate tenderness, it is recommended to marinate the chicken in the yogurt and spice mixture for a minimum of six hours to overnight. Shortening the marination time may not provide the same depth of flavor or succulence once cooked.
How can I get the smoky flavor in Chicken Tandoori if cooking indoors?
To achieve the signature smoky flavor indoors, you can use an indoor smoking technique with a piece of red-hot coal placed in a small bowl of oil, which is then situated in the pan with the chicken and covered to trap the smoke.
What are the essential ingredients for Chicken Tandoori?
The essential ingredients for a traditional Chicken Tandoori recipe include skinless chicken thighs or legs, full-fat Greek yogurt or hung curd for the marinade, a mix of fresh ginger and garlic, a selection of Indian spices, lemon juice, and mustard oil for an authentic aroma.
How do I prepare my chicken for Tandoori cooking?
Start by cleaning the chicken and patting it dry. Then make deep slits in the meat to allow the marinade to penetrate deeply and ensure more even cooking and flavor distribution.
What are some suitable side dishes to serve with Chicken Tandoori?
Chicken Tandoori pairs beautifully with Cilantro or Mint Chutney, sliced onions, and lemon wedges. Additionally, you might serve Turmeric Rice, Onion Salad, and Cucumber Raita for a complete Indian-themed meal experience.
What are the health benefits of eating Chicken Tandoori?
Chicken Tandoori is considered a healthier option within Indian cuisine as it is cooked without heavy creams or batters. The lean protein from the chicken provides nutritional value, and the use of yogurt and natural spices makes it a light yet flavorful dish.
How should I store and reheat leftover Chicken Tandoori?
Leftover Chicken Tandoori should be stored in an airtight container in the refrigerator for up to five days. When reheating, use an oven or microwave until hot without overheating to maintain the dish’s flavor and juiciness.
Welcome to our culinary journey to Bengal, where we unravel the secrets of Chingri Malai Curry – a savory delight that embodies the essence of Bengali cuisine. Known for its creamy coconut-infused gravy and juicy prawns, this authentic recipe is sure to transport your taste buds to the vibrant streets of Kolkata.
In this article, we will take you through the cultural significance of Chingri Malai Curry in Bengali traditions, the select ingredients that contribute to its flavorful profile, and a step-by-stepcooking guide that will enable you to recreate this Bengali masterpiece in your own kitchen.
So, let us embark on this culinary adventure and discover the captivating flavors of Chingri Malai Curry recipe!
Table of Contents
Key Takeaways:
Chingri Malai Curry is a beloved dish from Bengal, known for its creamy coconut-infused gravy and succulent prawns.
This recipe holds cultural significance in Bengali cuisine and is often prepared during festive occasions and celebrations.
The key ingredients for Chingri Malai Curry include fresh prawns and authentic Bengali spices.
Properly cleaning and marinating the prawns is essential to bring out their optimal flavor.
The coconut gravy is the heart of this dish, and achieving the perfect consistency is crucial.
The Cultural Significance of Chingri Malai Curry in Bengali Cuisine
Chingri Malai Curry holds a special place in Bengali cuisine and is often prepared during festive occasions and celebrations. It is considered an elegant Bengali classic and is cherished for its rich flavors and creamy texture.
This iconic dish has deep cultural roots and represents the culinary traditions of Bengal. It showcases the region’s love for seafood and the art of harmonizing spices and flavors to create a remarkable culinary experience.
The cultural significance of Chingri Malai Curry is evident in its association with special events and gatherings. Whether it’s a wedding, religious ceremony, or family gathering, this dish is often the centerpiece of the meal, symbolizing abundance, prosperity, and togetherness.
The popularity of Chingri Malai Curry goes beyond the borders of Bengal, extending to other parts of India and even internationally. It has become a favorite among food enthusiasts who appreciate the unique flavor profile and the cultural tapestry it represents.
Over the years, Chingri Malai Curry has evolved, taking inspiration from different culinary influences, yet staying true to its roots. It continues to delight taste buds and evoke a sense of nostalgia and pride among Bengalis and lovers of Bengali cuisine.
The Select Ingredients That Amplify the Flavor
In order to create a truly delicious and authentic Chingri Malai Curry, it is crucial to carefully select the ingredients that go into the dish. Two key components that play a significant role in enhancing the flavor are fresh prawns and authentic Bengali spices.
The Role of Fresh Prawns
Fresh prawns are the star of the show in Chingri Malai Curry. Their succulent and tender texture adds a delightful bite to the dish. By using fresh prawns, you can ensure that the flavors of the curry are at their best. The sweetness and natural umami of the prawns infuse the gravy, creating a truly memorable dining experience.
Importance of Authentic Spices
Authentic Bengali spices are the secret behind the rich and complex flavors of Chingri Malai Curry. The unique blend of spices, including turmeric, cumin, coriander, and garam masala, adds depth and aromatic notes to the dish. It is important to source high-quality and genuine Bengali spices to achieve the true flavor of this classic curry.
Preparing Prawns – The Right Way to Clean and Marinate
Properly preparing prawns is essential to ensure their freshness and optimal flavor in Chingri Malai Curry. Follow these step-by-step instructions on how to clean and devein prawns, as well as tips on marinating them for maximum flavor absorption.
Cleaning Prawns:
Start by removing the head of the prawn. Hold the prawn firmly and twist it to detach the head.
Gently peel off the shell by loosening it at the legs and then peeling it away, leaving the tail intact.
Make a shallow cut along the back of the prawn, using a small knife or kitchen shears.
Remove the dark vein running along the back, as this is the prawn’s digestive tract.
Rinse the prawns under cold water to remove any remaining debris.
Note: Cleaning prawns can be time-consuming, but it is crucial for a clean and delicious Chingri Malai Curry.
Marinating Prawns:
Place the cleaned prawns in a bowl.
Add your preferred marinade ingredients, such as ginger-garlic paste, turmeric powder, salt, and lemon juice.
Gently mix the prawns with the marinade, ensuring that each prawn is well-coated.
Cover the bowl and let the prawns marinate in the refrigerator for at least 30 minutes to allow the flavors to penetrate.
Note: Marinating prawns adds depth of flavor and enhances their tenderness, making them even more delicious in Chingri Malai Curry.
By cleaning and marinating prawns properly, you’ll ensure that they contribute to the delectable taste and texture of your Chingri Malai Curry. Give adequate attention to these steps to elevate the overall experience of enjoying this classic Bengali dish.
Mastering the Perfect Coconut Gravy
The creamy coconut gravy is the heart of Chingri Malai Curry. It is what gives this Bengali delight its rich and flavorful base. To ensure your Chingri Malai Curry is a success, it’s essential to master the art of making the perfect coconut-infused gravy. Below, we share some expert cooking tips and techniques to help you achieve the desired consistency and balance of flavors.
To begin, you’ll need to extract fresh coconut milk to use as the base for your gravy. Here’s a simple method to extract coconut milk:
Crack open a mature coconut and remove the white flesh.
Grate the coconut flesh using a fine grater.
Place the grated coconut in a muslin cloth and squeeze out the milk. This will be your first extract.
Add some warm water to the squeezed coconut and repeat the process to obtain a second extract. The first extract will be thicker and creamier.
Once you have your coconut milk, it’s time to infuse it with the flavors of the spices and other ingredients. Here are a few tips:
Use fresh and aromatic spices such as bay leaves, cardamom, cinnamon, and cloves to add depth of flavor to the gravy.
Saute the spices in hot oil or ghee until fragrant before adding the coconut milk. This helps to release their essential oils and enhances their flavors.
Balance the sweetness of the coconut milk with a touch of savory by adding a pinch of salt. This will bring out the flavors of the other ingredients.
For a creamier texture, you can add a teaspoon of cashew paste or grated khoya (dried milk solids) to the gravy.
Once you have added the coconut milk and spices to your liking, it’s time to simmer the gravy until it reaches the desired consistency. Remember to stir occasionally to prevent the bottom from burning. Keep in mind that the gravy will thicken further upon standing, so it’s best to slightly undercook it.
Now that you know the secrets to mastering the perfect coconut gravy, you can confidently prepare a delicious and authentic Chingri Malai Curry. The rich, creamy, and full-bodied flavors of the gravy will complement the succulent prawns, creating a culinary masterpiece that will delight your taste buds with every bite.
Step-by-Step Cooking Guide for Chingri Malai Curry
Now that we have explored the cultural significance of Chingri Malai Curry and the key ingredients that enhance its flavor, it’s time to delve into the step-by-step process of creating this delectable Bengali dish. In this section, we will guide you through the essential techniques required to achieve a flavorful and creamy curry.
Tempering Spices for Enhanced Aromas
To begin, let’s focus on tempering the spices to unlock their aromatic flavors. Follow these simple steps:
Heat a tablespoon of oil in a pan over medium heat.
Add whole spices like cinnamon, cardamom, cloves, and bay leaves to the hot oil.
Sauté the spices for a minute until they release their delightful aromas.
Tempering the spices at the beginning of the cooking process infuses the dish with their rich flavors, creating a foundation of taste for the Chingri Malai Curry.
Sautéing Onions to Golden Perfection
The next crucial step is sautéing the onions to achieve that irresistible golden color and sweet caramelized taste. Follow these steps:
Add finely chopped onions to the pan with the tempered spices.
Sauté the onions over medium heat until they turn golden brown.
Make sure to stir occasionally to ensure even cooking.
The onions not only contribute to the color of the curry but also add depth and sweetness to the overall flavor profile of the dish.
Secrets to a Creamy and Rich Curry
To achieve the signature creamy texture and richness of Chingri Malai Curry, pay attention to the following tips:
Use freshly extracted coconut milk to impart a luscious creaminess to the curry.
Simmer the curry on low heat for a longer duration to allow the flavors to meld together and develop depth.
Add a touch of ghee or butter at the end of the cooking process to enhance the richness of the curry.
By following these secrets, you can create a Chingri Malai Curry that is velvety, indulgent, and bursting with flavor.
Now that we have mastered the step-by-step cooking guide for Chingri Malai Curry, we are well on our way to creating a truly authentic and delicious Bengali dish. In the next section, we will explore the best accompaniments to serve alongside this delightful curry, enhancing the overall dining experience.
Serving Suggestions: Best Accompaniments to Chingri Malai Curry
Chingri Malai Curry, with its creamy and flavorful profile, is elevated by the right accompaniments that complement its taste and texture. To enhance your dining experience, consider serving these delicious side dishes alongside your Chingri Malai Curry:
Steamed Rice: The simplicity of steamed rice perfectly balances the richness of the curry, allowing you to savor the flavors of both.
Pulao: Fragrant and mildly spiced, pulao adds a delightful aromatic element to the meal, harmonizing well with the flavors of the curry.
Naan: Soft and pillowy, naan bread is an excellent choice for scooping up the creamy curry and savoring every bite.
Garnishing and presentation can also play a role in enhancing the visual appeal and overall experience of your Chingri Malai Curry. Consider sprinkling some fresh cilantro leaves on top or adding a squeeze of lime for a burst of freshness. The vibrant colors and enticing aromas will make your dish even more appetizing.
Variations of the Classic Chingri Malai Curry Recipe
While the traditional Chingri Malai Curry recipe is a delight in itself, there are variations that cater to different tastes and dietary preferences. In this section, we will explore alternative seafood options that can be used in place of prawns and a low-fat version of the curry for health-conscious individuals. We will provide detailed instructions and ingredient substitutions for each variation.
Alternative Seafood Options
If you’re looking to switch up the traditional recipe, there are several alternative seafood options that you can use instead of prawns in Chingri Malai Curry. Here are some popular alternatives:
Fish: Opt for firm fleshed fish such as cod, halibut, or tilapia. Cut them into chunks or fillets and follow the same cooking process as prawns.
Scallops: Scallops add a delicate sweetness to the curry. Just sear them separately and add them to the cooked sauce.
Lobster: For a truly indulgent version, replace the prawns with lobster meat. Ensure the lobster is cooked beforehand and add it to the curry towards the end.
Experimenting with different seafood options can bring exciting flavors and textures to your Chingri Malai Curry.
Low-fat Version for Health-Conscious Foodies
If you prefer a healthier option without compromising on taste, you can make a low-fat version of Chingri Malai Curry. Here are some tips:
Use low-fat coconut milk: Swap regular coconut milk with its low-fat alternative to reduce the overall fat content in the curry.
Reduce oil: Cut down on the amount of oil used for tempering and sautéing the ingredients.
Skip cream or yogurt: Omit or reduce the amount of cream or yogurt used in the recipe. You can also use low-fat yogurt as a healthier substitute.
Increase vegetable content: Add more vegetables such as bell peppers, carrots, or peas to the curry. They not only enhance the nutritional value but also add color and texture.
By making these simple adjustments, you can enjoy a lighter yet equally flavorful Chingri Malai Curry.
Tips and Tricks to Nail the Authentic Bengali Flavor
Achieving the authentic flavor of Chingri Malai Curry requires attention to detail and specific techniques. We want to help you master the art of creating an authentic Bengali taste that will leave your taste buds craving for more. Here are a few tips and tricks to ensure your Chingri Malai Curry captures the authentic flavor of Bengal:
Use the right spices: The combination of spices used in Chingri Malai Curry is what gives it its distinct taste. To achieve the authentic flavor, be sure to use traditional Bengali spices like turmeric, cumin, coriander, and garam masala. These spices are the key to creating a flavorful and aromatic curry.
Adjust seasoning: Tasting and adjusting the seasoning as you cook is essential to achieving the perfect balance of flavors. Be mindful of salt, spices, and any additional ingredients you choose to add. Don’t be afraid to experiment to find the right balance that suits your taste buds.
Incorporate traditional cooking methods: Bengali cuisine has its own unique cooking techniques that contribute to its authentic flavor. For example, tempering whole spices in hot oil or ghee at the beginning of the cooking process releases the flavors and aromas. Sautéing onions until they turn golden brown adds depth and sweetness to the curry. Understanding and utilizing these traditional techniques will elevate the taste of your Chingri Malai Curry.
By following these tips and tricks, you can infuse your homemade Chingri Malai Curry with the authentic flavor of Bengal. Experience the rich and intricate flavors that Bengali cuisine is renowned for, and savor every bite of this exquisite dish.
Preserving and Reheating Leftovers – The Correct Way
Chingri Malai Curry is a dish that can be enjoyed over multiple meals. To make the most of your leftovers, it’s important to know how to properly preserve them and reheat them while maintaining their texture and flavor. Follow these guidelines to ensure a delicious and satisfying experience with your reheated Chingri Malai Curry.
Maintaining Texture and Flavor Upon Reheating
When reheating Chingri Malai Curry, it’s essential to preserve its original texture and flavor. Here are some tips to help you achieve the best results:
Reheat gently: To prevent the curry from becoming overly thick and losing its creamy consistency, reheat it gently over low heat.
Avoid excessive stirring: Stir the curry sparingly while reheating to avoid breaking up the prawns and keeping them intact.
Add a splash of water or coconut milk: If the curry appears too dry while reheating, add a small amount of water or coconut milk to restore its original consistency.
Adjust seasoning if necessary: Taste the reheated curry and adjust the seasoning, adding more salt or spices if needed to enhance the flavors.
By following these tips, you can ensure that your reheated Chingri Malai Curry maintains its texture and flavor, allowing you to enjoy it just as much as the first time.
Preserving Leftovers
Reheating Leftovers
1. Store in airtight containers: Transfer the leftover curry to airtight containers and refrigerate it within two hours of cooking. This will help prevent bacterial growth and maintain the freshness of the curry.
1. Stovetop reheating: Transfer the desired portion of Chingri Malai Curry to a saucepan and heat it slowly over low heat. Stir occasionally to ensure even reheating.
2. Label and date: Label the containers with the date the curry was stored to keep track of its freshness. Consume it within 2-3 days.
2. Microwave reheating: Place the desired portion of curry in a microwave-safe dish. Cover with a microwave-safe lid or plastic wrap and heat in short intervals, stirring in between to distribute the heat evenly.
3. Freeze for long-term storage: If you have more leftovers than you can consume within a few days, consider freezing them. Transfer the curry to freezer-safe containers, leaving some space for expansion. Use within 2-3 months for the best quality.
3. Oven reheating: Preheat the oven to a low temperature (around 300°F/150°C). Place the curry in an oven-safe dish, cover with foil, and heat for 20-30 minutes or until warmed through.
In conclusion, our exploration of Chingri Malai Curry has revealed the rich cultural significance and mouthwatering flavors of this Bengali delight. We’ve discussed the key ingredients that enhance its taste, the step-by-step cooking guide to recreate it at home, and the best accompaniments to elevate your dining experience.
Throughout the article, we’ve emphasized the importance of using fresh prawns and authentic Bengali spices to achieve an authentic flavor. We’ve also provided variations that cater to different tastes and dietary preferences, ensuring that everyone can enjoy this culinary masterpiece.
By following our expert tips and tricks, you can confidently create a creamy, coconut-infused gravy that will transport you to the vibrant streets of Bengal. Preserving and reheating leftovers correctly will allow you to savor the flavors of Chingri Malai Curry over multiple meals.
Now that you are equipped with the knowledge and guidance to prepare this delightful Bengali dish, we encourage you to embark on your own culinary journey. Experience the joy of indulging in Chingri Malai Curry and share the flavors of Bengal with your loved ones!
FAQ
What is Chingri Malai Curry?
Chingri Malai Curry is a traditional Bengali dish known for its creamy, coconut-infused gravy and succulent prawns.
What is the cultural significance of Chingri Malai Curry in Bengali cuisine?
Chingri Malai Curry holds a special place in Bengali cuisine and is often prepared during festive occasions. It is considered an elegant Bengali classic and cherished for its rich flavors and creamy texture.
What are the key ingredients that enhance the flavor of Chingri Malai Curry?
Fresh prawns play a crucial role in enhancing the flavor and texture of the dish, while authentic Bengali spices add depth and complexity to Chingri Malai Curry.
How do you properly clean and marinate prawns for Chingri Malai Curry?
To properly clean prawns, remove the shells and devein them before marinating. Marinate the prawns with a combination of spices and aromatics for maximum flavor absorption.
What are the secrets to mastering the perfect coconut gravy for Chingri Malai Curry?
The secrets to mastering the perfect coconut gravy include techniques for extracting coconut milk, balancing flavors, and achieving the desired consistency for a rich and creamy curry.
Can you provide a step-by-step cooking guide for making Chingri Malai Curry?
Yes, we have a detailed, step-by-step cooking guide that covers essential techniques such as tempering spices, sautéing onions, and achieving a creamy and rich curry. Each step is accompanied by expert tips and tricks.
What are the best side dishes to serve with Chingri Malai Curry?
Chingri Malai Curry pairs perfectly with steamed rice, pulao, or naan. These side dishes complement the flavors and textures of the curry. We will also provide ideas for garnishing and presentation to elevate your dining experience.
Are there any variations of the classic Chingri Malai Curry recipe?
Yes, there are variations of Chingri Malai Curry that cater to different tastes and dietary preferences. We will explore alternative seafood options that can be used in place of prawns, as well as a low-fat version of the curry for health-conscious individuals.
What are some tips and tricks to nail the authentic Bengali flavor in Chingri Malai Curry?
Some tips and tricks to nail the authentic Bengali flavor in Chingri Malai Curry include using the right spices, adjusting seasoning, and incorporating traditional cooking methods.
How can I properly preserve leftover Chingri Malai Curry?
To properly preserve leftover Chingri Malai Curry, store it in an airtight container in the refrigerator. We will provide guidelines on storage, reheating methods, and precautions to ensure the best possible eating experience.
Are you ready to embark on a culinary adventure and discover the rich flavors of Guyanese cuisine? Look no further than an authentic Guyanese pepperpot recipe, a savory stew that showcases the vibrant cultural heritage of Guyana. In this guide, we will take you through the step-by-step process of creating this traditional dish, ensuring it is both flavorful and easy to make.
Pepperpot is more than just a meal. It is a celebration of Guyanese traditions, bringing families and communities together. This national dish is cherished for its complex blend of spices and aromatic flavors, making it a favorite choice for festive occasions.
Whether you are an experienced cook or a novice in the kitchen, this easy pepperpot recipe will allow you to recreate the authentic flavors of Guyana in the comfort of your own home. So, let’s gather our ingredients and embark on a culinary journey to savor the taste of Guyanese pepperpot!
Table of Contents
Key Takeaways:
An authentic Guyanese pepperpot recipe exemplifies the vibrant cultural heritage of Guyana.
Pepperpot is a cherished national dish that unites families and communities during festive occasions.
This recipe provides a simple and straightforward approach, suitable for both experienced and novice cooks.
Discover the unique blend of spices and flavors that set Guyanese pepperpot apart from other variations in the Caribbean.
Enjoy the savory-sweet balance and aromatic complexity that characterize Guyanese cuisine.
Pair your pepperpot with traditional accompaniments to create a well-rounded dining experience.
Preserve the timeless tradition of pepperpot by sharing it with others and celebrating the joy it brings.
The Rich Heritage of Guyanese Pepperpot
In Guyana, pepperpot isn’t just a delicious stew, it’s a cultural icon that holds a deep significance in Guyanese cuisine. The unique flavors and aromas of this dish have been passed down through generations, making it a cherished part of Guyanese culinary heritage.
Understanding Cassareep’s Role in Pepperpot
A key component of Guyanese pepperpot is cassareep, a thick, dark syrup made from boiled cassava juice. Cassareep not only adds depth and richness to the stew but also acts as a natural preservative. It is derived from Amerindian traditions and is responsible for the distinct taste and dark color of Guyanese pepperpot.
The National Dish That Unites Generations
Pepperpot holds a special place in the hearts of Guyanese people and is considered the national dish of Guyana. It is a dish that brings families and communities together, particularly during festive occasions such as Christmas. The tradition of cooking pepperpot is passed down from one generation to the next, reinforcing cultural bonds and preserving Guyanese culinary heritage.
What Sets Guyanese Pepperpot Apart?
In this section, we will explore the unique features of Guyanese pepperpot that set it apart from other variations in the Caribbean. We will delve into the distinctive spices used, which contribute to the aromatic complexity and flavor profile of this beloved dish. Additionally, we will discuss how pepperpot holds a special place in Guyanese celebrations and the differences it has with other Caribbean pepperpot recipes.
Distinctive Spices and Aromatic Complexity
Guyanese pepperpot stands out for its use of distinctive spices that create an exceptional flavor experience. The combination of flavors from cloves, cinnamon, and cassareep (a rich sauce made from the juice of cassava) lends a deep and complex taste to the stew. The aromatic essence of these spices infuses every bite, making Guyanese pepperpot a truly unique culinary delight.
Celebrating Guyanese Festivities with Pepperpot
Pepperpot holds a special significance in Guyanese culture and is often prepared during festive occasions. From birthdays to weddings, Christmas to New Year’s, pepperpot is a staple dish that brings families and communities together in celebration. Its rich and hearty nature symbolizes abundance and prosperity, making it an integral part of Guyanese traditions.
Differences with Other Caribbean Pepperpot Variations
While pepperpot is enjoyed across the Caribbean region, Guyanese pepperpot has distinct characteristics that differentiate it from its counterparts. The use of cassareep, a key ingredient in Guyanese pepperpot, sets it apart from other Caribbean variations. The method of slow-cooking over an extended period, allowing the flavors to meld and intensify, is another unique aspect of Guyanese pepperpot. These differences contribute to the unmatched depth of flavor and cultural significance of Guyanese pepperpot.
***Note: The image of spices in Guyanese pepperpot complements the content and provides visual interest.***
Choosing the Right Ingredients
When it comes to making authentic Guyanese pepperpot, selecting the right ingredients is crucial. The combination of flavors and textures is what sets this traditional dish apart. In this section, we will provide practical tips on choosing the best ingredients for your pepperpot.
Meat Selection:
One of the key components of Guyanese pepperpot is the meat. The type of meat you use will greatly impact the final taste and texture of the dish. While traditionally made with beef, you can also experiment with other meats such as pork, lamb, or chicken. Each meat will bring its unique flavor and tenderness to the dish.
Choosing the Best Cuts:
When choosing meat for pepperpot, it’s important to select cuts that are suitable for slow cooking. Tougher cuts with more connective tissue, like shanks or chuck roast, are ideal as they become tender and flavorful when cooked for an extended period.
Other Essential Ingredients:
In addition to the meat, there are other essential ingredients that contribute to the flavor and texture of Guyanese pepperpot. These include cassareep, the key ingredient that gives the dish its rich color and depth of flavor. Cassareep is a thick, black sauce made from cassava root and is readily available in Guyanese and Caribbean grocery stores. Other ingredients like garlic, onions, ginger, and spices like cloves and cinnamon also add layers of complexity to the dish.
Meat
Description
Beef
Tender and flavorful, traditionally used in pepperpot
Pork
Brings a rich and savory taste to the dish
Chicken
Offers a lighter flavor and tender texture
Lamb
Provides a unique and robust flavor
When selecting ingredients for your Guyanese pepperpot, be sure to choose high-quality meat and fresh produce to enhance the overall taste and experience. Experiment with different combinations to find your favorite variation. Now that we have covered the importance of choosing the right ingredients, let’s move on to the step-by-step guide to making authentic Guyanese pepperpot.
Step-by-Step Guide to Making Authentic Guyanese Pepperpot
Preparing a delicious and authentic Guyanese pepperpot requires careful attention to detail and a few essential steps. In this guide, we will walk you through each stage of the process, ensuring that your pepperpot turns out flavorful and tender, just like the traditional recipe demands.
Preparations Before Cooking: Marinating Your Meats
Marinating the meats is an essential step in adding depth and complexity to your pepperpot. Here’s how you can marinate your meats:
Select your preferred meats such as beef, pork, or mutton, and cut them into bite-sized pieces.
In a large bowl, combine the meats, traditional pepperpot spices, garlic, onion, and cassareep.
Thoroughly coat each piece of meat with the marinade, ensuring they are well-covered.
Cover the bowl with plastic wrap and refrigerate for at least 2 hours, or ideally overnight, allowing the flavors to marinate and penetrate the meats.
The Importance of Slow Cooking for Authentic Flavor
Slow cooking is the secret to achieving the rich, hearty flavor that defines authentic Guyanese pepperpot. Follow these steps for slow cooking:
Transfer the marinated meats and marinade into a large, heavy-bottomed pot.
Place the pot on low heat and bring the mixture to a gentle simmer. Avoid boiling, as this can toughen the meats.
Cover the pot and let it simmer on low heat for several hours, ideally 3 to 4 hours, allowing the meats to become tender and the flavors to meld together.
During this time, check the pot occasionally to ensure the liquid doesn’t evaporate too much. If needed, add a small amount of water to maintain the desired consistency.
Tips for Pressure Cooking the Various Meats
For those who prefer to use a pressure cooker to save time without sacrificing flavor, here are some tips for pressure cooking the meats:
After marinating the meats, transfer them along with the marinade to the pressure cooker.
Close the pressure cooker and set it to high heat.
Cook the meats under high pressure according to the recommended cooking times for each type of meat. For example, beef may take approximately 20 minutes, while pork or mutton may take around 30 minutes.
Once the cooking time is complete, allow the pressure to naturally release for a few minutes before opening the cooker.
Check the meats for tenderness and adjust the cooking time accordingly if needed. They should be easily fork-tender.
By following these marinating, slow cooking, and pressure cooking techniques, you’ll be able to create a delectable and authentic Guyanese pepperpot that will impress your family and friends.
Guyanese pepperpot recipe
Are you ready to recreate the authentic flavors of Guyana in your own kitchen? Look no further than this traditional pepperpot recipe! With its rich heritage and distinctive spices, Guyanese pepperpot is a staple dish that brings together generations of families and communities.
To make this authentic pepperpot, you will need the following ingredients:
Beef – 3 pounds, preferably with bones
Pork – 1 pound, preferably with bones
Chicken – 1 pound, preferably with bones
Cassareep – 1 cup
Scotch bonnet pepper – 1, whole
Onion – 1, chopped
Garlic – 4 cloves, minced
Thyme – 1 tablespoon, fresh or dried
Bay leaves – 2
Cinnamon stick – 1 inch
Whole cloves – 4
Whole allspice – 4
Ground black pepper – 1 teaspoon
Salt – to taste
Water – 4 cups
Now that you have all the ingredients ready, follow these simple steps to prepare your Guyanese pepperpot:
In a large pot, combine the beef, pork, and chicken. Add the cassareep, Scotch bonnet pepper, onion, garlic, thyme, bay leaves, cinnamon stick, cloves, allspice, black pepper, and salt. Mix well to coat the meats with the seasonings.
Pour in the water and bring the pot to a boil over high heat.
Once boiling, reduce the heat to low and let the pepperpot simmer for 3-4 hours, partially covered. Stir occasionally to prevent sticking.
After a few hours of slow cooking, the meats should be tender and the flavors well developed. Adjust the seasoning if necessary.
Remove the Scotch bonnet pepper, cinnamon stick, bay leaves, and whole spices before serving.
Traditionally, Guyanese pepperpot is served with a side of fluffy white rice or bread to soak up all the delicious gravy. Enjoy!
In this section, we will discuss the traditional cooking methods for making Guyanese pepperpot and explore how modern cooking techniques can be adapted to prepare this dish. When it comes to traditional cooking, pepperpot is typically slow-cooked in a large pot, allowing the flavors to meld together over a long period of time.
Traditionally, pepperpot is cooked using the “bottom pot” method, where all the ingredients, including the meats, spices, and cassareep, are added to a large pot and simmered over a low fire for several hours. This slow cooking process allows the flavors to develop and intensify, resulting in a rich and flavorful stew.
However, in today’s fast-paced world, not everyone has the time to dedicate hours to cooking a traditional pepperpot. Fortunately, there are modern cooking techniques that can be adapted to make this dish more accessible and time-efficient.
One such technique is pressure cooking. By using a pressure cooker, you can significantly reduce the cooking time while still achieving tender and flavorful results. The high pressure and heat help to break down the tough meat fibers and infuse the flavors of the spices and cassareep more quickly.
Another option is to use a slow cooker or crockpot. This is a convenient method that allows you to set the ingredients in the morning and come home to a deliciously cooked pepperpot in the evening. The low and slow cooking process in a slow cooker also helps to enhance the flavors and tenderness of the meats.
Adapting the traditional pepperpot recipe to modern cooking techniques allows you to enjoy this beloved Guyanese dish without compromising on taste and authenticity. Whether you choose to stick to the traditional slow-cooking method or opt for a more time-efficient approach, the key is to preserve the flavors and cultural significance of this iconic dish.
Enhancing Flavor – The Impact of Nutmeg and Other Spices
In Guyanese cuisine, flavor enhancement plays a crucial role in creating the distinct taste of pepperpot. One key ingredient that contributes to the complexity of flavors is nutmeg. Its warm, earthy notes add depth and richness to the dish, elevating it to new heights.
But nutmeg is not the only spice that brings flavor to Guyanese pepperpot. The art lies in layering various spices to create a harmonious blend that tantalizes the taste buds. The combination of cinnamon, cloves, allspice, and other aromatic spices enhances the overall savory profile of the dish.
By skillfully layering spices, each ingredient adds a different dimension to the flavor, resulting in a pepperpot that is both robust and nuanced. This spice layering technique is a hallmark of Guyanese cuisine, showcasing the culinary expertise and attention to detail that goes into every dish.
The Savory-Sweet Balance in Guyanese Cuisine
Another characteristic feature of Guyanese cuisine is the balancing of savory and sweet flavors. In pepperpot, this balance is achieved through the careful combination of ingredients such as cassareep (a thick, black sauce made from cassava) and the natural sweetness of vegetables like pumpkin and sweet potatoes.
The savory-sweet balance is essential in creating a well-rounded and satisfying flavor profile. It adds complexity to the dish, with the savory notes providing depth and richness, while the subtle sweetness brings a delightful contrast that keeps the palate intrigued.
This harmonious interplay of flavors is a reflection of Guyanese culinary tradition, where the blending of diverse ingredients creates a unique tapestry of taste. It is this balance that makes Guyanese pepperpot a standout dish, cherished by both locals and those who have had the pleasure of experiencing its flavors.
Spices
Flavor Profile
Nutmeg
Warm, earthy, and subtly sweet
Cinnamon
Warm, slightly sweet, and aromatic
Cloves
Strong, pungent, and slightly sweet
Allspice
Complex blend of flavors, including notes of cinnamon, nutmeg, and cloves
Pairing Guyanese Pepperpot with the Right Accompaniments
When it comes to enjoying a delicious bowl of Guyanese pepperpot, choosing the right accompaniments can take the dining experience to the next level. The best accompaniments for pepperpot are traditional side dishes that complement the rich flavors and hearty nature of the stew, creating a well-rounded meal.
One classic side dish that pairs perfectly with pepperpot is rice. Whether it’s plain steamed rice or aromatic coconut rice, the soft and fluffy grains serve as a neutral base that allows the flavors of the stew to shine through.
An essential addition to any pepperpot meal is roti. This traditional flatbread, made from flour, water, and sometimes oil, is a staple in Guyanese cuisine. Its soft and chewy texture provides a satisfying contrast to the robust flavors of the stew.
To add some freshness and crunch to your pepperpot meal, consider serving it with a green salad. A simple salad made with mixed greens, tomatoes, cucumber, and a tangy vinaigrette can provide a refreshing balance to the richness of the stew.
No pepperpot meal is complete without some heat. A side of pepper sauce or hot chutney is a must-have for those who enjoy a spicy kick. These condiments add a fiery element that enhances the overall flavor profile of the dish.
If you’re looking to incorporate more vegetables into your meal, consider serving pepperpot with callaloo. This leafy green vegetable, similar to spinach, is often sautéed with onions and garlic and provides a nutritious and vibrant addition to the plate.
Lastly, for those who enjoy a touch of sweetness, plantains make a delightful pairing with pepperpot. Fried or baked plantains offer a mellow sweetness and a slightly caramelized texture that complements the savory flavors of the stew.
By choosing the right accompaniments, you can elevate your Guyanese pepperpot experience and create a satisfying and well-balanced meal. Whether you prefer traditional staples like rice and roti or enjoy experimenting with different flavors and textures, these side dishes are sure to enhance your pepperpot feast.
As we conclude our exploration of Guyanese pepperpot, we are reminded of the timeless tradition that this dish represents. Throughout generations, pepperpot has been passed down, cherished, and celebrated, becoming an integral part of Guyanese culture. It serves as a connection to our roots, a symbol of our heritage, and a testament to the importance of preserving culinary traditions.
The Joy of Sharing Authentic Guyanese Pepperpot
One of the most delightful aspects of Guyanese pepperpot is the joy it brings through sharing. Gathering around a steaming pot of pepperpot with family and friends evokes a sense of togetherness and the warmth of communal dining. The rich aromas, complex flavors, and tender meats create a culinary experience that is meant to be enjoyed together, fostering connections and creating lasting memories.
By sharing this authentic dish, we not only savor the flavors but also honor the history and culture that have shaped our identities. We pass on traditions, stories, and a unique heritage that is deeply rooted in the heart of Guyana. Whether celebrating special occasions, holidays, or simply coming together for a delicious meal, Guyanese pepperpot celebrates the power of food to bring people together and create lasting bonds.
FAQ
What is an authentic Guyanese pepperpot recipe?
An authentic Guyanese pepperpot recipe is a traditional dish that combines various meats, spices, and cassareep to create a rich and flavorful stew. It is a cherished national dish in Guyana and is often enjoyed during festive celebrations.
What role does cassareep play in Guyanese pepperpot?
Cassareep is a vital ingredient in Guyanese pepperpot. It is made from boiling cassava juice until it thickens and develops a dark, syrup-like consistency. Cassareep adds a distinct flavor and color to the dish, giving it its unique taste.
How does Guyanese pepperpot differ from other Caribbean variations?
Guyanese pepperpot stands out from other Caribbean pepperpot recipes due to its distinctive blend of spices. The combination of cinnamon, cloves, and other aromatic spices creates a complex flavor profile that sets it apart. Additionally, the way pepperpot is traditionally enjoyed during Guyanese festivities showcases its unique cultural significance.
What are the essential ingredients for making authentic Guyanese pepperpot?
The essential ingredients for making authentic Guyanese pepperpot include various meats such as beef, pork, and chicken, as well as spices like cinnamon, cloves, and thyme. Cassareep, which is made from cassava juice, is also a key ingredient that gives the stew its distinct flavor.
How do I make authentic Guyanese pepperpot?
To make authentic Guyanese pepperpot, you need to marinate the meats in a mixture of spices and cassareep before cooking. Slow cooking is essential for achieving an authentic flavor, but pressure cooking can be used as a time-saving alternative. The complete recipe and step-by-step instructions can be found in the previous section.
What are the traditional cooking methods for making Guyanese pepperpot?
The traditional cooking methods for making Guyanese pepperpot involve slow cooking the stew in a large pot over low heat. However, modern cooking techniques such as using a slow cooker or pressure cooker can also be adapted to prepare this dish.
How can I enhance the flavor of Guyanese pepperpot?
The flavor of Guyanese pepperpot can be enhanced by adding spices such as nutmeg and layering them with other aromatic ingredients. Achieving a savory-sweet balance is also crucial, as it is a characteristic feature of Guyanese cuisine.
What are some recommended accompaniments for Guyanese pepperpot?
Guyanese pepperpot pairs well with traditional side dishes such as rice, roti, or bread. These accompaniments complement the flavors of the stew and provide a well-rounded dining experience.
What is the cultural significance of Guyanese pepperpot?
Guyanese pepperpot holds a special place in the country’s cultural heritage. It is considered a national dish that brings together families and communities during festive celebrations. The tradition of making and sharing pepperpot has been passed down through generations, preserving the authentic flavors and culinary traditions of Guyana.
Welcome to our blog! Are you in search of an easy couscous recipe that yields perfect fluffy results every time? Look no further! We’ve got you covered with a recipe that is simple to follow and guarantees delicious couscous. Whether you’re a beginner or an experienced cook, you can create light, fluffy, and flavorful couscous with our step-by-step guide and helpful tips. Let’s get started!
Table of Contents
Key Takeaways:
Our easy couscous recipe delivers perfect fluffy results every time.
Whether you’re a beginner or an experienced cook, this recipe is simple to follow.
Our step-by-step guide and helpful tips ensure light, fluffy, and flavorful couscous.
Prepare for success by understanding the basics of couscous cooking.
Elevate the flavor of your couscous with various herbs, spices, and add-ins.
Discovering the World of Couscous
In this section, we will explore the fascinating world of couscous. Couscous is a staple dish that has a rich history and cultural significance. Let’s dive into the origins of couscous and its journey from North Africa to cuisines around the globe.
Couscous, believed to have originated in North Africa, has been a culinary tradition for centuries. It holds a special place in the hearts and palates of people across the region. Over time, its popularity spread to different parts of the world, contributing to the diverse culinary landscape we experience today.
There are various types of couscous, each with its own unique characteristics and cooking methods. Let’s explore some of them:
Moroccan couscous: This is the most common type of couscous, known for its fine and fluffy texture. It is typically steamed to perfection and pairs well with a variety of dishes.
Pearl couscous: Also known as Israeli couscous, this type is larger in size and has a slightly chewy texture. It is often toasted before cooking, adding a delicious nutty flavor to the dish.
Lebanese couscous: This couscous variety is larger than Moroccan couscous and has a more robust texture. It takes longer to cook but offers a heartier bite, making it ideal for salads and stews.
Now let’s discover the culinary uses of couscous. Couscous is incredibly versatile and can be incorporated into a wide range of dishes. Whether as a side dish or the star of the meal, couscous lends itself well to various cuisines and flavors. It can be served alongside grilled meats, roasted vegetables, or used as a base for salads and grain bowls.
From classic Moroccan tagines to Mediterranean-inspired salads, couscous brings a delightful complexity and texture to dishes. It absorbs flavors beautifully, making it a perfect canvas for experimenting with different spices, herbs, and ingredients.
Now that we have delved into the world of couscous, let’s move on to the next section, where we will guide you in choosing the right type of couscous for your dish.
Choosing the Right Type of Couscous for Your Dish
In this section, we will discuss the different types of couscous and help you choose the right one for your dish. Couscous is a versatile grain that comes in various forms, each with its own unique characteristics and cooking times. By understanding the flavor profiles and cooking properties of different types of couscous, you can enhance the taste and texture of your recipes. Let’s explore three popular types of couscous:
Moroccan Couscous: Quick Cooking Delight
Moroccan couscous is the most common and widely available type. It has a fine texture and is made from semolina wheat. This variety of couscous cooks quickly, usually within 5 minutes, making it ideal for busy weeknight meals. Moroccan couscous has a light and fluffy consistency, making it perfect for absorbing flavors and sauces. It pairs well with a wide range of ingredients, and its delicate texture allows it to complement both light and heavy dishes.
Pearl Couscous: A Toasted Treasure
Pearl couscous, also known as Israeli couscous, is made from wheat flour and rolled into small granules. Unlike Moroccan couscous, pearl couscous has a toasted flavor and a slightly larger size. It has a chewy texture that adds a pleasant bite to any dish. Pearl couscous requires a slightly longer cooking time, usually around 10-12 minutes. The toasted flavor of pearl couscous makes it a great option for salads, pilafs, and hearty side dishes.
Lebanese Couscous: The Hearty Option
Lebanese couscous, also known as Moghrabieh, is a larger and heartier variety. The grains are often described as tiny balls, similar to small pearls. Lebanese couscous has a nutty flavor and a more substantial texture. It takes a bit longer to cook compared to other types of couscous, typically around 15-20 minutes. This robust couscous is perfect for stews, casseroles, and dishes where you want a satisfying bite. Its larger size also makes it an excellent choice for stuffing and filling.
To help you visualize the differences between the types of couscous, here is a handy table:
Type of Couscous
Texture
Cooking Time
Flavor Profile
Moroccan Couscous
Fine and fluffy
5 minutes
Delicate and versatile
Pearl Couscous
Toasted and chewy
10-12 minutes
Nutty and robust
Lebanese Couscous
Larger and hearty
15-20 minutes
Nutty and substantial
By considering the cooking times, flavor profiles, and textures of different types of couscous, you can enhance your culinary creations and create dishes that are tailored to your preferences. Whether you’re looking for a quick and light couscous or a heartier option, there is a type of couscous to suit every taste and meal. So, choose wisely and enjoy the wonderful world of couscous!
The Couscous Ratio: Understanding Basics
In this section, we will cover the basics of the couscous ratio. Achieving perfectly cooked couscous every time requires an understanding of the proper couscous to water ratio. It’s a simple but crucial step in ensuring that your couscous turns out fluffy and delicious.
When it comes to cooking couscous, the recommended ratio is typically 1 part couscous to 1.5 parts water. This ratio will yield light and fluffy couscous that isn’t too dry or mushy. However, it’s important to note that the specific ratio may vary slightly depending on the type of couscous you’re using and your desired texture.
Here are a few tips and tricks to keep in mind when cooking couscous:
Use flavorful liquids: Instead of using plain water, consider using broth or stock to cook your couscous. This adds extra depth of flavor to the dish.
Adjust cooking time: The cooking time can vary depending on how tender or al dente you prefer your couscous. Follow the package instructions as a general guide and adjust the cooking time to achieve your desired texture.
Fluff with a fork: After the couscous is cooked, fluff it with a fork to separate the grains. This helps prevent clumping and ensures a light and airy texture.
By understanding the basics of the couscous ratio and following these tips, you’ll be able to create perfectly cooked couscous every time. Experiment with different flavors and textures to find your favorite combination.
Perfect Fluffy Couscous: Tips and Techniques
In this section, we will share tips and techniques to help you achieve perfect fluffy couscous. Achieving the perfect texture is crucial for a delicious couscous dish, so we’ll guide you through the process and provide expert advice.
Preparation: Setting the Stage for Success
Before cooking your couscous, it’s important to properly prepare and set the stage for success. Here are a few key tips:
Measure your ingredients accurately to maintain the right couscous to water ratio. This will ensure that your couscous cooks evenly and achieves a fluffy texture.
Fluff the couscous grains before cooking. This helps to separate and loosen any clumps, resulting in a lighter and fluffier end product.
Consider toasting the couscous lightly before cooking. This can enhance the nutty flavor and add an extra dimension of taste to your dish.
When it comes to cooking couscous, there are two main methods: steaming and boiling. Both methods have their advantages, so let’s take a look:
Steaming: Steaming couscous allows the grains to absorb the liquid gradually, resulting in a light and fluffy texture. It’s a traditional method used in Moroccan cuisine and requires a couscous steamer or a heatproof colander placed over a pot of simmering liquid.
Boiling: Boiling couscous is a quicker method and works well if you’re short on time. Simply bring the liquid to a boil, add the couscous, and cook until tender. This method is more common for larger types of couscous, such as Moroccan and Lebanese.
The Fluff Factor: Achieving the Perfect Texture
Now, let’s dive into the “fluff factor” – the key to achieving the perfect texture in your couscous. Here’s what you need to know:
Fluffing with a fork: After cooking the couscous, use a fork to fluff the grains gently. This will separate any clumps and create light, airy couscous.
Add moisture if needed: If your couscous turns out too dry, you can add a little bit of warm liquid or olive oil and fluff again. This will help to restore moisture and prevent a dry texture.
Resting time: After fluffing, let the couscous rest for a few minutes. This allows the grains to absorb any remaining moisture and further enhances the texture.
By following these tips and techniques, you’ll be well on your way to achieving the perfect fluffy couscous every time.
Couscous recipe
The Simple Ingredients You’ll Need
To make this easy couscous recipe, you’ll only need a few simple ingredients:
Couscous
Liquid (water, broth, or stock)
Seasonings (salt, pepper, herbs, spices)
Step-by-Step Cooking Instructions
In a saucepan, bring the liquid to a boil. The amount of liquid you’ll need depends on the specific couscous brand you’re using, so refer to the package instructions for guidance.
Once the liquid is boiling, remove it from the heat and add the couscous to the saucepan.
Stir the couscous gently to ensure it is fully submerged in the liquid. Cover the saucepan with a lid and let it sit for about 5 minutes.
After 5 minutes, remove the lid and fluff the couscous with a fork. This step helps separate the grains and create a light, fluffy texture.
Add your desired seasonings to the couscous, such as salt, pepper, herbs, or spices. Mix well to evenly distribute the flavors.
Your delicious couscous is now ready to be served as a side dish or as a base for a variety of flavorful recipes!
By following these step-by-step couscous cooking instructions, you can easily create a flavorful and fluffy couscous dish. Whether you’re a beginner or an experienced cook, this recipe is simple to follow and guarantees perfect results every time.
Flavor Enhancers: Elevating Your Couscous
In this section, we will explore various flavor enhancers that can elevate your couscous to the next level. Enhancing the flavor of couscous is a great way to make your dish more exciting and enjoyable. By using different ingredients and techniques, you can create a couscous dish that is bursting with flavor.
Using Broth Instead of Water
One simple way to enhance the flavor of your couscous is to use broth instead of water when cooking. By substituting water with vegetable, chicken, or beef broth, you can infuse your couscous with rich and savory flavors. The broth adds depth to the taste of the couscous and creates a more robust overall dish.
Herbs and Spices for that Extra Zing
To add an extra zing to your couscous, consider incorporating herbs and spices into the dish. Herbs like mint, parsley, cilantro, and basil can add freshness and vibrancy to your couscous. Similarly, spices such as cumin, paprika, turmeric, and cinnamon can bring complexity and warmth to the flavor profile. Experiment with different combinations to find the perfect balance of flavors that complement your couscous.
Customizing Your Couscous with Add-ins
Another way to enhance the flavor of your couscous is by adding a variety of ingredients known as add-ins. These add-ins can provide additional texture, taste, and visual appeal. Some popular couscous add-ins include roasted vegetables, dried fruits, nuts, feta cheese, and cooked meats like chicken or lamb. They can transform a simple couscous dish into a delicious and satisfying meal.
Get creative and experiment with different combinations of add-ins to customize your couscous according to your preferences. The possibilities are endless, and you can create unique and flavorful couscous dishes that will impress your family and friends.
By using broth instead of water, incorporating herbs and spices, and customizing your couscous with add-ins, you can take your couscous to the next level of flavor. These simple techniques will elevate your couscous dishes and make them even more enjoyable.
Storing and Reheating Couscous
In this section, we will provide guidance on storing and reheating couscous. We understand that sometimes you may have leftovers or want to prepare couscous in advance for convenience. To maintain the freshness and flavor of your cooked couscous, follow these simple tips:
Storing Cooked Couscous: After cooking the couscous, allow it to cool completely. Transfer the couscous into an airtight container and refrigerate. The airtight container will help prevent moisture loss and keep your couscous from drying out. Stored properly, cooked couscous can last in the refrigerator for up to 3-4 days.
Reheating Couscous: When it’s time to reheat your couscous, you have several options:
Microwave: Place the desired amount of couscous in a microwave-safe bowl and sprinkle a little water or broth over it to add moisture. Cover the container with a microwave-safe lid or plastic wrap, leaving a small vent for steam to escape. Heat on medium power for 1-2 minutes, stirring halfway through, until heated thoroughly.
Stovetop: In a saucepan, add a splash of water or broth to the couscous to prevent sticking. Heat over medium heat, stirring occasionally until heated through. This method may take slightly longer than using the microwave but allows for even heating.
Oven: Preheat the oven to 350°F (175°C). Place the couscous in an oven-safe dish and drizzle a little water or broth over it for moisture. Cover the dish with aluminum foil and bake for about 15-20 minutes, or until the couscous is heated thoroughly.
Remember to fluff the reheated couscous with a fork before serving to regain its light and fluffy texture. Enjoy your reheated couscous without sacrificing its quality and taste!
Couscous in Your Daily Diet: Versatility and Health
In this section, we will explore the versatility and health benefits of couscous. Couscous is not only a delicious and easy-to-prepare grain, but it also offers numerous advantages for your overall well-being. Whether you’re looking for a healthier twist or searching for a satisfying main course option, couscous has got you covered.
Whole Wheat Couscous: A Healthier Twist
If you’re aiming to incorporate more nutritious options into your diet, whole wheat couscous is a fantastic choice. Made from whole grains, this variety of couscous retains more fiber and nutrients compared to its refined counterpart. Whole wheat couscous offers several health benefits, including:
Improved Digestion: The fiber content in whole wheat couscous promotes healthy digestion and helps prevent constipation.
Increased Fullness: The higher fiber content and slower digestion rate of whole wheat couscous can keep you feeling satisfied for longer periods, aiding in weight management.
Nutrient-Rich: Whole wheat couscous contains essential vitamins and minerals such as B vitamins, iron, and magnesium, contributing to overall good health.
Heart Health: The fiber and nutrient profile of whole wheat couscous supports cardiovascular health by reducing cholesterol levels and regulating blood sugar levels.
By incorporating whole wheat couscous into your meals, you can enjoy the delectable flavors while reaping the numerous health benefits it offers.
From Side Dish to Main Course: Couscous’ Flexible Role
One of the remarkable qualities of couscous is its versatility in the kitchen. While often used as a side dish, couscous has the potential to be a satisfying main course on its own. Here are some ways you can transform couscous into a filling and flavorful main course:
Couscous Salad: Toss cooked couscous with a medley of fresh vegetables, herbs, and a zesty dressing for a refreshing and nutritious salad.
Couscous Stuffed Peppers: Fill hollowed-out bell peppers with a savory couscous filling, topped with melted cheese for a satisfying vegetarian main dish.
Couscous Stir-Fry: Incorporate cooked couscous into a colorful stir-fry with your favorite vegetables and protein, seasoned with your choice of sauces and spices.
Couscous Pilaf: Create a fragrant and flavorful couscous pilaf by sautéing couscous with aromatic ingredients and cooking it in flavorful broth.
With these innovative ideas, couscous can take center stage and transform your mealtime into a delightful and nutritious experience.
Health Benefits of Whole Wheat Couscous
Health Benefit
Description
Improved Digestion
The fiber content in whole wheat couscous promotes healthy digestion and helps prevent constipation.
Increased Fullness
The higher fiber content and slower digestion rate of whole wheat couscous can keep you feeling satisfied for longer periods, aiding in weight management.
Nutrient-Rich
Whole wheat couscous contains essential vitamins and minerals such as B vitamins, iron, and magnesium, contributing to overall good health.
Heart Health
The fiber and nutrient profile of whole wheat couscous supports cardiovascular health by reducing cholesterol levels and regulating blood sugar levels.
In conclusion, couscous offers both versatility and health benefits in your daily diet. With the option of whole wheat couscous, you can enjoy a healthier twist while exploring the various roles couscous can play in your meals. From side dish to main course, couscous is a grain that can enhance your culinary experience while nourishing your body.
Conclusion
Throughout this article, we have explored the world of couscous, from its fascinating history to its various culinary uses. We’ve discussed the different types of couscous available, including Moroccan, pearl, and Lebanese, and how to choose the right one for your dish. We’ve also provided valuable tips and techniques for cooking perfect fluffy couscous, emphasizing the importance of preparation and the advantages of steaming or boiling methods.
By following our easy couscous recipe and using the proper couscous to water ratio, you can achieve delicious results every time. We’ve also touched upon enhancing the flavor of couscous with broth, herbs, spices, and add-ins, allowing for endless customization. And don’t forget about the versatility and health benefits of couscous, whether you opt for whole wheat couscous or incorporate it as a main course.
In conclusion, couscous is a versatile and flavorful ingredient that can elevate your meals to new heights. By understanding the basics of cooking couscous and experimenting with different flavors and techniques, you can create a wide range of delicious dishes. So go ahead, embrace the world of couscous and let your culinary creativity shine!
FAQ
Can you provide an easy couscous recipe that yields perfect fluffy results?
Absolutely! Our easy couscous recipe guarantees delicious couscous with perfect fluffy results every time. Whether you’re a beginner or an experienced cook, this recipe is simple to follow. We’ll guide you through the step-by-step process and share tips to ensure your couscous turns out light, fluffy, and full of flavor.
What will I learn about couscous in this article?
In this article, we will explore the fascinating world of couscous. We’ll take a look at the history of couscous and its origins in North Africa. Additionally, we’ll discuss the various types of couscous available, including Moroccan couscous, pearl couscous, and Lebanese couscous. Finally, we’ll delve into the culinary uses of couscous, highlighting its versatility and the different dishes in which it can be incorporated.
How do I choose the right type of couscous for my dish?
Choosing the right type of couscous is important for achieving the desired outcome. We’ll help you with that. We’ll explore the characteristics of Moroccan couscous, known for its quick cooking time and delicate texture. We’ll then move on to pearl couscous, also known as Israeli couscous, which has a toasted flavor and slightly larger size. Finally, we’ll introduce Lebanese couscous, which is heartier and takes a bit longer to cook. By understanding the unique qualities of each type, you can select the perfect couscous for your recipe.
What is the couscous ratio and how do I achieve perfectly cooked couscous?
The couscous ratio refers to the recommended ratio of couscous to water. Getting this ratio right is crucial for achieving perfectly cooked couscous. In this section, we’ll explain the couscous ratio and provide tips and tricks for cooking couscous. We’ll also discuss the importance of using flavorful liquids and adjusting the cooking time based on the desired texture.
Can you share tips and techniques for achieving perfect fluffy couscous?
Of course! We have plenty of tips and techniques to help you achieve perfect fluffy couscous. In this section, we’ll discuss the importance of preparation and setting the stage for success. We’ll also explore the different cooking methods for couscous, including steaming and boiling, and explain the advantages of each. Lastly, we’ll delve into the “fluff factor” and provide guidance on how to achieve the perfect texture in your couscous.
Can you provide a detailed couscous recipe for me to follow?
Absolutely! In this section, we will provide a detailed couscous recipe for you to follow. We’ll list the simple ingredients you’ll need, including couscous, liquid, and seasonings. Then, we’ll provide step-by-step cooking instructions, walking you through the process from start to finish. By following this recipe, you’ll be able to create delicious couscous with ease.
How can I enhance the flavor of my couscous?
To elevate the flavor of your couscous, we have some great suggestions for you. In this section, we’ll discuss the option of using broth instead of water to infuse your couscous with additional flavor. Additionally, we’ll provide suggestions for herbs and spices that can add a zing to your couscous. Lastly, we’ll explore the world of add-ins and offer ideas for customizing your couscous with additional ingredients.
How should I store and reheat couscous?
Storing and reheating couscous properly is important to maintain its freshness and flavor. In this section, we’ll provide guidance on the best methods for storing cooked couscous and tips for reheating it. Whether you’re using a microwave, stovetop, or oven, we’ll ensure that your leftover couscous tastes just as delicious as the day it was cooked.
What are the versatility and health benefits of couscous?
Couscous is not only versatile but also has various health benefits. In this section, we’ll explore the versatility of couscous and its transition from a side dish to a main course. We’ll also discuss the health benefits of whole wheat couscous as a healthier alternative. Whether you’re looking for a nutritious meal or a creative way to incorporate couscous into your diet, we have you covered.