Welcome to our culinary adventure as we dive into the rich and vibrant flavors of Burmese cuisine. Today, we bring you an authentic Mohinga recipe, a traditional Burmese noodle soup that is as comforting as it is delicious. Mohinga holds a special place in the hearts of the Burmese people, often enjoyed as a hearty breakfast to start the day off right.
Mohinga is more than just a dish; it represents the cultural heritage and flavors of Myanmar. Made with a flavorful fish broth, rice noodles, and an array of aromatic herbs and spices, Mohinga embodies the unique culinary traditions of Burma. Join us as we explore the history, ingredients, variations, and garnishing techniques that make this dish truly special.
Table of Contents
Key Takeaways:
- Mohinga is a traditional Burmese noodle soup enjoyed for breakfast.
- It is made with a flavorful fish broth, rice noodles, and various aromatic herbs and spices.
- Mohinga represents the cultural heritage and flavors of Myanmar.
- There are regional variations of Mohinga, each with its own unique twist.
- Garnishing Mohinga with traditional toppings enhances its flavors and textures.
Now, let’s dive into the history and cultural significance of Mohinga in our next section!
Discovering Mohinga: The Quintessential Burmese Breakfast
When it comes to Burmese breakfast, one dish stands out as a cultural favorite – Mohinga. This traditional breakfast recipe embodies the rich flavors of Myanmar and holds a special place in the hearts of the Burmese people.
Mohinga is more than just a meal; it is a cultural breakfast dish that represents the essence of Burmese cuisine. It is often enjoyed as a flavorful and comforting start to the day, providing a satisfying and nutritious foundation. The unique combination of flavors in Mohinga reflects Myanmar’s diverse culinary heritage and reflects the country’s vibrant food culture.
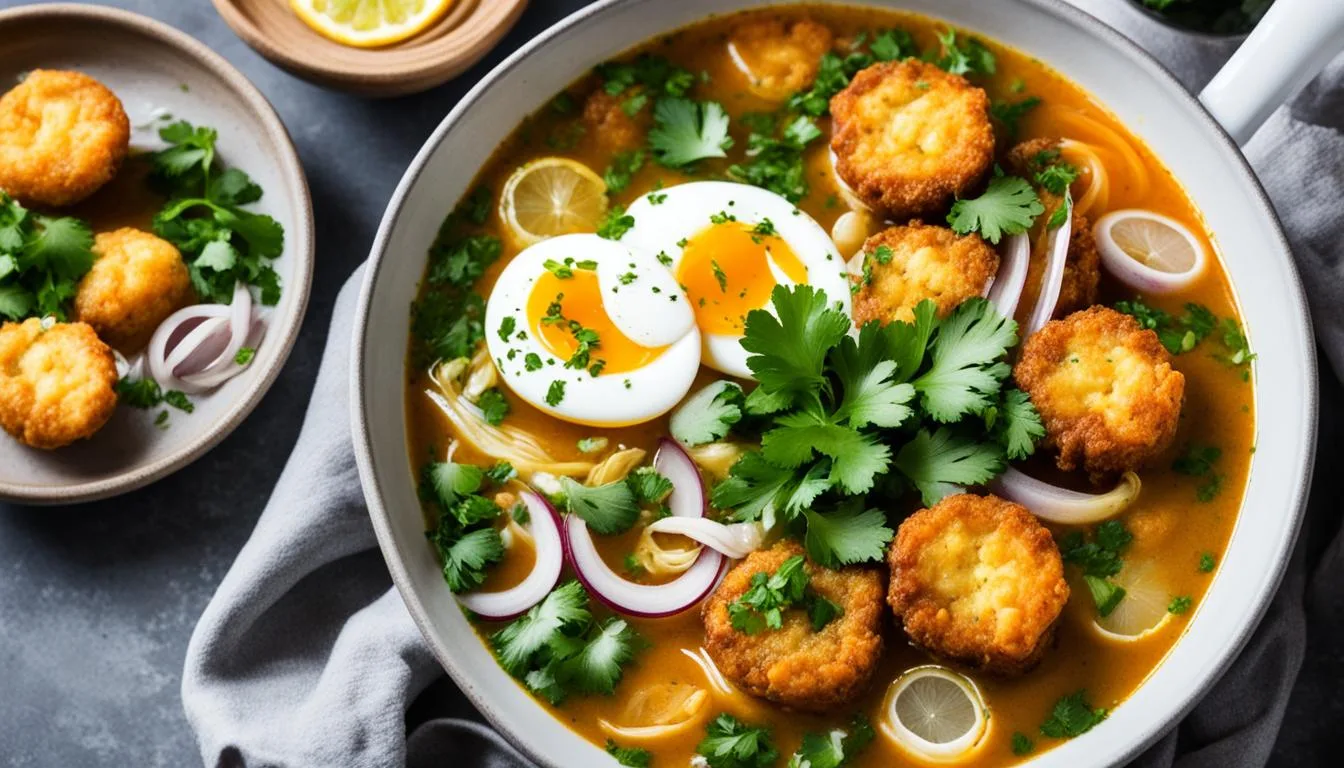
Mohinga is made with a fragrant fish broth that forms the base of the soup. This flavorful broth is then combined with rice noodles, tender pieces of fish, and an array of aromatic herbs and spices. The dish is typically garnished with crunchy fried fritters, fresh cilantro, and a squeeze of lime, enhancing the overall taste and texture.


What sets Mohinga apart from other breakfast dishes is its bold and distinct flavors. The combination of fish, herbs, spices, and condiments creates a harmonious balance of savory, tangy, and aromatic notes that tantalize the taste buds. It is a dish that embodies the essence of Burmese cuisine, showcasing the unique flavors and ingredients that make Myanmar’s culinary heritage so vibrant.
Whether you’re a lover of cultural breakfast dishes or simply seeking to expand your culinary horizons, exploring the world of Mohinga is an adventure worth undertaking. In the following sections, we will delve deeper into the history, ingredients, variations, and garnishing of this iconic Burmese breakfast dish, providing you with all the knowledge and inspiration to embark on your own Mohinga culinary journey.
Exploring the Storied Past of Burma’s National Dish
In this section, we will delve into the fascinating history and cultural significance of Mohinga, Burma’s national dish. Mohinga is more than just a delicious noodle soup; it holds deep spiritual and historical connections within the country.
The Spiritual Connection to Mohinga
Mohinga’s significance extends beyond its culinary delights. It is intricately linked to Buddhism, the predominant religion in Myanmar (formerly known as Burma). The preparation and consumption of Mohinga are often associated with merit-making, a spiritual practice that aims to accumulate good karma. It is believed that offering the dish to monks and partaking in it oneself can bring blessings and spiritual well-being.
Tracing the Origins: Mohinga’s Cultural Significance
Mohinga has a rich cultural heritage and is deeply woven into the fabric of Burmese society. It is considered one of the most iconic and beloved dishes in Myanmar, with a history dating back centuries. Mohinga’s cultural significance lies in its representation of national identity and the pride Burmese people take in their culinary traditions. This beloved dish reflects the shared heritage and values of the Burmese people, serving as a symbol of unity and cultural pride.
Mohinga Through the Ages: A Historical Overview
The origins of Mohinga can be traced back to the Mon people, an ethnic group inhabiting various regions of Myanmar. Historically, it was a humble dish enjoyed by fishermen along the riverbanks, providing sustenance during their long days of work. Over time, Mohinga gained popularity and made its way into the hearts and homes of the Burmese people, ultimately becoming a staple breakfast dish at tea shops across the country.

The evolution of Mohinga has seen variations in ingredients and cooking methods across different regions of Myanmar. While the essence of the dish remains the same, each region adds its unique touch to Mohinga, showcasing the diverse culinary landscape of the country.
A Journey into Burmese Cuisine: Ingredients and Flavors
As we dive deeper into the vibrant world of Burmese cuisine, we are greeted with a delightful array of flavors and ingredients. Traditional Burmese dishes are known for their bold and aromatic profiles, combining a harmonious blend of spices, herbs, and other key components. Let’s take a closer look at the fascinating ingredients and flavors that make Burmese cuisine truly unique.
Burmese Cuisine:
Burmese cuisine is a reflection of Myanmar’s diverse ethnic groups and their culinary traditions. From the tangy and spicy flavors of the north to the milder yet complex tastes of the south, Burmese cuisine offers a wide range of dishes that cater to different palates. The use of fresh ingredients and the careful balance of flavors are central to Burmese cooking.
Traditional Burmese Ingredients:
When it comes to traditional Burmese ingredients, several staples take the spotlight. Rice, being a dietary staple, forms the foundation of many Burmese meals. Fish, particularly freshwater species, is widely used in various dishes, including the beloved Mohinga. Other common ingredients include shrimp paste, lemongrass, garlic, ginger, shallots, and an array of fragrant herbs and spices.
Flavors of Burmese Dishes:
Burmese dishes boast an enchanting mix of flavors that stimulate the taste buds. The cuisine is characterized by its subtle sweetness, tanginess, and a touch of spiciness. The use of lime, tamarind, and fermented ingredients like fish sauce and shrimp paste adds depth and complexity to the dishes. The liberal use of fresh herbs such as coriander, mint, and basil imparts a refreshing aroma to the cuisine.

| Key Ingredients | Flavors |
|---|---|
| Shrimp Paste | Savory, umami |
| Fresh Herbs (Coriander, Mint, Basil) | Refreshing, aromatic |
| Tamarind | Tangy, slightly sweet |
| Lime | Bright, citrusy |
| Chili Peppers | Spicy, fiery |
Table: Key Ingredients and Their Flavors in Burmese Cuisine
The flavors of Burmese dishes are a testament to the culinary heritage of Myanmar. From the pungent aromas of fish sauce to the zesty tang of lime, each ingredient plays a crucial role in creating the palate-pleasing experience that defines Burmese cuisine.
In the next section, we will embark on a culinary adventure as we explore an authentic Mohinga recipe, unraveling the secrets behind this beloved Burmese noodle soup.
Mohinga Recipe: A Step-by-Step Culinary Adventure
Now that we’ve explored the history, cultural significance, and ingredients of Mohinga, it’s time to embark on a step-by-step journey to prepare this authentic Burmese noodle soup from scratch. In this section, we will guide you through each stage of the process, from making the flavorful fish stock to assembling the perfect bowl of Mohinga.
Preparing the Flavorful Fish Stock
The key to a delicious bowl of Mohinga lies in the rich and flavorful fish stock that forms the foundation of the soup. Follow these steps to prepare the fish stock:
- Start by selecting fresh fish, such as catfish or white fish, and clean it thoroughly.
- In a large pot, combine the fish with water, lemongrass, ginger, garlic, and onions.
- Bring the mixture to a boil, then reduce the heat and let it simmer for about 30 minutes or until the fish is cooked and tender.
- Once the fish is fully cooked, remove it from the broth and set it aside to cool.
- Strain the fish stock to remove any solids and transfer it to a clean container.
The homemade fish stock will infuse the Mohinga with its unique and delectable flavors.
The Essential Soup Base: Aroma and Spice
To create the aromatic and flavorful base for your Mohinga, follow these essential steps:
- In a large pot, heat oil and add diced onions and minced garlic. Sauté until they become fragrant and translucent.
- Add turmeric powder, paprika, and ground coriander. Stir well to combine the spices with the onions and garlic.
- Pour in the fish stock that you prepared in the previous step. Bring the mixture to a simmer and let it cook for about 15 minutes to allow the flavors to meld together.
- Season the soup base with salt and fish sauce to taste. Remember to start with small amounts and adjust according to your preference.
The soup base will serve as the flavorful canvas for your Mohinga.
Assembling the Perfect Bowl of Mohinga
Now that you have the fish stock and soup base ready, it’s time to assemble the perfect bowl of Mohinga. Here’s how:
- Cook rice vermicelli noodles according to package instructions. Drain and set aside.
- Add the cooked noodles to individual serving bowls.
- Ladle the hot soup base over the noodles, ensuring they are fully immersed.
- Place a piece of cooked fish, flaked into bite-sized chunks, on top of the noodles.
- Add additional toppings like boiled eggs, crispy fried onions, chopped cilantro, and sliced lime based on your preference.
Lastly, garnish your bowl of Mohinga with a sprinkle of sliced green onions and serve it hot.

With this step-by-step guide, you can now create a bowl of authentic Mohinga that embodies the flavors of Myanmar. Enjoy the comforting and soul-satisfying experience of this quintessential Burmese breakfast dish.
Mohinga Variations: Regional Twists on a Classic
One of the fascinating aspects of Mohinga is the regional variations and adaptations found across Burma. While the core essence of this beloved dish remains the same, different regions infuse their own unique flavors and techniques, resulting in diverse interpretations of Mohinga.
North and South: Diverse Burmese Interpretations
The northern and southern regions of Burma have distinct interpretations of Mohinga, reflecting their local tastes and culinary traditions. In the north, Mohinga is often prepared with thicker noodles and a rich and spicy broth. The addition of extra spices and chili lends a fiery kick to the dish, making it ideal for those who prefer their Mohinga with a bold and robust flavor.
In the south, Mohinga takes on a milder and sweeter taste profile. The broth is typically thinner, allowing the delicate flavors of the fish stock and traditional seasonings to shine through. Southern-style Mohinga often features additional ingredients like banana tree stems, roasted chickpea powder, and tamarind paste, adding complexity to the dish.
Adapting to Local Tastes: Ingredients and Toppings
In addition to regional variations, Mohinga is also adapted to suit the local tastes of different communities within Burma. Depending on the area, you may find variations that incorporate specific ingredients or toppings that are popular in those localities.
In coastal regions, fresh seafood such as prawns, squid, and crab may be added to the dish, giving it a delightful oceanic flavor. Inland regions, on the other hand, may showcase ingredients like pork or chicken to cater to different dietary preferences.
Yangon vs. Mandalay: A Comparison of Styles
Two major cities in Burma, Yangon and Mandalay, have their own distinct styles of Mohinga.
Yangon Mohinga is known for its rich and flavorful broth, achieved by simmering fish bones and aromatic spices for hours. The use of banana tree stems adds a unique texture to the dish, while the various toppings, such as fried onions and crushed chili, provide a delightful crunch and additional layers of taste.
Mandalay Mohinga, on the other hand, is characterized by its thicker and chewier noodles, similar to Chinese wheat noodles. The broth is lighter and milder in flavor, allowing the simplicity of the dish to shine through. Mandalay-style Mohinga often incorporates fish cake slices and crispy fritters as toppings, enhancing the overall texture and taste.

As you can see, the regional variations of Mohinga offer a tapestry of flavors and textures that celebrate the diversity of Burmese regional cuisine. Whether you prefer the fiery spices of the north or the delicate sweetness of the south, each variation showcases the culinary artistry and cultural richness of this beloved dish.
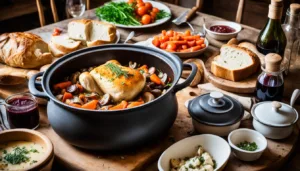
- Classic Coq au Vin Recipe – French Comfort Food
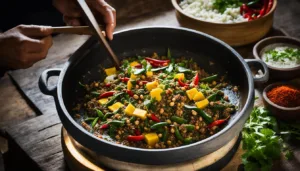
- Authentic Ema Datshi Recipe | Taste of Bhutan
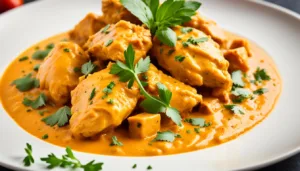
- Creamy Chicken Butter Masala Recipe – Taste the special and the best!

The Art of Garnishing Mohinga: Toppings and Accompaniments
In the vibrant world of Burmese cuisine, Mohinga stands out as a beloved and iconic dish. This hearty noodle soup is not only renowned for its flavorful broth and tender noodles but also for its artful presentation. To truly elevate the experience of enjoying Mohinga, the right selection of toppings and accompaniments is crucial. Let’s explore the traditional Mohinga garnishes and Burmese soup accompaniments that add the perfect finishing touches to this delightful dish.
Traditional Mohinga garnishes include:
- Lime: The tangy zest of lime provides a refreshing burst of citrus flavor that cuts through the richness of the soup.
- Cilantro: Fresh cilantro leaves add a vibrant touch and a hint of herbaceousness to the dish.
- Fried Onions: Crispy fried onions not only lend a delightful crunch but also contribute a subtle sweetness to the overall flavor profile.
- Fish Cake: Thin slices of savory fish cake lend an additional dimension of taste and texture to the soup.
These traditional Mohinga toppings work in harmony to enhance the flavors and textures of the dish, creating a delightful balance that satisfies the palate.

Accompaniments play an equally important role in complementing the richness of Mohinga. Here are a few noteworthy Burmese soup accompaniments:
- Crackers: Light and crispy crackers provide a delightful contrast to the heartiness of Mohinga, offering a satisfying crunch to each bite.
- Chili Sauce: For those who enjoy a spicy kick, a dollop of fiery chili sauce adds a tantalizing heat that elevates the overall flavor profile.
- Boiled Egg: Sliced boiled eggs are a common accompaniment, providing a protein-rich element that adds substance to the meal.
- Fried Noodles: Garnishing Mohinga with a handful of fried noodles gives an extra dimension of texture and a delightful crunch.
By adding these accompaniments to your bowl of Mohinga, you can personalize the dish to suit your own preferences and create a truly enjoyable and memorable culinary experience.
The art of garnishing Mohinga extends beyond mere decoration. The carefully selected traditional Mohinga garnishes and Burmese soup accompaniments contribute to the overall flavor profile, adding layers of complexity and texture to this classic Burmese dish. Whether you prefer the zing of lime, the freshness of cilantro, or the tantalizing heat of chili sauce, these thoughtful embellishments help transform Mohinga into an unforgettable culinary delight.
Customizing Your Mohinga Experience: Tips for Personalization
Creating a personalized Mohinga experience allows you to adapt this traditional Burmese dish to suit your unique taste preferences. By incorporating different ingredients and variations, you can customize Mohinga to reflect your culinary style. Here are some tips and suggestions for personalizing and adapting the Mohinga recipe:
- Explore Ingredient Alternatives: Experiment with alternative proteins such as chicken, shrimp, or tofu instead of fish. This allows you to personalize the flavor profile of your Mohinga.
- Add Vegetables: Enhance the nutritional value of your Mohinga by incorporating your favorite vegetables. Consider adding sliced mushrooms, spinach, or bell peppers for a nutritional boost.
- Spice it Up: Play with different spice combinations to bring your preferred level of heat and flavor to the dish. Adjust the amount of chili powder or pepper flakes according to your taste.
- Try Different Noodle Options: While rice noodles are traditional for Mohinga, you can experiment with other types of noodles like egg noodles or soba noodles for a unique twist.
- Customize Toppings: Explore a variety of toppings and garnishes to enhance the flavor and visual appeal of your Mohinga. Consider adding chopped green onions, crispy fried shallots, or a squeeze of lime juice.
- Experiment with Broth Variations: Modify the base broth by adding a touch of coconut milk for a creamier texture or using different types of stock to infuse additional flavors.
Remember, the key to personalizing Mohinga is to be creative and have fun with your culinary adventure. Feel free to adapt the recipe and techniques to suit your preferences. So go ahead, unleash your inner chef, and create a customized Mohinga experience that satisfies your taste buds!
The Importance of Freshness in Preparing Mohinga
When it comes to creating an authentic and flavorful bowl of Mohinga, freshness is key. Using fresh ingredients elevates the taste and brings out the true essence of this beloved Burmese noodle soup.
Selecting the Right Type of Fish
The choice of fish plays a crucial role in the rich and delicate flavors of Mohinga. Opt for fresh fish that is readily available in your local market. Popular options include catfish, snakehead, and hilsa fish, which impart a distinct taste and texture to the soup. Selecting the right fish ensures that your Mohinga is bursting with flavor and maintains its authenticity.
Benefits of Using Garden-Fresh Herbs and Spices
Garden-fresh herbs and spices are essential for adding depth and complexity to the flavors of Mohinga. Coriander, lemongrass, ginger, and garlic are some of the fragrant ingredients that contribute to the aromatic broth. By using these herbs and spices at their freshest, you can enhance the overall taste of your Mohinga and bring out the authentic Burmese flavors.
Source Locally: Emphasizing Seasonal Produce
To truly capture the essence of Mohinga, it is important to source locally and emphasize the use of seasonal produce. Fresh vegetables, such as banana stems, onions, and garlic, add additional layers of flavor and texture to the soup. By using ingredients that are in season, you ensure that your Mohinga is not only bursting with freshness but also supports sustainable and eco-friendly practices.
| Benefits of Fresh Ingredients in Mohinga |
|---|
| Fresher fish provides a more delicate and flavorful broth. |
| Garden-fresh herbs and spices enhance the overall taste and aroma. |
| Locally sourced and seasonal produce adds layers of freshness and supports sustainable practices. |
Mohinga Recipe: Traditional Burmese Comfort in a Bowl
Get ready to experience the ultimate comfort food with this traditional Mohinga recipe. Bursting with flavors and textures, this Burmese noodle soup is a beloved dish that brings warmth and satisfaction to countless breakfast tables in Myanmar. Let us guide you through the step-by-step process of creating this authentic fish soup recipe, ensuring that you achieve the perfect bowl of Mohinga every time.
Ingredients:
- 1 lb of fresh catfish fillets (boneless and skinless)
- 4 cups of fish stock
- 2 tablespoons of fish sauce
- 1 tablespoon of shrimp paste
- 1 teaspoon of ground turmeric
- 1 teaspoon of paprika
- 1 teaspoon of chili powder
- 1 tablespoon of peanut oil
- 4 cloves of garlic (minced)
- 1 onion (diced)
- 1 stalk of lemongrass (bruised)
- 2 tablespoons of rice flour, dissolved in water
- Salt to taste
Instructions:
- In a large pot, bring the fish stock to a boil. Add the catfish fillets and cook until tender and flaky. Remove the fish from the stock and set aside.
- In a small bowl, mix the fish sauce, shrimp paste, ground turmeric, paprika, and chili powder. Set aside.
- Heat the peanut oil in a separate pan and sauté the minced garlic and diced onion until fragrant and golden brown.
- Add the spice mixture to the pan and cook for another minute, allowing the flavors to meld.
- Pour the mixture into the pot with the fish stock. Add the bruised lemongrass stalk and simmer for 10-15 minutes to allow the flavors to infuse.
- Return the catfish fillets to the pot and let them simmer for an additional 5 minutes.
- Gradually stir in the rice flour mixture to thicken the soup. Continue stirring until the desired consistency is reached.
- Season with salt to taste.
- Serve the Mohinga hot, ladled over rice noodles and garnished with your choice of traditional toppings, such as sliced hard-boiled eggs, fried onions, fresh cilantro, chopped green onions, and a squeeze of lime.
Get ready to indulge in the comforting flavors of this Burmese comfort food. The rich fish stock, aromatic spices, and fresh ingredients come together harmoniously to create a bowl of Mohinga that will transport you to the heart of Myanmar. Enjoy this traditional Burmese noodle soup recipe for breakfast or any time of the day, and savor the authentic taste of this beloved dish.
Conclusion
We have taken you on a culinary journey through the flavors and traditions of Mohinga, the quintessential Burmese noodle soup. This iconic dish holds a significant place in Burmese culture as a hearty and comforting breakfast option. Its rich history and spiritual connection to Buddhism make it a true symbol of Myanmar’s culinary heritage.
Throughout this article, we have explored Mohinga’s origins, discussing its cultural significance and evolution over time. We have dived into the ingredients and flavors that define Burmese cuisine, showcasing the unique spices and herbs that contribute to the distinct taste of Mohinga.
We have also delved into the various regional variations of Mohinga, highlighting the diverse interpretations found in different parts of Burma. From the northern and southern regions to the distinct styles of Yangon and Mandalay, each variation offers a unique twist on this beloved dish.
To personalize your Mohinga experience, we have provided tips on customization, emphasizing the importance of using fresh ingredients and seasonal produce. Additionally, we have shared a step-by-step recipe, ensuring you have all the knowledge and guidance needed to create an authentic bowl of Mohinga in your own kitchen.
In conclusion, we invite you to embark on a culinary adventure and try your hand at making Mohinga. Explore the rich flavors and cultural traditions of Myanmar through this delicious and comforting Burmese noodle soup. Whether it’s enjoying the traditional recipe or adding your own personal touch, Mohinga is sure to transport you to the vibrant streets of Burma, tantalizing your taste buds and giving you a true taste of this remarkable country.
FAQ
Do you have an authentic Mohinga recipe?
Yes, we have a traditional Burmese Mohinga recipe that captures the authentic flavors of this beloved dish. Keep reading to find out how to make it!
What is Mohinga?
Mohinga is a traditional Burmese noodle soup and is considered the quintessential Burmese breakfast dish. It is a flavorful and comforting soup made with fish stock, rice noodles, and a variety of aromatic spices and herbs.
How is Mohinga significant in Burmese cuisine?
Mohinga holds great cultural significance in Burmese cuisine and is considered the national dish of Burma. It is a breakfast staple that reflects the rich culinary heritage of Myanmar and showcases the unique flavors and ingredients of the region.
Can you tell me more about the history of Mohinga?
Mohinga has deep cultural roots and has been enjoyed in Myanmar for centuries. It is believed to have originated in the Mon kingdoms of southern Myanmar and has evolved over time, incorporating different influences and regional variations.
What are the key ingredients used in Mohinga?
The key ingredients in Mohinga include fish (usually catfish), rice noodles, lemongrass, ginger, garlic, onion, chickpea flour, fish sauce, turmeric, and various spices and herbs. These ingredients come together to create the distinctive flavors of this traditional Burmese dish.
What are the regional variations of Mohinga?
Mohinga varies across different regions of Myanmar. In the north, Mohinga is typically thinner and less spicy compared to the thicker and spicier Mohinga found in the south. There are also variations in the choice of fish and garnishes used in different parts of the country.
What are the traditional toppings and accompaniments for Mohinga?
Traditional toppings and accompaniments for Mohinga include lime wedges, cilantro, fried onions, fish cake, hard-boiled eggs, and crispy fritters. These garnishes add texture and enhance the flavors of the dish.
Can I customize the Mohinga recipe to suit my tastes?
Absolutely! Mohinga can be easily personalized by incorporating your favorite ingredients and flavors. Experiment with different toppings, spices, or even adding vegetables to create your unique twist on this classic Burmese dish.
What should I consider when selecting fish for Mohinga?
It is essential to use fresh fish for the best flavor and texture in Mohinga. Catfish is the most commonly used fish in Burmese cuisine, but other white fish varieties can also be used. Select fish that is firm, odorless, and sourced from reputable suppliers.
Where can I find the complete traditional Mohinga recipe?
The full traditional Mohinga recipe can be found in our article. It includes step-by-step instructions, detailed ingredient measurements, and cooking times to help you prepare this delicious Burmese noodle soup at home.