Welcome to our homemade apple pie recipe guide! We are excited to share with you a recipe that combines the warmth of freshly baked apples with the indulgence of a flaky pie crust. Whether you’re a seasoned baker or just starting out, this easy and delicious apple pie recipe is sure to impress your family and friends.
There’s something truly special about a homemade apple pie. The aroma of cinnamon and apples wafting through the kitchen, the golden crust with a hint of buttery sweetness, and the anticipation of that first bite – it all adds up to a classic dessert that never fails to delight.
So, why not roll up your sleeves and join us on a mouthwatering journey to create the perfect apple pie? From choosing the right apples to achieving a flaky pie crust, we’ll guide you every step of the way.
Table of Contents
Key Takeaways
- Our homemade apple pie recipe is easy to follow and results in a delicious treat.
- Choosing the right apples, such as Granny Smith, is crucial for a perfect apple pie.
- A flaky and tender pie crust is achievable with our secrets and tips.
- Preparing your ingredients properly, including the perfect spice combination, enhances the flavor of your apple pie.
- Assembling and baking your apple pie requires attention to detail and expert techniques.
The Allure of a Classic Homemade Apple Pie
When it comes to classic desserts, few can rival the timeless appeal of a homemade apple pie. The delicious combination of sweet, tart apples, warm cinnamon spice, and a flaky crust evokes feelings of comfort and nostalgia. It’s a dessert that has been passed down through generations, becoming a cherished tradition in American culture.
The Tradition of Apple Pie in American Culture
Apple pie holds a special place in American culture. It has long been considered a symbol of home and family, with its roots dating back to the early colonial days. The tradition of serving apple pie during holidays, gatherings, and even as a simple weeknight treat has endured over the years.
From the picturesque imagery of a rustic apple pie cooling on a windowsill to the nostalgic scent that fills the kitchen while it bakes, the tradition of apple pie brings people together and creates lasting memories.
The Irresistible Combination of Cinnamon and Apples
One of the key elements that makes a classic homemade apple pie so irresistible is the perfect pairing of cinnamon and apples. The warm, aromatic spice of cinnamon enhances the natural sweetness of the apples, creating a harmonious flavor profile that is undeniably delicious.
Every bite offers a comforting balance of tender, spiced apples enveloped in a buttery, golden crust. It’s a combination that has stood the test of time and continues to captivate taste buds with its simple yet mouthwatering allure.
So, whether you’re looking to carry on a beloved family tradition, celebrate a special occasion, or simply indulge in a comforting slice of pie, a classic homemade apple pie is sure to satisfy your cravings and warm your heart.

Why “Granny Smith” Apples Make Your Apple Pie Recipe Perfect
In the world of apple pies, the choice of apple is crucial to achieving the perfect balance of flavors and textures. And when it comes to creating the ideal apple pie recipe, Granny Smith apples are a game-changer.
The Importance of Choosing the Right Apple
When selecting apples for your apple pie, it’s essential to choose the right variety to ensure the best results. Each apple has its unique characteristics in terms of flavor, texture, and tartness. And finding the perfect balance is crucial to creating a delicious apple pie.
While some apple varieties, like Red Delicious or Gala, may be your go-to choices for snacking, they might not be the best option for baking. Baking apples need to hold their shape, retain some firmness, and provide a balanced sweetness and tartness that complements the pie’s flavors.
Granny Smith’s Balance of Tartness and Firmness
When it comes to baking an apple pie, Granny Smith apples are widely regarded as the ultimate choice. These beautiful green apples have a perfect balance of tartness and firmness that makes them ideal for pie making.
The tartness of Granny Smith apples adds a refreshing tang to the apple pie, cutting through the sweetness and providing a delightful contrast. At the same time, their firm texture holds up well during baking, ensuring that the apple slices maintain their shape and don’t turn mushy.
Furthermore, Granny Smith apples have a distinct acidity that helps enhance the overall flavors of the pie, resulting in a well-rounded and memorable taste experience.

| Apple Variety | Tartness | Firmness |
|---|---|---|
| Granny Smith | High | High |
| Red Delicious | Low | Low |
| Gala | Low | Medium |
Table: Comparison of Tartness and Firmness in Different Apple Varieties
Secrets to a Flaky and Tender Pie Crust
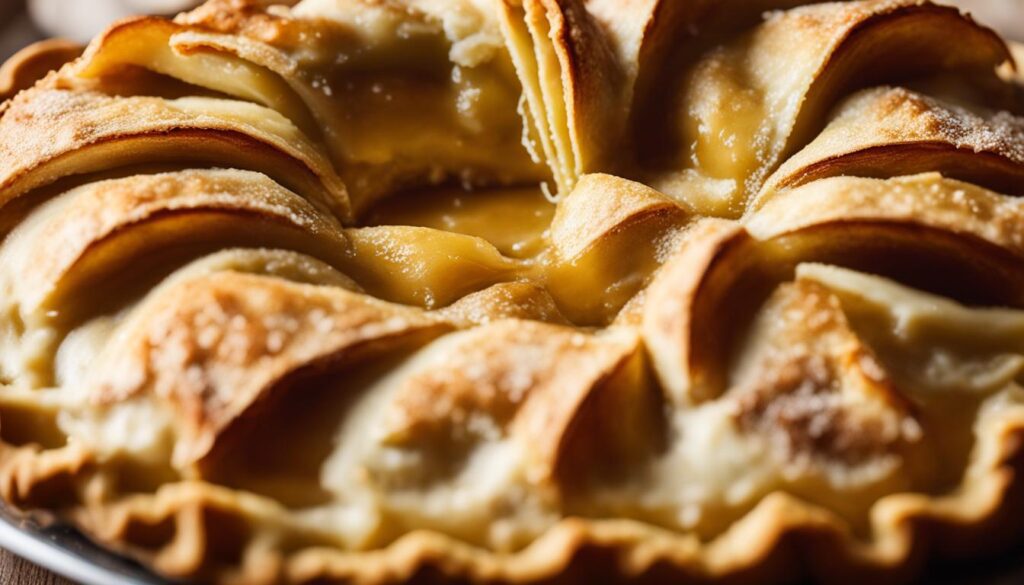
Creating a flaky and tender pie crust is essential for a truly delicious homemade apple pie. With a few key techniques and tricks, you can elevate your pie crust game and impress your guests with a pastry that is buttery, light, and irresistible. Discover the secrets to achieving the perfect pie crust texture and take your apple pie to the next level.
1. Start with cold ingredients: Using cold butter and icy water is crucial to achieving a flaky crust. Cold ingredients create small pockets of butter in the dough, which melt during baking and create those coveted layers.
2. Use the right flour: Opt for all-purpose flour, as it provides the ideal balance of protein and starch. This will give your crust structure while still maintaining tenderness.
3. Don’t overwork the dough: When mixing the dough, be careful not to overmix or knead it too much. Overworking the dough can develop gluten, resulting in a tough crust. Mix until the dough just comes together, then stop.
4. Chill the dough: After preparing the dough, wrap it tightly in plastic wrap and refrigerate for at least 30 minutes. This allows the butter to re-solidify, resulting in a more tender crust.
5. Roll it out with care: Roll the dough gently and evenly to maintain an even thickness. Avoid adding excessive flour, as this can make the crust dry and tough. Use a minimal amount of flour on the rolling pin and work surface to prevent sticking.
6. Try the vodka trick: Some bakers swear by replacing some of the ice water in the recipe with vodka. Vodka inhibits gluten development, resulting in a more tender crust. Plus, the alcohol evaporates during baking, leaving behind a perfectly flaky crust.
7. Use a decorative crust: Impress your guests by trying different decorative crust techniques, such as a lattice design or cut-out shapes. Not only does this add visual appeal to your pie, but it also helps create additional layers for a flakier texture.
Remember, practice makes perfect when it comes to pie crust. Don’t be discouraged if your first attempt doesn’t turn out exactly as planned. With time and experience, you’ll discover the techniques that work best for you. So, roll up your sleeves, arm yourself with these secrets, and prepare to create the flakiest, tenderest pie crust ever.
Preparing Your Ingredients for the Ultimate Apple Pie
In order to create the ultimate apple pie, it’s crucial to start with the best ingredients and prepare them properly. Paying attention to the details will elevate your pie from good to exceptional. From the flaky crust to the flavorful apple filling, every element contributes to the perfection of this beloved dessert.
Pie Crust Essentials: Butter and a Hint of Vinegar
The foundation of any great apple pie is a buttery and flaky crust. To achieve this, it’s important to use quality ingredients and follow a few key steps. Firstly, make sure your butter is cold and cut it into small cubes. This will help create the desired texture as the butter melts during baking. Additionally, a hint of vinegar adds tenderness to the crust and helps prevent a tough texture. Incorporating these essentials into your pie crust will result in a pastry that is both melt-in-your-mouth and structurally sound.
Spicing Up Your Apples: Cinnamon and Nutmeg Love Affair
No apple pie is complete without the perfect blend of spices to enhance the flavor of the apples. The classic combination of cinnamon and nutmeg is the secret to achieving that nostalgic, warm, and aromatic taste. Cinnamon adds a sweet and slightly spicy note, while nutmeg brings a hint of earthiness. Together, they create a harmonious love affair that will transport your taste buds to autumn bliss. Be generous with the spices, and don’t be afraid to adjust the amounts to suit your preference.
Now that you understand the importance of preparing your ingredients, it’s time to move on to the next step: the art of assembling your apple pie recipe.
The Art of Assembling Your Apple Pie Recipe
Now that you have all the elements ready, it’s time to bring them together and assemble your delicious apple pie. Follow these step-by-step instructions for the best results:
- Start by preheating your oven to the recommended temperature.
- Prepare your pie crust according to the recipe or using a store-bought crust if preferred.
- Place one pie crust into a pie dish, gently pressing it into the bottom and sides, ensuring there are no air pockets.
- Add your apple filling, ensuring it is evenly distributed across the crust.
- Place the second pie crust on top of the filling. You can leave it as a whole crust or create a lattice design for an eye-catching presentation.
- Seal the edges of the crust by pressing them together and crimping if desired.
- Make a few slits or decorative cutouts on the top crust to allow steam to escape during baking.
- Brush the top crust with an egg wash or milk for a golden finish.
- Place the assembled pie on a baking sheet to catch any drips and prevent a messy oven.
- Now, your apple pie is ready to be baked to perfection.
Follow the baking instructions in the recipe, and soon, your kitchen will be filled with the irresistible aroma of a freshly baked apple pie.
Once the pie is baked to a golden brown and the filling is bubbly, remove it from the oven and allow it to cool on a wire rack before serving.
Now that you know the art of assembling an apple pie, it’s time to savor each delicious bite. Whether enjoying it warm with a scoop of vanilla ice cream or savoring a slice with a cup of freshly brewed coffee, your homemade apple pie is sure to be a crowd-pleaser.
- Classic Coq au Vin Recipe – French Comfort Food

- Authentic Ema Datshi Recipe | Taste of Bhutan

- Creamy Chicken Butter Masala Recipe – Taste the special and the best!

Expert Tips for Baking and Protecting Your Apple Pie Crust
When it comes to baking the perfect apple pie, the crust is just as important as the filling. A flaky and golden crust not only adds flavor and texture but also protects the luscious apple filling inside. In this section, we will share some expert tips for baking and protecting your apple pie crust.
Perfecting the Bake: Temperature Tips and Techniques
One of the keys to a successful apple pie is baking it at the right temperature. Here are some temperature tips and techniques to ensure a perfectly baked pie:
- Preheat your oven to 425°F (220°C) to ensure that it reaches the correct temperature for baking.
- Place your pie on the center rack of the oven for even heat distribution.
- Consider using a pie crust shield or foil to cover the edges of the crust during baking. This will prevent the edges from over-browning while allowing the rest of the pie to bake to perfection.
- For a golden brown crust, brush the top of the pie with an egg wash before baking. This will give your pie a beautiful shine.
- Bake the pie for the recommended time stated in your recipe, but always keep an eye on it. Every oven is different, so you may need to adjust the baking time accordingly.
Shielding the Edges: Foil Tricks to Prevent Over-Browning
Over-browning of the crust edges can be a common issue when baking apple pies. To prevent this, here are some foil tricks you can try:
- Tear off a strip of aluminum foil that is long enough to cover the edges of the pie crust.
- Gently fold the foil strip in half lengthwise to create a smooth, straight edge.
- Place the foil strip around the edges of the pie crust, covering them completely.
- Make sure the foil is snug against the crust to prevent any heat from escaping.
- During the last 15-20 minutes of baking, carefully remove the foil to allow the edges to brown.
By following these temperature tips and foil tricks, you can bake an apple pie with a perfectly golden and protected crust. Your pie will come out of the oven looking and tasting amazing, ready to be enjoyed by friends and family.
How to Achieve the Perfectly Set and Juicy Apple Filling
Creating a perfectly set and juicy apple filling is crucial to the success of your homemade apple pie. Follow these tips and techniques for a deliciously cooked filling:
- Choose the right apples: Select apples that are known for their balance of tartness and firmness, such as Granny Smith apples. These apples hold their shape well during baking and provide a delightful tanginess to your pie.
- Slice your apples evenly: To ensure even cooking and texture, slice your apples evenly. This will help them cook consistently and prevent some pieces from being overcooked while others are undercooked.
- Coat your apple slices: Coat your apple slices in a mixture of sugar, spices, and a bit of lemon juice. This will enhance the flavor of the apples and allow them to release their juices during baking.
- Precook your filling: For a perfectly set apple filling, consider precooking your apple slices before assembling the pie. This will soften the apples and allow the flavors to meld together, resulting in a cohesive and firm filling.
- Allow for cooling time: Once your pie is baked, let it cool completely before serving. This will give the filling time to set, ensuring that each slice holds together perfectly.
By following these steps, you’ll achieve a pie with a beautifully set and juicy apple filling that will have everyone coming back for seconds.

Apple Pie Recipe: Step-by-Step Guide to the Perfect Slice
In this section, we will take you through a detailed, step-by-step guide to achieving the perfect slice of apple pie. Follow these instructions carefully to create a stunning dessert that will impress your family and friends.
Lattice Work: Weaving Your Top Crust
Creating a lattice top crust adds a beautiful and intricate design to your apple pie. Here’s how to do it:
- Roll out your pie dough and cut it into even strips.
- Place half of the strips horizontally across the top of the pie, spacing them evenly.
- Fold back every other strip halfway, then lay a strip vertically across the unfolded strips.
- Unfold the folded strips back over the vertical strip.
- Fold back the remaining strips that weren’t folded in step 3, then lay another strip vertically across the unfolded ones.
- Continue this process until a lattice pattern covers the entire top of the pie.
The Golden Finish: Egg Wash for a Shiny Crust
To achieve a golden finish on your apple pie crust, use an egg wash. Here’s how:
- In a small bowl, beat an egg until it is well blended.
- Using a pastry brush, lightly brush the egg wash onto the crust, covering the entire surface.
- Be careful not to apply too much egg wash, as it can cause the crust to become soggy.
Now that you’ve mastered the art of lattice work and creating a golden finish with an egg wash, your apple pie is ready to be baked to perfection!
Preventing Common Apple Pie Baking Mishaps
When it comes to baking an apple pie, there are a few common mishaps that can occur along the way. But fear not, we’re here to help you navigate through these pitfalls and ensure that your apple pie turns out perfectly every time. By being aware of these common mistakes and following our expert tips, you’ll be well on your way to baking the best apple pie of your life.
One common mishap is a soggy bottom crust. There’s nothing worse than biting into a slice of apple pie only to find the crust is soggy and undercooked. To prevent this, make sure to blind bake your crust before adding the filling. Blind baking involves pre-baking the crust without the filling, allowing it to crisp up and create a barrier between the filling and the crust.
Another common mishap is an overcooked or burned top crust. To prevent this, cover the edges of the pie with foil or a pie shield to prevent them from getting too dark. This will allow the pie to bake evenly and result in a golden, perfectly cooked crust.
Unevenly cooked apples can also be a problem when baking an apple pie. To ensure that your apple filling is perfectly cooked, make sure to slice your apples evenly and toss them in a mixture of sugar, spices, and a thickening agent such as flour or cornstarch. This will help to distribute the heat evenly and prevent any undercooked or raw apples in your pie.
Lastly, a collapsed or runny filling can be a disappointment. This can happen if the pie is not baked long enough or if the filling is not thickened properly. To prevent this, make sure to bake the pie for the recommended time and allow it to cool and set before slicing into it. Also, make sure to use a thickening agent such as flour or cornstarch in your filling to ensure a cohesive and delicious pie filling.
By keeping these tips in mind and being aware of these common apple pie baking mishaps, you’ll be well-equipped to create the perfect apple pie every time. Don’t let these mishaps discourage you from baking this classic dessert. With a little knowledge and practice, you’ll become a master at baking apple pies that are sure to impress.
Storing & Savoring: Keeping Your Apple Pie Fresh and Delicious
After putting in the effort to bake a delicious homemade apple pie, you’ll want to ensure it stays fresh and flavorful for as long as possible. Here are some handy tips for storing and savoring your apple pie:
Short-Term and Long-Term Pie Storage Tips
For short-term storage, simply cover your apple pie with a clean kitchen towel or plastic wrap and keep it at room temperature for up to 24 hours. This will help preserve its texture and prevent it from drying out. If you prefer a chilled pie, you can store it in the refrigerator for up to 3 days. Just make sure to cover it tightly with plastic wrap to prevent any odors from seeping in.
If you need to store your apple pie for a longer period, freezing is the way to go. First, allow the pie to cool completely at room temperature. Then, wrap it tightly in several layers of plastic wrap, followed by a layer of aluminum foil to prevent freezer burn. Place the wrapped pie in a freezer-safe container or bag, and make sure to label it with the date. Your apple pie can be stored in the freezer for up to 3 months.
When you’re ready to enjoy your frozen apple pie, simply thaw it overnight in the refrigerator. Once thawed, you can either serve it cold or reheat it for a warm, freshly baked taste.
Reheating Your Pie: How to Restore Fresh-Baked Warmth
To reheat your apple pie and restore that fresh-baked warmth, follow these easy steps:
- Preheat your oven to 350°F (175°C).
- Remove the pie from the freezer or refrigerator, and discard the plastic wrap and foil.
- Place the pie on a baking sheet to catch any drips or spills.
- Lightly cover the pie with aluminum foil to prevent the crust from burning.
- Bake the pie in the preheated oven for 15-20 minutes, or until heated through.
- Remove the foil and continue baking for an additional 5-10 minutes to crisp up the crust.
- Once heated to your liking, remove the pie from the oven and let it cool for a few minutes before serving.
Now you’re ready to savor the deliciousness of your freshly reheated apple pie!
Conclusion
As we wrap up our article on the homemade apple pie recipe, it’s clear that this classic dessert holds a special place in American culture. The irresistible combination of cinnamon and apples, along with the flaky and tender pie crust, creates a truly mouthwatering experience.
Choosing the right apples, such as Granny Smith, is crucial for achieving the perfect balance of tartness and firmness in your apple pie. And don’t forget the importance of properly preparing the ingredients, from the butter and vinegar in the pie crust to the delightful spice combination of cinnamon and nutmeg in the apple filling.
Assembling and baking the pie requires attention to detail, but following expert tips ensures a beautifully golden crust and a perfectly set and juicy apple filling. And once your apple pie is baked to perfection, our tips for storing and reheating will help you enjoy its fresh-baked warmth for days to come.
In conclusion, with our detailed step-by-step guide and helpful tips, you’ll be able to create the ultimate homemade apple pie that will impress your family and friends. So, gather your ingredients, roll up your sleeves, and let the aroma of baked apples and cinnamon fill your kitchen as you embark on the wonderful journey of making your very own homemade apple pie.
FAQ
What is the allure of a classic homemade apple pie?
The allure of a classic homemade apple pie lies in its rich tradition in American culture and the irresistible combination of cinnamon and apples.
Why are Granny Smith apples recommended for apple pie recipes?
Granny Smith apples are the perfect choice for apple pie because they strike the right balance of tartness and firmness, creating an ideal texture and flavor in the pie filling.
What are the secrets to creating a flaky and tender pie crust?
The secrets to a flaky and tender pie crust include using the right techniques and ingredients, such as using chilled butter and handling the dough gently.
How should I prepare the ingredients for the ultimate apple pie?
To prepare the ultimate apple pie, make sure to use quality ingredients, including butter and a hint of vinegar for the pie crust, and the perfect spice combination of cinnamon and nutmeg for the apple filling.
What is the step-by-step process for assembling an apple pie?
The step-by-step process for assembling an apple pie involves layering the pie crust and apple filling, creating a balanced and delicious pie.
How can I bake an apple pie without over-browning the crust?
To bake an apple pie without over-browning the crust, follow expert tips on temperature control and use foil tricks to shield the edges of the pie crust.
How can I achieve the perfect set and juicy apple filling in my apple pie?
Achieving the perfect set and juicy apple filling in your apple pie requires proper cooking techniques and ensuring the filling reaches the desired consistency.
What is the step-by-step guide to creating the perfect slice of apple pie?
The step-by-step guide to creating the perfect slice of apple pie includes instructions on creating a lattice top crust and achieving a golden finish with an egg wash.
How can I prevent common baking mishaps when making an apple pie?
To prevent common baking mishaps when making an apple pie, be aware of potential pitfalls and follow expert tips and techniques to overcome them.
What are the best practices for storing and savoring an apple pie?
The best practices for storing and savoring an apple pie include short-term and long-term storage tips, as well as instructions on how to reheat the pie to restore its fresh-baked warmth.

